Dominic Greco
Member
- Messages
- 149
- Location
- Bucks County PA
Hi gang
I just finished cleaning up this Union Warranted Coffin Smoother and have been having some problems getting it to work properly. I took a lot of photos in the hopes that the more knowledgable of you could offer me some tips.
This Union Warranted Coffin Smoother was purchased at a local flea market for the kingly sum of $5 and it came with a very nice Butcher Iron. But at the same place I found a Buck Brothers Iron of the same size. The seller threw that in as an incentive. So I can swap out one or the other. Both of these irons had their backs flattened and polished to a mirror finish. The bevels were hollow ground and sharpened to the point where they could cut end grain pine with little effort.
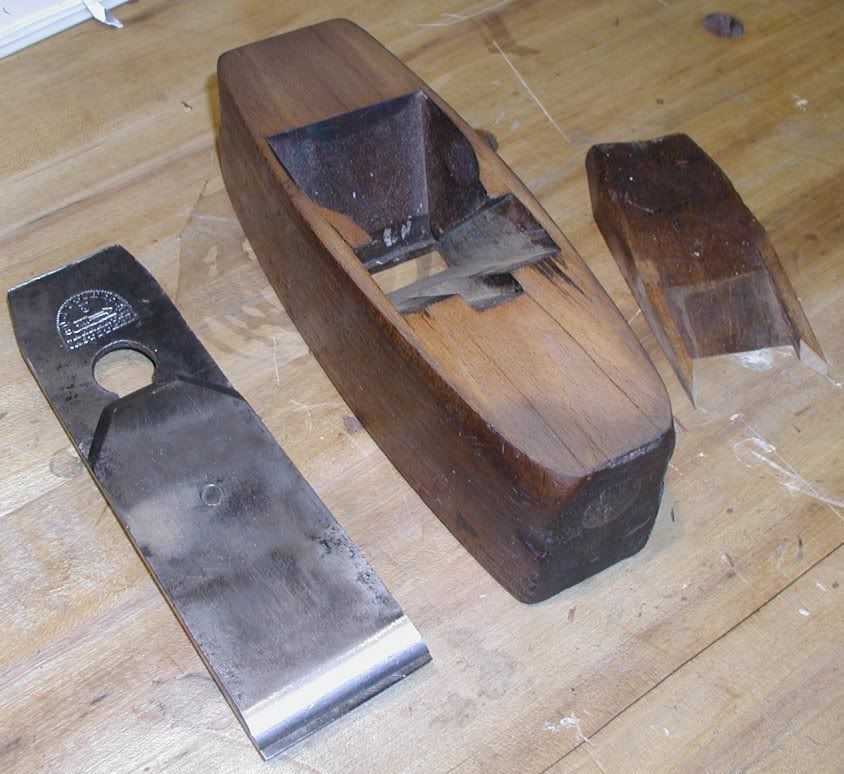
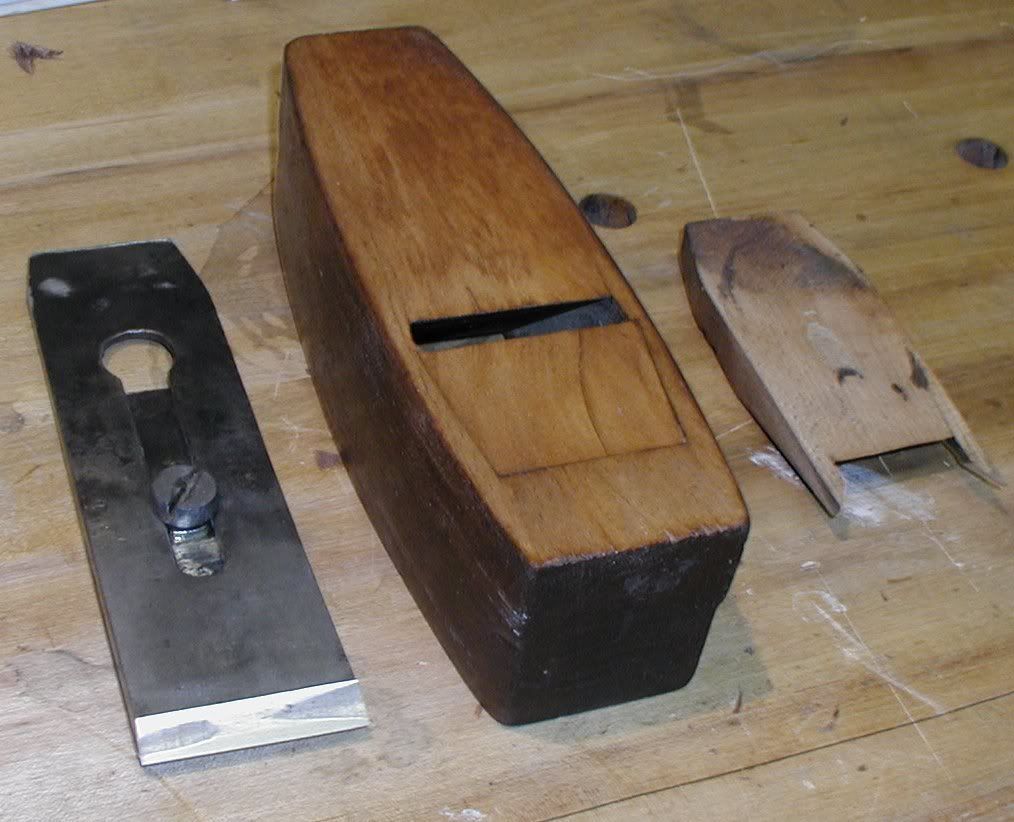
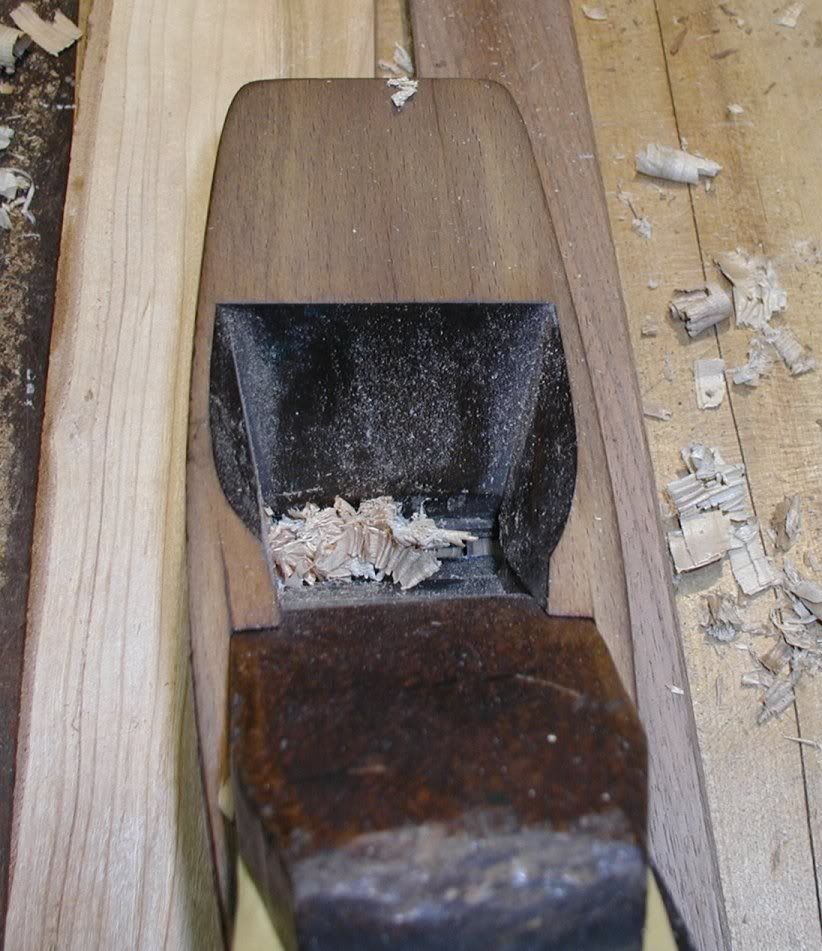
There were some cracks on the body that I repaired with a bit of epoxy and some sawdust. But any that were in non critical areas I left alone. Near the abutments there were some stress fractures. But these were glued and clamped up overnight. In the photos below it LOOKS like there is a crack on one "ear", but it's really filled with epoxy and sawdust. I flattened the sole on some sandpaper as well as flattening the back of the wedge. I also cleaned up the points of the wedge to get rid of areas where chips would snag. Where I sanded, I gave the body a coat of BLO and allowed it to dry before waxing. I made sure that I didn't get any oil or wax in the abutments, bed, or ears.
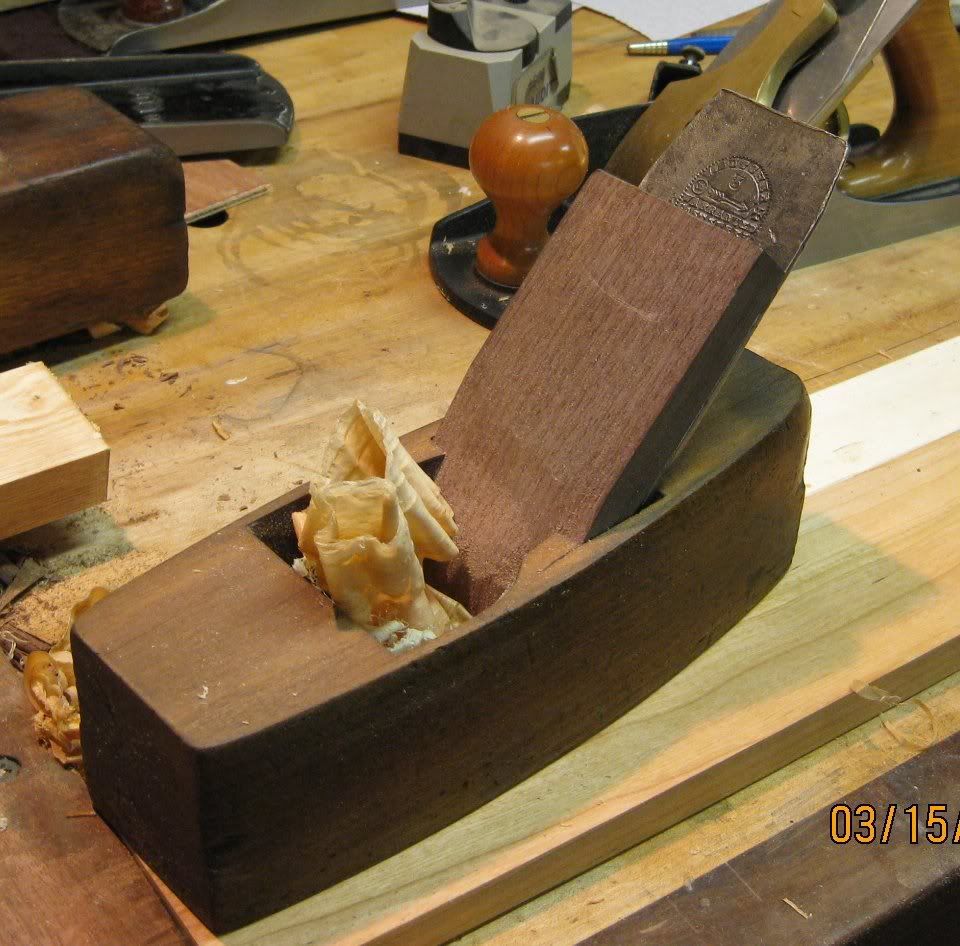
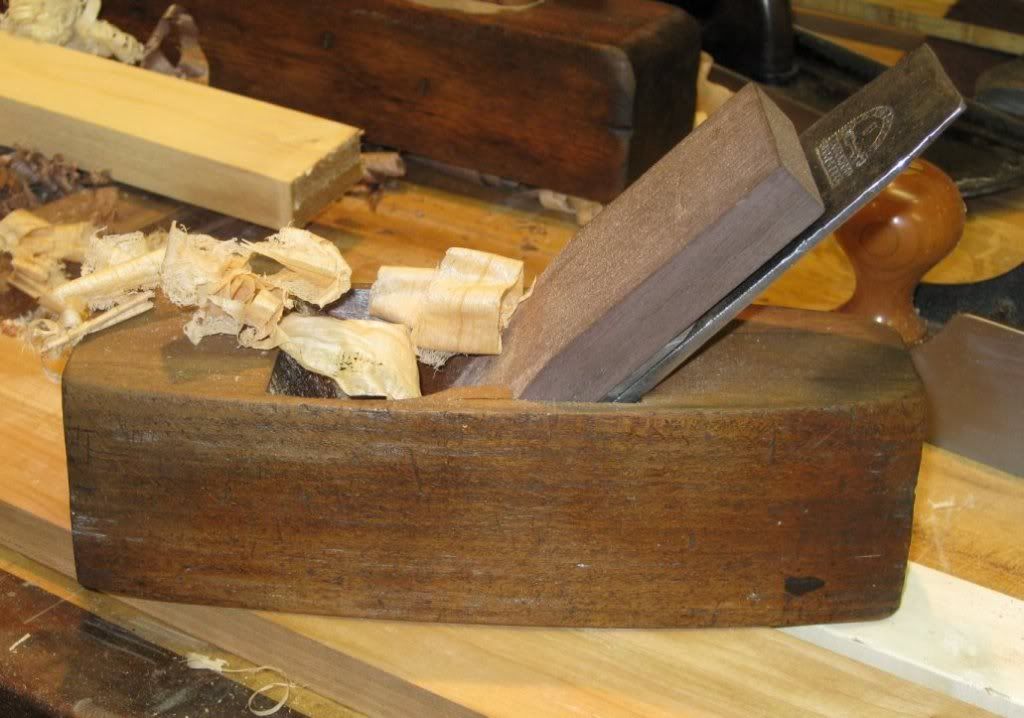
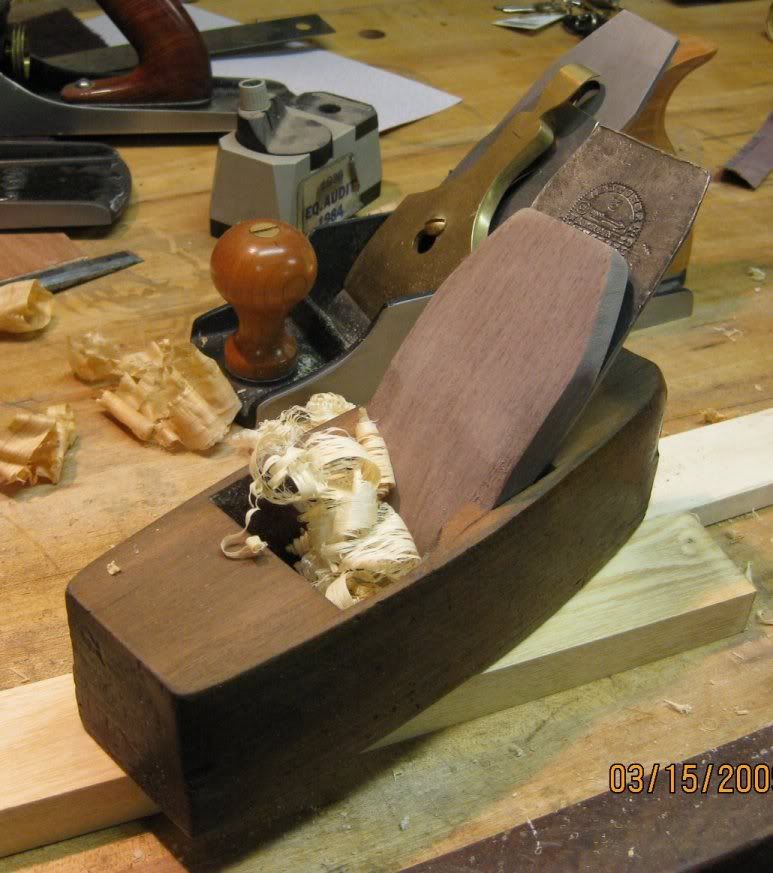
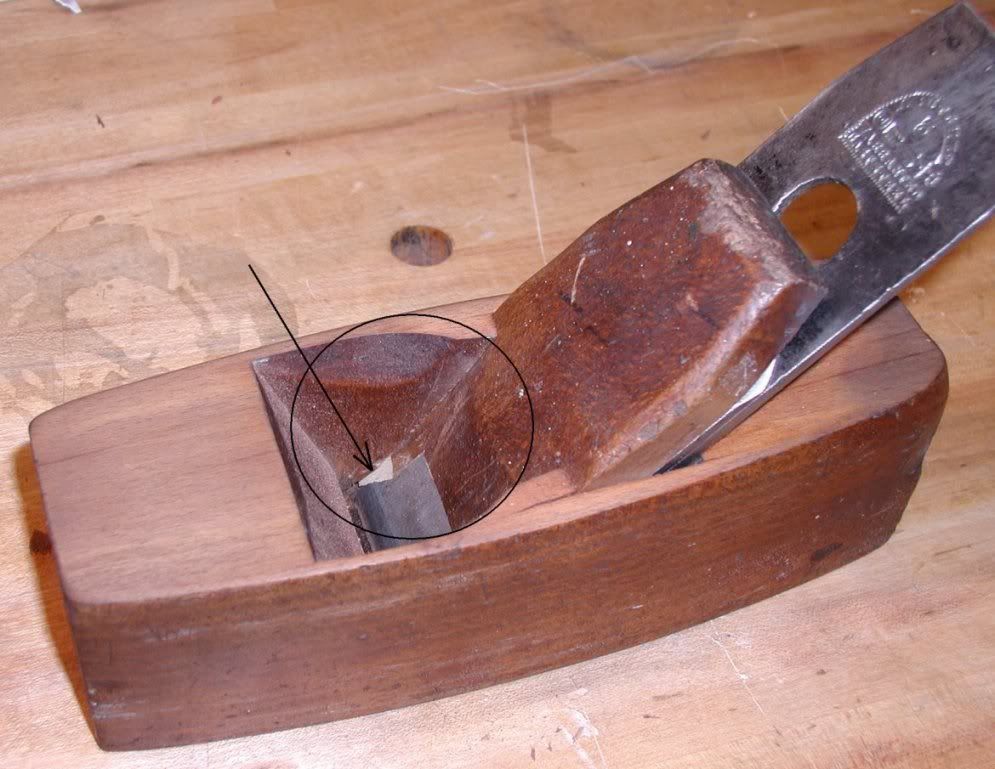
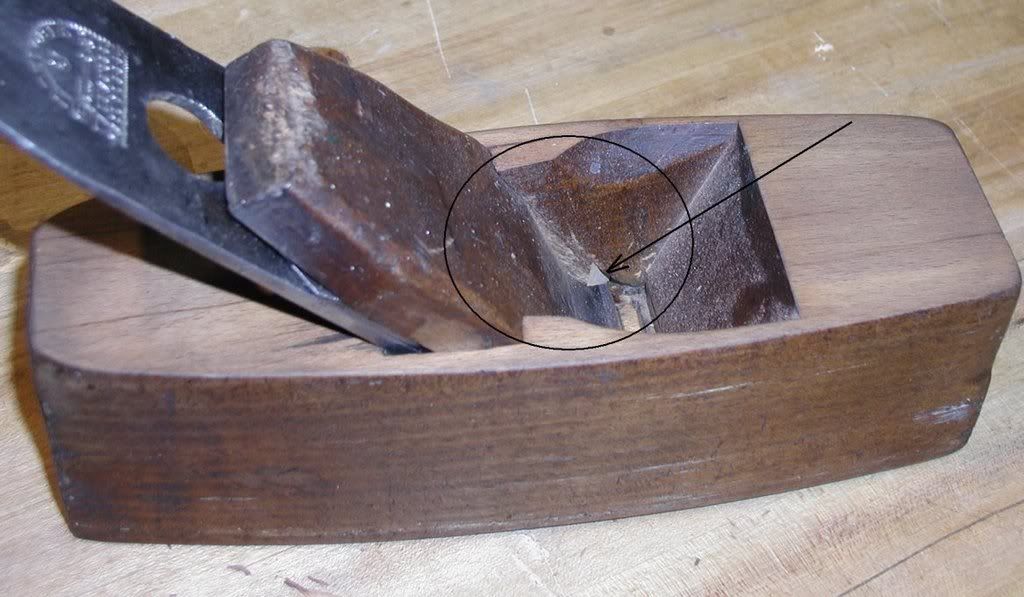
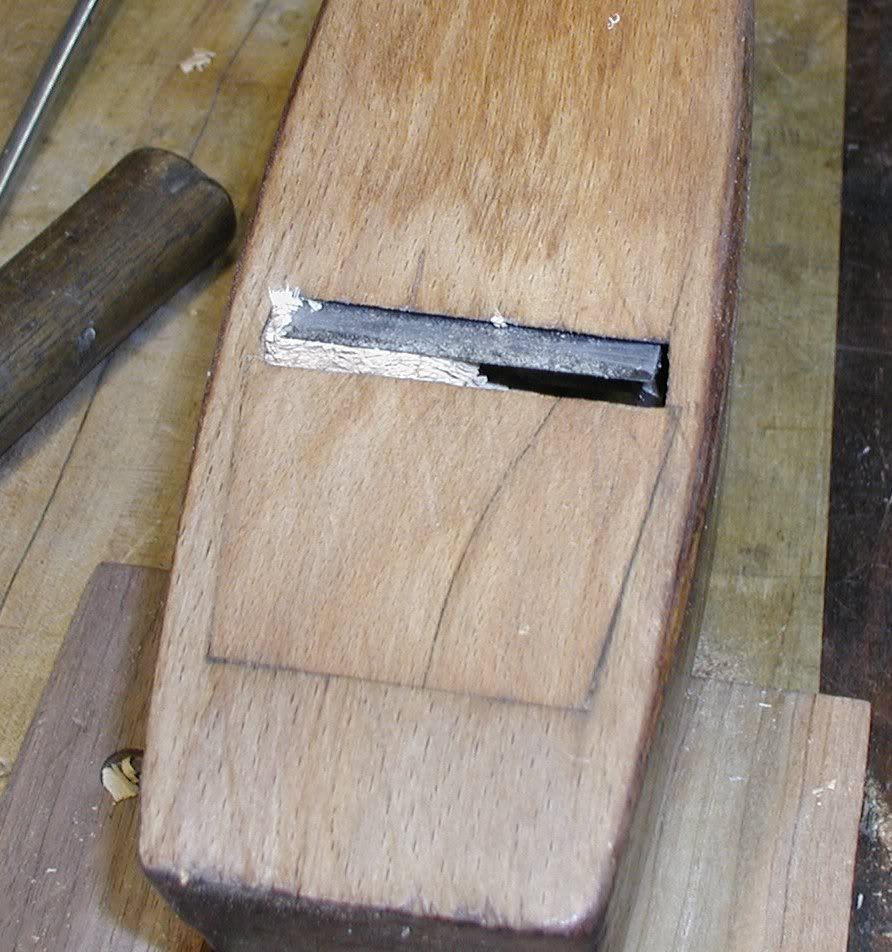
When I installed the iron/chipbreaker assembly and wedge into the smoother I noticed that the wedge was VERY tight in regards to the sides. I believe that this would account for the cracks near the abutments. I sanded the wedge so that I got a nice even fit. I also took care to assure that there weren't any gaps between the wedge and the cheek. You can see this in the highlighted areas of the photos below.
After all this tuning up, I decided last night to give this little beauty a test drive on some nice straight grained cherry. However, when I went to use it I ran into all sorts of problems.
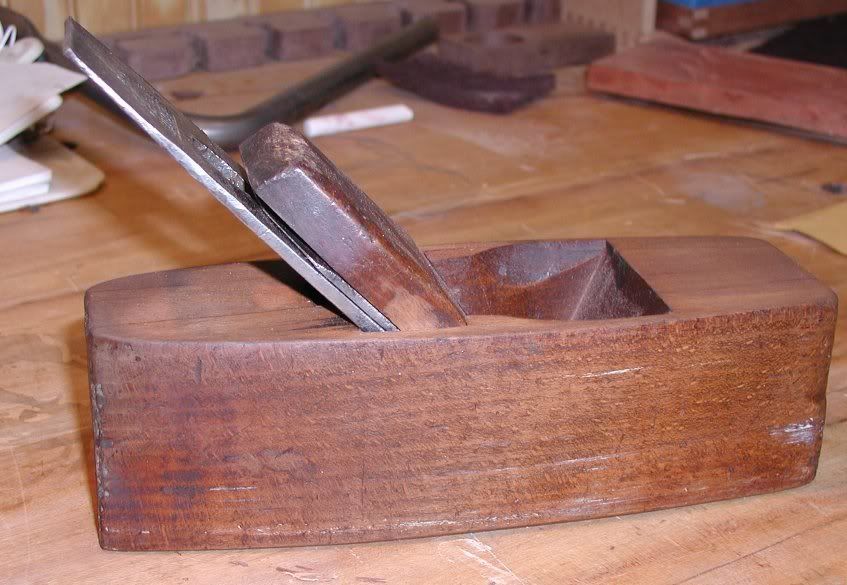
1.) The original iron just fits the mouth opening. And I had thought that I re-ground the bevel so that it was 90 deg to the sides. But this iron has slightly tapered sides. So it's close, but not dead on. This makes getting an even "reveal" pretty difficult. I ended up swapping out the Butcher Iron and replacing it with the smaller Buck Brothers Iron. You can see the amount or room between the sides of the iron and the sides of the mouth in the last photo.
2.) I can't get the wedge to hold the iron in place. When I hit a particularly knarly or tough patch of grain, it moves. From the photos you can see that I have the wedge as tightly fit as I can get it.
3.) When I tap on the back of the iron, the iron moves and the chip breaker DOESN'T! This is with BOTH the Butcher AND the Buck Brothers Irons! So the amount of iron showing increases each time I tap the back of the iron!
4.) Last but not least; I get chips clogged in one corner. I'm thinking that the points of the wedge need to be shortened so that the are sitting on the flat of the chip breaker. If they are near the end where it curves, then there is a place for a chip to get stuck.
I've been reading through Whelan's "Making Traditional Wooden Handplanes" as well as Finck's "Making & Mastering Wood Planes". These books helped a lot. But I would really appreciate input from members who tune up and use wood hand planes.
I just finished cleaning up this Union Warranted Coffin Smoother and have been having some problems getting it to work properly. I took a lot of photos in the hopes that the more knowledgable of you could offer me some tips.
This Union Warranted Coffin Smoother was purchased at a local flea market for the kingly sum of $5 and it came with a very nice Butcher Iron. But at the same place I found a Buck Brothers Iron of the same size. The seller threw that in as an incentive. So I can swap out one or the other. Both of these irons had their backs flattened and polished to a mirror finish. The bevels were hollow ground and sharpened to the point where they could cut end grain pine with little effort.


There were some cracks on the body that I repaired with a bit of epoxy and some sawdust. But any that were in non critical areas I left alone. Near the abutments there were some stress fractures. But these were glued and clamped up overnight. In the photos below it LOOKS like there is a crack on one "ear", but it's really filled with epoxy and sawdust. I flattened the sole on some sandpaper as well as flattening the back of the wedge. I also cleaned up the points of the wedge to get rid of areas where chips would snag. Where I sanded, I gave the body a coat of BLO and allowed it to dry before waxing. I made sure that I didn't get any oil or wax in the abutments, bed, or ears.
When I installed the iron/chipbreaker assembly and wedge into the smoother I noticed that the wedge was VERY tight in regards to the sides. I believe that this would account for the cracks near the abutments. I sanded the wedge so that I got a nice even fit. I also took care to assure that there weren't any gaps between the wedge and the cheek. You can see this in the highlighted areas of the photos below.


After all this tuning up, I decided last night to give this little beauty a test drive on some nice straight grained cherry. However, when I went to use it I ran into all sorts of problems.
1.) The original iron just fits the mouth opening. And I had thought that I re-ground the bevel so that it was 90 deg to the sides. But this iron has slightly tapered sides. So it's close, but not dead on. This makes getting an even "reveal" pretty difficult. I ended up swapping out the Butcher Iron and replacing it with the smaller Buck Brothers Iron. You can see the amount or room between the sides of the iron and the sides of the mouth in the last photo.
2.) I can't get the wedge to hold the iron in place. When I hit a particularly knarly or tough patch of grain, it moves. From the photos you can see that I have the wedge as tightly fit as I can get it.
3.) When I tap on the back of the iron, the iron moves and the chip breaker DOESN'T! This is with BOTH the Butcher AND the Buck Brothers Irons! So the amount of iron showing increases each time I tap the back of the iron!
4.) Last but not least; I get chips clogged in one corner. I'm thinking that the points of the wedge need to be shortened so that the are sitting on the flat of the chip breaker. If they are near the end where it curves, then there is a place for a chip to get stuck.


I've been reading through Whelan's "Making Traditional Wooden Handplanes" as well as Finck's "Making & Mastering Wood Planes". These books helped a lot. But I would really appreciate input from members who tune up and use wood hand planes.

