
[Originally posted in this thread]
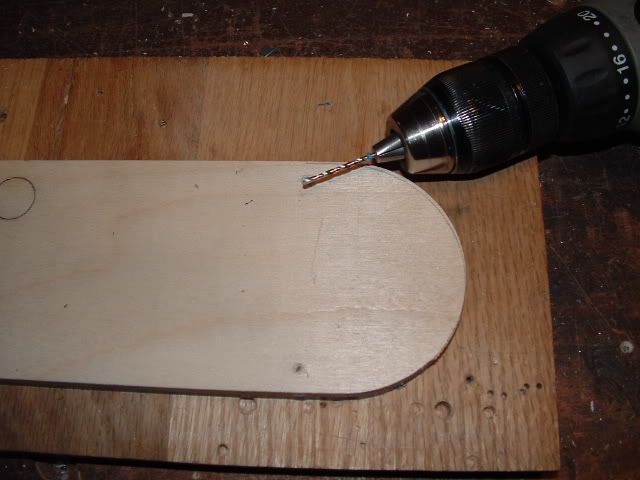
One of the more handsome members asked me to share how I make ZCI's. First, I'm using materials that I have on hand. I don't think the material is critical as long as it stays flat and doesn't have too much friction.
My ZCI's are made of 1/4" Baltic birch plywood and 1/4" HDPE plastic bonded together with epoxy. I score the HDPE to give the epoxy some bite. I removed the adjustment screws from the factory insert and I use some short screws to attach it to the ZCI. A pattern bit in the router table gets me to the right shape and the holes left by the screws tell me where my adjuster screws need to go. Don't forget to mark and drill the finger hole. (I always do)
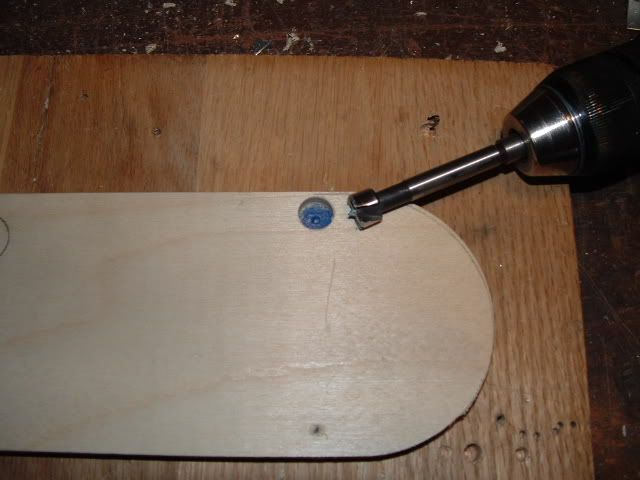
Next I drill holes for magnet cups in two of the holes. Do not drill into the plastic.
Then drill out the holes in the cups to allow the adjustment screw to pass through (I'm using 10-32x3/8" allen head set screws.
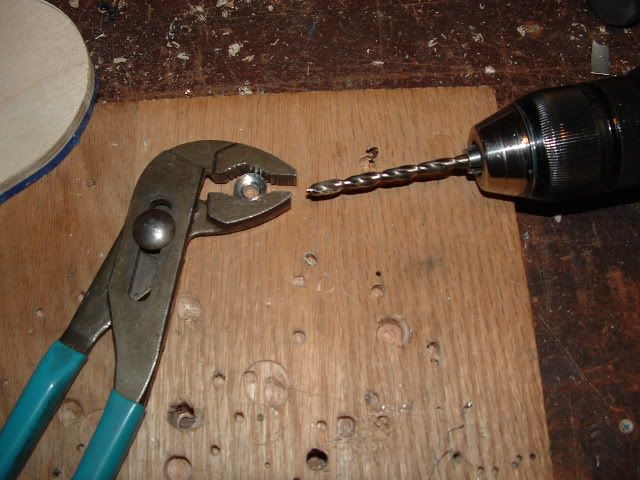
Now I drill and tap all four holes for my set screws. The two with magnets will pass thru the cups and push the magnets down. The other two work like stock adjusment screws.
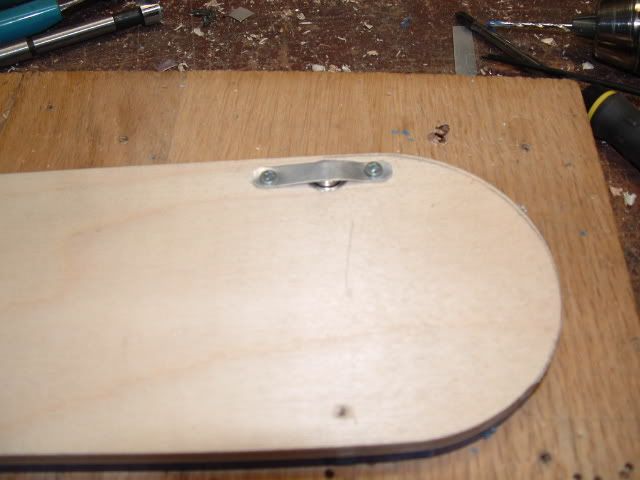
To prevent leaving the magnet/cup behind when removing the ZCI, I installed narrow strips of aluminum flashing. It stretches as you tighten the screw.
One of the more handsome members asked me to share how I make ZCI's. First, I'm using materials that I have on hand. I don't think the material is critical as long as it stays flat and doesn't have too much friction.
My ZCI's are made of 1/4" Baltic birch plywood and 1/4" HDPE plastic bonded together with epoxy. I score the HDPE to give the epoxy some bite. I removed the adjustment screws from the factory insert and I use some short screws to attach it to the ZCI. A pattern bit in the router table gets me to the right shape and the holes left by the screws tell me where my adjuster screws need to go. Don't forget to mark and drill the finger hole. (I always do)
Next I drill holes for magnet cups in two of the holes. Do not drill into the plastic.
Then drill out the holes in the cups to allow the adjustment screw to pass through (I'm using 10-32x3/8" allen head set screws.
Now I drill and tap all four holes for my set screws. The two with magnets will pass thru the cups and push the magnets down. The other two work like stock adjusment screws.
To prevent leaving the magnet/cup behind when removing the ZCI, I installed narrow strips of aluminum flashing. It stretches as you tighten the screw.