Jamie's Shop Thread

Been a while

02/13 Progress

Well, I did not get a chance to provide an update last week, but there was progress. I got the final inspection (building) on the 31st (Wednesday) and was finally good to go from the township’s standpoint. That weekend, I did the electrical work.

My only window to dig was on Saturday (weather took a big turn for the worst, Saturday’s high was 25, but Sunday was only supposed to get to 15, and we have not been above freezing since…) so I went to the HD to rent their small trencher. They could not get the thing started, and I was worried about the irrigation pipe anyway, so I went home and started the dig by hand. It actually went well. The ground was only frozen for the first inch and a half or so, and I have sand. The only tough part was avoiding the irrigation and the many surface roots that I have. The trench was a total of about 110’, and I kept it 24” deep.

I ran a 1 ¼” conduit for the service and an extra ¾” conduit for future stuff. In the 1 ¼” is three pieces of #6 THHN cable and a #10 ground. The pull went fine, and I was live to the panel at about 1:30. I had a little help from a neighbor who is a union electrician. He helped with the conduit and the cable pull. He terminated the main panel as I did the sub panel. By the way, the sub panel is a 12 space 125 amp main lug panel.

When the panels were connected, my neighbor went home and I filled in the trench. I still have a lot of work to do on the trench, but it will have to wait until the weather improves. Once the trench was filled in, I ran one circuit with two outlets (no circuit has more than 4 outlets, and I have four circuits (so far) plus one lighting circuit (so far). It was getting late, and I owed my wife a nice night out, so I called it a day.

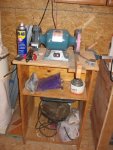
I did not get started until after noon on Sunday, but got the rest of the outlet circuits listed above run and the tools off of my patio and into the shop. I will try to take some pictures this weekend, but other than the lighting circuit that I did this past circuit, that is all that I have done so far.

Well, I have a lot left, and am starting to get anxious to start turning, so I may have to let some things wait a while (my budget was tightened up as well). For instance, I am thinking to hold off on insulation and wall covering (OSB) until the fall. I may start with building some rolling cabinets and wall cabinets though. The wall cabinets will be hung on those French cleats, so I will not cause too much extra work by doing them before the wall material.

Here is my latest sketch up layout. I think I like this version and everything will be on wheels except the lathe.
Top.jpgISO.jpg
The cabinets along the walls will be at the same height as the table saw so that I can have a large out-feed table when needed.
TableSaw Config.jpg
I am also planning to build a cabinet around the table saw to maximize storage.
 
Are you insulating the floor somehow? I don't recall this being mentioned. Doesn't look like much clearance for getting under it.

No, and not by choice. This is one of the down sides to using a shed contractor. What I should have done is to build the floor system myself. That way, I would have used standard 2X8 floor joist with a vapor barrier and insulation. I have been trying to think of a way to insulate, but have not gotten anywhere. Any ideas?

Thx...Jamie
 
One more thing, put your plugs more then 4 feet from the floor, that way if you put a sheet of plywood against the wall it won't cover up any plugs..

Don,

Great suggestion... I installed the outlet boxes 52" to the bottom of the box. I should not have any issues with leaning material against the wall or having one of the counter top benches or wall cabinets in the way. I will probably install more outlets as I go as well...

Thx...Jamie
 
I wish I'd seen this thread sooner, but it may not be too late since you said you wanted more windows. Put one of the windows in-line with you table saw. That way if you need to rip a long board, you can run it out the open window. It's saved me more than once, and my shop is 22' long.
 
Progress

03/12

Well, I have not put nearly as much time into the shop as I would have hoped but I have accomplished some. Over the last few weeks, I was able to finish installing the wall outlets (four circuits spread out around the room), installed some overhead lighting (temporary incandescent fixtures), and put up OSB (and leftover plywood from my old shed) on two walls.

My main focus lately has been organizing things. In my past shops, I never had the room to really have any sort of organization. I just had some peg board (I will not be using that again), no bench or counter, and no cabinets. My only real organization was the small tool chest (the one that my drill press is on in the pictures) and that was definitely not enough.

DrillPress.jpg

I was able to get some of the kitchen cabinets (uppers) from my mother’s old kitchen.

Cabinets.jpg

I mounted them on the French cleats so that I can fine tune the placement. I will be getting a few more once I can get some help getting them out of her basement, but that will wait until I am done with the OSB on the walls.

I also threw together a temporary work table from scrap.

Bench.jpg

It is definitely not the greatest, but it keeps my tools off of the floor and out of the way while I am working on projects. My goal for this table will be to rebuild it with wheels. I will use some sort of clamp to hold it in place against the wall yet give me the ability to use it as an out-feed table for the table saw when needed. I hope to build a total of three of these, but that will come later. All of my cabinets/workbenches will be at the height of the table saw as well.

I have also had the chance to do some turning, but I will outline that in that forum.

Thanks for looking, and as always, comments are welcome.
 

Attachments

  • Walls.jpg
    Walls.jpg
    65.3 KB · Views: 15
  • Grinder.jpg
    Grinder.jpg
    67.6 KB · Views: 13
Are you kidding me? Looks like you got a lot done.

If those are your mother's "old" cabinets, I'd like to see the new ones. They look great. Wise move with the french cleats.

Looking good Jamie!

:thumb:
 
Top