Aparto II - 2012 Update

Naw, not going to happen, the Voxy is the family van, not used much but for family outings, I don't like to use it for my "Reno" work if I can avoid it.

The new micro van, a Subaru Sambar Dios, will have a full length roof rack that I'll be able to haul what I need.

The Voxy was bought in November of 2001, so in November of 2009, this year, it will be eight years old, but it is still like a new van to us, we have just under 19,000 Km on it, that is only 11,800 miles in EIGHT years, so 1475 miles a year...... and it is paid for! :D


Wow, and I thought that *I* was a low km driver... Our five year old Toyota Sienna had about 78,000km on it, and that is consider low around here. (would have been lower except for that return trip to Florida two years ago...)

And I was googling to find out just what a Sambar Dias was, and I found this web page... Wow. Isn't it nice to know, Stu, that when you retire back home to Canada you'll still be able to import into Canada those cool micro vehicles you get to drive in Japan. :wave: (Though I am curious as to the prevalance of VW Micro Bus "branding" on so many of those Subaru Sambar Dias vans. Is that a common custom mod?)

best
...art
 
Wow Art, all of those Dias are OLD models, pre 1998 I think.

The new ones look like this.....
SB_S008_F002_M008_1_L.jpg samba_dias.jpg samba_dias2.jpg

samba_dias_interior_1.jpg samba_dias_cargo.jpg samba_dias_cargo2.jpg samba_dias_interior_flat.jpg

With the back seats down, flat into the floor, I can easily fit full sheets of plywood in there (remembering that here in Japan a full sheet of plywood is about 3' x 6' ) the Subaru is the only Micro van that can do this. All of the other brands, they have moved the front wheels WAY forward to get a longer wheelbase, for a nicer ride, like this.......
Town_Box_AUTOSdeJ@PON.jpg
...... the problem is that your feet and the wheel wells get into each others way, so they moved the front passenger compartment back about 6" to 8" and in doing so, the cargo area is now too small to fit a sheet of plywood :doh:

The Subaru is also the only one with a 4 cylinder motor, the others are all 3 cylinder, and the Subaru runs a lot smoother, also, because it it at the rear of the van, it is quieter inside, and has good traction in the snow etc.

They sell these vans ready to go for a courier company, these vans see 100,000 Km per year (60,000 miles) and they still have a 3 year warranty, all of the other makers say if you use if for a courier business, the warranty is only one year.

I'm just looking forward to getting a new van, with ABS, airbags, seatbelts in the back seats, and a functioning AC :thumb:

Cheers!
 
Last edited:
Wow, and I thought that *I* was a low km driver... Our five year old Toyota Sienna had about 78,000km on it, and that is consider low around here. (would have been lower except for that return trip to Florida two years ago...)...art

My '97 Toyota Tacoma (bought new in '96) only has 43,00 miles on it. Doesn't get used much for 'just traveling,' though. Generally, when it goes out, it comes back hauling something. On its last long day out, it was hauling Larry to Hartville and back. :D :D :D
 
Sheesh, I wish I could get the LOML to adopt some of ya'lls habits.:rolleyes: She got a Brand New 2005 Merc in March of 2006 and already has in the HIGH 40's, (like maybe 48,000 or thereabouts).:bang::bang::bang: (And that's MILES, not kilometers).
 
Well Stu, that short roof rack will give you the excuse to build up your wood stash. Two or three 2x4's under the sheet goods should stiffen it up and give you and excuse to bring home a little "extra" wood for a later project.
 
My '97 Toyota Tacoma (bought new in '96) only has 43,00 miles on it...

Man, you've barely worn the molding marks off the tires. :D My '97 Ranger pickup has over 250,000 miles on it, but the vast majority of them were put on it by my dad before I got the truck about 3 years ago. It's still running strong on the first engine, although it had the clutch replaced at about 90K. Since I've had it, I think I've put fewer than 1000 miles per year on it.

Stu, my hat's off to you for dealing with Tokyo traffic in those little vans. I don't know if I could handle it.
 
.............Stu, my hat's off to you for dealing with Tokyo traffic in those little vans. I don't know if I could handle it.

When I first go here, it drove me nuts, and they drive on the wrong side of the road!! :eek: :doh:

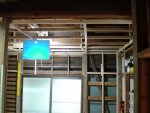
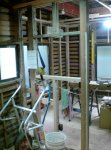
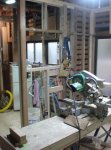
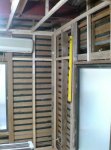
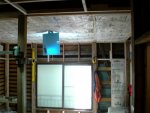
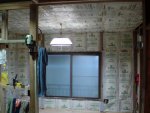
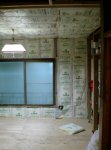
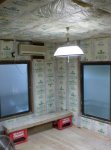
I've been blocking the walls and the ceiling, to hang drywall, it is slow work, this building was NOT built with drywall in mind, they used wattle between the timbers :rolleyes:

There are simply a bunch of little bits and pieces that need to be put in for support of the drywall.

Here are some pics of the work.......

ceilings_walls_blocking_1.jpg ceilings_walls_blocking_2.jpg ceilings_walls_blocking_3.jpg ceilings_walls_blocking_4.jpg

Might be hard to see, as I've been using old wood and new wood to do this.

I must have been up and down that ladder a couple hundred times today :coffee: I'm bushed :eek:

I've got a busy week here, this coming weekend we have the summer festival in the town, lots of extra work, I'll lose Friday, Saturday, and Monday to this festival. :(

I hope to get the blocking and insulation all done by the end of the week, we shall see I guess.

Cheers!
 
I got the ceiling in the living room area all blocked and ready for insulation, then drywall, and most of the walls done too, I ran out of time, or I would have gotten the last little bit under one window done.

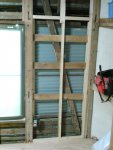
shutter_wall_1.jpg shutter_wall_2.jpg
How do you like my custom light shade :D
Without it the pics are just washed out by the light, and if I turn off the light, then it's too dark to take a picture. The structure is solid, I can hang from it and it does not budge, so it should take the drywall just fine.

in one wall there is a shutter box, most of the older homes, have sliding widow shutters, they slide out of a pocket on the outside of the house and completely block out the windows, great for darkening rooms in the middle of the day, some privacy and when a typhoon comes. Most of these pockets are, like I said attached to the outside of the wall, for whatever reason, the one on the West side of this apartment is in the wall :dunno:
lvr_ceiing_blocked_1.jpg
This is not really a problem, but I want to insulate the walls, and I am concerned the the bats of insulation could, at some point get tangled up with the sliding shutters, there is not much wood there to keep the bats of insulation out of harms way. True, the bats are stapled to the studs, but stuff happens, so I decided to put some more boards in there.......

lvr_ceiling_blocked_2.jpg
...... I think that should do the job nicely.

I also had the electric company over today, to upgrade the service from 20 Amps to 30 Amps, took the guy all of 5 minutes to do :thumb:

While there, he took a look around and told me that I was doing a good job, and that the electrical was looking fine, he said he has seen some really bad work done by "Professional" electricians, but my work was good, for a renovation, of course for new construction the standard is much different. That kind of made my day, as I'm not really that happy with how it looks, I know it is safe and all of the connections are good, as well as upgrading to the 30 Amp service and spitting things up into four circuits is a big improvement, but still, I think it looks messy :dunno:

Tomorrow is Thursday, I'll do my best to get a full day in tomorrow, and then only the morning in on Friday, I really hope I'll be hanging drywall early next week, I NEED to get this done.

Cheers!
 
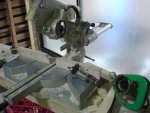
Well, I hit a snag today :( about half an hour after I started work, I went to cut a board on the SCMS and it made a very sick sound, kind of a grinding/groaning/dying sound :eek: :doh:

The saw is my venerable Hitachi C8FB dual compound sliding miter saw, it has been real work horse for me. I took it apart..............

hitachi_c8fb_busted.jpg
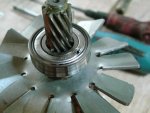
........... and found the source of the problem.......

hitachi_c8fb_bearing_failure_1.jpg hitachi_c8fb_bearing_failure_2.jpg
........ I'd call that a catastrophic bearing failure...... :(

I had to go find a bearing and fix the saw, I kind of need it you know...

First place (15 minutes away) I went, they did not sell bearings, the second place, (25 minutes away) they sell bearing but were sold out of the one I needed three times is the charm I guess, because the third place (35 minutes away) had it!

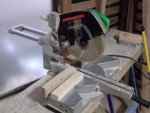
Still, by the time I got back to the Dungeon, and took the old bearing off the old bearing and installed the new bearing, then went back to the Aparto, and reassembled the saw................

hitachi_c8fb_fixed.jpg
............. my work day was effectively over :rolleyes:

Kind of sucks, but hey, at the very least I got the saw fixed.

Cheers!
 
Last edited:
Yeah, I'd say it's time for new bearings. Good job on sussing out the problem and fixing it. I've never taken an electric tool apart deep enough to get to the bearings...dunno if I'd be able to get it all back together without having some leftover parts. :p
 
Yeah, I'd say it's time for new bearings. Good job on sussing out the problem and fixing it. I've never taken an electric tool apart deep enough to get to the bearings...dunno if I'd be able to get it all back together without having some leftover parts. :p

When I first started taking stuff apart and trying to put them back together, that was a problem, but really, these tools are very simple, and you can almost always get an exploded parts diagram online to help, if you need it.

worm gear looks good.......ought to be good for another 100k miles;)
Yeah, I hope so, this saw is a real workhorse, the other bearings all seem good, this one is on the end of the motor armature, not the biggest bearing in the saw, that one is on the main shaft that the blade is on, and it is a LOT larger, but felt nice and smooth too.

Here is hoping it lasts a while longer, I think it is a vintage 1988 saw, so it has got 21 years of use and abuse on it, I hope it lasts another 10 years or more!

Cheers!
 
When I first started taking stuff apart and trying to put them back together, that was a problem, but really, these tools are very simple, and you can almost always get an exploded parts diagram online to help, if you need it...Cheers!

Yeah, Hitachi even has the manuals online.

BTW, did you replace the brushes when you reassembled it? Easy and cheap - and good 'insurance.'
 
Yeah, Hitachi even has the manuals online.

BTW, did you replace the brushes when you reassembled it? Easy and cheap - and good 'insurance.'

You are right about the manuals, I even found a manual for my old bandsaw that that thing has not been built for 30 years :thumb:

The brushes are just fine, lots of life in them yet :D
 
I finally got done all of the blocking and started on the insulation! :thumb:

Long time coming for sure!

On Monday I'll be heading out to Super Viva Home to get the drywall as well as some other stuff. I hope to have my friend Neil along. Neil teaches English, as well as doing some other stuff here, he is basically on holidays for two weeks, the first week he took his wife and three boys for a trip, I think up to Gumma. He told me that if I could use his help next week, he would be willing to lend a hand :D I don't know how much of this carpentry etc stuff that Neil knows, I think he knows which end of the hammer to hang on to :eek:

All kidding aside, if he can help me out for even just a day with putting the drywall up on the ceiling, it will be greatly appreciated!

Today, I made a quick video of the aparto, before I started the insulation etc, I wanted to take it with my video camera, but the battery was dead, so I used my cell phone instead, not the greatest video for sure...........

>> The Aparto II Quick Tour <<

...... not the best video, but you get the idea :rolleyes:

I have a question for all of you guys that know about this kind of stuff, the aparto is one building, but two apartments up and down, so I would like to add insulation in the ceiling of the first floor aparto, this would be the normal fiberglass bat stuff, is there a problem with doing this? It is just that the 1st floor apartments suffer in the winter because heat rises, so the heat just goes straight up, is there a better way of doing this? I am a bit worried about trapping moisture on the first floor, so I was thinking of putting some vents on the ousdied wall, between the floors, so to speak, between the ceiling of the 1st floor aparto, and the floor of the 2nd floor aparto....?

What do you think?
 
I finally got done all of the blocking and started on the insulation!...I am a bit worried about trapping moisture on the first floor, so I was thinking of putting some vents on the ousdied wall, between the floors, so to speak, between the ceiling of the 1st floor aparto, and the floor of the 2nd floor aparto....?

What do you think?

Why not put a poly vapor barrier under the ceiling drywall? That'd keep the moisture from penetrating into the insulated space.

If you're gonna vent the ceiling space to the outdoors, wouldn't it negate any insulation you install?

Also, to vent it properly, wouldn't you need a vent on both sides of the building to allow cross flow? You'd also need a vent in each joist space, wouldn't you, to avoid having one cold and the adjacent one warm - and causing a potential condensation problem. That's just my thoughts - I could be wrong...

The space between the top of the ceiling, above the insulation, and the bottom of the floor upstairs, which has no insulation would be vented. I can put vents on three sides of the building, just the back side I cannot get too, which is OK, as that is the side with the closet, and the bath room (which will be vented separately.

The vented space would not negate the value of the insulation, you would have warm/cool room, drywall, insulation, then vented space, then bottom of the floor upstairs, (not insulated or vapour sealed).

Cheers! :D
 
I worked at the Aparto from about noon to 5 PM today, Sunday, including one quick run to buy staples, as I ran out :doh:

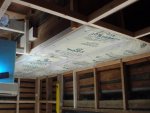
I did get the insulation in the living area done..........

insulation_ceiling_started.JPG insulation_ceiling_done.JPG
The ceiling started.......

insulation_living_1.JPG insulation_living_2.JPG insulation_living_3.JPG insulation_living_4.JPG
..........and the rest of the room, next up some vapour barrier and then drywall!

Tomorrow, Monday, I'm off to Super Viva Home to get a variety of stuff, but mainly the drywall, my buddy Neil should be coming along and then help me with the drywall installation!

I'm really behind the eight ball here!
 
Top