- Messages
- 36,123
- Location
- ABQ NM
Curt Fuller sent me a gorgeous piece of box elder burl a while back, and I thought some of you might like to see a few pics showing the process I went through to get a couple pieces out of it last week.
This piece was pretty odd-shaped, so it took a little jockying to get it oriented with the major burl spikes aligned with what would become the top of the turning. I used a spur center at the headstock end...
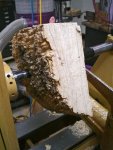
...and the live center at the tailstock end. I didn't get any pics of it, but I used my bandsaw sled to cut a flat spot (roughly) parallel with the top where the live center needed to go. Here's the tailstock view after the first few cuts with the bowl gouge. (I didn't use the Ci1 on this piece, since the wood was soft and I wanted to take light cuts. A sharp bowl gouge fit the bill.)
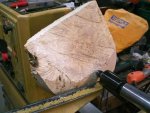
Here it is about 10 minutes later. Looking more round now.
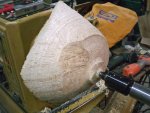
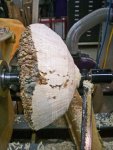
Another half hour or so later, I had the outside finish shaped and a tenon made. This wood was relatively dry, so I planned to turn to finished thickness from the start. No DNA soak for this one.

I also still hadn't decided what I was going to make now that I had the blank round, so I called it a night at that point so I could figure out my next steps. I debated making a set of nested bowls, one large hollow form, or some combination of the two. This blank was a great candidate for a set of 3 or 4 nested bowls, but I'm still on the learning curve with my coring rig, and I was hesitant to get too ambitious with trying to cut thin cores. This was too nice of wood to mess something up. I was also intrigued by the spiky top, and wondered how it would look on a spike-topped hollow form.
By the next day, I had decided to make a bowl and hollow form. I still hadn't decided if the hollow form would have spikes all over the top, or if it should just have a spiked collar. Before I made that decision, I still had some coring to do. BTW, the perspective of the first pic below is skewed...the handle on the coring tool is not as big around as a trash can. It just looks that way in the photo.


In the end, I was real conservative with the coring rig, leaving the bowl walls quite a bit thicker than I needed to. That was still better than making a burl funnel, IMHO.
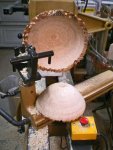
After a few more hours of finish turning and sanding, I ended up with my bowl and hollow form. I ended up leaving the entire top of the hollow form spiky, because if I had cut away enough wood to get to a smooth top, the form would have been shorter and squatter than I wanted. Plus, I just wanted to see how a spike-topped hollow form would look.
Here are the two pieces ready for finishing...
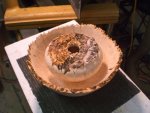

They're finished and buffed out, and I took pics earlier tonight. I'll post the finished pics tomorrow in separate threads. The figure in this wood is gorgeous. Stay tuned...I think you'll like the pictures.
This piece was pretty odd-shaped, so it took a little jockying to get it oriented with the major burl spikes aligned with what would become the top of the turning. I used a spur center at the headstock end...

...and the live center at the tailstock end. I didn't get any pics of it, but I used my bandsaw sled to cut a flat spot (roughly) parallel with the top where the live center needed to go. Here's the tailstock view after the first few cuts with the bowl gouge. (I didn't use the Ci1 on this piece, since the wood was soft and I wanted to take light cuts. A sharp bowl gouge fit the bill.)

Here it is about 10 minutes later. Looking more round now.


Another half hour or so later, I had the outside finish shaped and a tenon made. This wood was relatively dry, so I planned to turn to finished thickness from the start. No DNA soak for this one.

I also still hadn't decided what I was going to make now that I had the blank round, so I called it a night at that point so I could figure out my next steps. I debated making a set of nested bowls, one large hollow form, or some combination of the two. This blank was a great candidate for a set of 3 or 4 nested bowls, but I'm still on the learning curve with my coring rig, and I was hesitant to get too ambitious with trying to cut thin cores. This was too nice of wood to mess something up. I was also intrigued by the spiky top, and wondered how it would look on a spike-topped hollow form.
By the next day, I had decided to make a bowl and hollow form. I still hadn't decided if the hollow form would have spikes all over the top, or if it should just have a spiked collar. Before I made that decision, I still had some coring to do. BTW, the perspective of the first pic below is skewed...the handle on the coring tool is not as big around as a trash can. It just looks that way in the photo.


In the end, I was real conservative with the coring rig, leaving the bowl walls quite a bit thicker than I needed to. That was still better than making a burl funnel, IMHO.


After a few more hours of finish turning and sanding, I ended up with my bowl and hollow form. I ended up leaving the entire top of the hollow form spiky, because if I had cut away enough wood to get to a smooth top, the form would have been shorter and squatter than I wanted. Plus, I just wanted to see how a spike-topped hollow form would look.
Here are the two pieces ready for finishing...


They're finished and buffed out, and I took pics earlier tonight. I'll post the finished pics tomorrow in separate threads. The figure in this wood is gorgeous. Stay tuned...I think you'll like the pictures.


