
Mike Grimm
Member
- Messages
- 159
Well, I couldn't figure out how to get them really good sized for viewing, so you'll have to make due with what I did get!
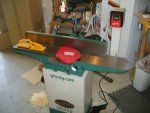
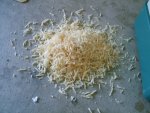
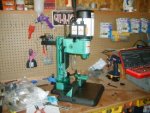
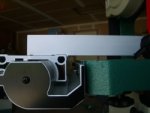
The boxes, planer, its maiden pile of sawdust!, band saw, mortiser, tenoning jig and finally the fence on the band saw. Something about is off, but I can't figure out what I did wrong. The holes where the fence attaches to the table have no adjustment room on them, but clearly the fence is sitting up above the surface of the table. Got some playing to do!
The boxes, planer, its maiden pile of sawdust!, band saw, mortiser, tenoning jig and finally the fence on the band saw. Something about is off, but I can't figure out what I did wrong. The holes where the fence attaches to the table have no adjustment room on them, but clearly the fence is sitting up above the surface of the table. Got some playing to do!


 They should serve you well for a long time.