
Bruce Moffitt
Member
- Messages
- 34
- Location
- Ottawa, Ontario, Canada
Back in November I asked a question about finishing the ash Table I was working on and said I would post pics when it was finished") .
.
Well yesterday I finished it and moved it in to the Dining Room . It’s not perfect but boy have I learned a lot.
During the process I had a table saw accident that cost me part of my ring finger and for the most part disabled my index finger. That being said I was very lucky and am back in the shop and enjoying it.
After a number of mistakes with over sanding and spraying lacquer
  that forced me to strip back to bare wood and restart it's finally finished.
.Well yesterday I finished it and moved it in to the Dining Room
. It’s not perfect but boy have I learned a lot.During the process I had a table saw accident that cost me part of my ring finger and for the most part disabled my index finger
. That being said I was very lucky and am back in the shop and enjoying it.After a number of mistakes
with over sanding and spraying lacquer that forced me to strip back to bare wood and restart it's finally finished.Attachments
-
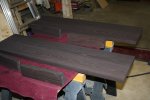
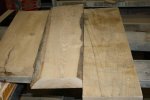 rough sawn ash.jpg49.3 KB · Views: 53
 -
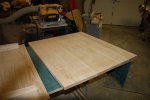 Table top.jpg46.5 KB · Views: 49
 -
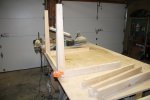
 top and legs.jpg43.2 KB · Views: 56
 -
 skirt leg assembly.jpg44.4 KB · Views: 52
 -
 filled top.jpg52.7 KB · Views: 50
 -
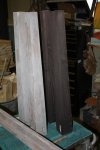 Dyed & filled legs.jpg48.1 KB · Views: 55
 -
 dyed leaf & skirts.jpg49.7 KB · Views: 54
 -
 dyed skirt.jpg69.2 KB · Views: 53
 -
 lacquer finish.jpg47.2 KB · Views: 93