Steve Schlumpf
Member
- Messages
- 687
- Location
- Harvey, Michigan
Everyone knows that you have to step out of your comfort zone every once in a while and try new things in order to grow. I like what I am doing as far as forms but really want to play around with colored dyes and see if they work for me or are just a passing gimmick. I have seen a few folks out there that have done amazing things with dyes and thought I would give it a try. Please forgive the snapshots…
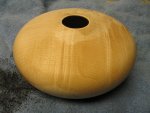
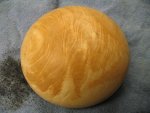
Started off with a really nice curly maple HF - that would have been just fine if left alone - but it had fairly bland color to it and was a great candidate for using dyes.


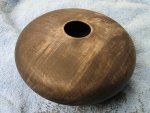
Using Black RIT powdered clothing dye, I combined approximately 1 teaspoon with about ¼ cup of denatured alcohol (DNA) in one of those plastic margarine containers and mixed it up using a 1” foam brush. Applied the dye to the form – inside and out – until it was saturated. Using an old towel, I wiped all the excess off and set it out in the garage to dry for a few hours.

Once the form was dry, using 220 grit sandpaper - sanded everything down. Didn’t try to remove all the dye – just even things out and prep the wood for the next dye.
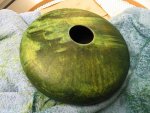
Using Teal RIT powdered clothing dye, I again combined approximately 1 teaspoon with about ¼ cup of denatured alcohol (DNA) and mixed it up using a new 1” foam brush. Applied the dye to the form – just on the outside – until it was saturated. Using an old towel, I wiped all the excess off and took it back out to the garage to dry for a few hours.

Once the form was dry (about 3 hours later) - used 280 grit sandpaper and sanded everything down. Once again, not trying to remove all the dye – just even things out and prep the wood for the next dye.
Using Yellow RIT powdered clothing dye, I followed the same application process and stuck the form back out in the garage to dry overnight.

Tomorrow I will sand the form down with 320 grit and then start applying Wipe-On Gloss Poly. This will deepen the colors and should really make the curl stand out.
As stated – this is an experiment and it either works or it doesn’t. I have my fingers crossed that it will.
Will post photos – instead of snapshots – once the piece is finished.
As always – your opinions, critiques and comments are welcome!
Thanks for looking!
Started off with a really nice curly maple HF - that would have been just fine if left alone - but it had fairly bland color to it and was a great candidate for using dyes.


Using Black RIT powdered clothing dye, I combined approximately 1 teaspoon with about ¼ cup of denatured alcohol (DNA) in one of those plastic margarine containers and mixed it up using a 1” foam brush. Applied the dye to the form – inside and out – until it was saturated. Using an old towel, I wiped all the excess off and set it out in the garage to dry for a few hours.

Once the form was dry, using 220 grit sandpaper - sanded everything down. Didn’t try to remove all the dye – just even things out and prep the wood for the next dye.
Using Teal RIT powdered clothing dye, I again combined approximately 1 teaspoon with about ¼ cup of denatured alcohol (DNA) and mixed it up using a new 1” foam brush. Applied the dye to the form – just on the outside – until it was saturated. Using an old towel, I wiped all the excess off and took it back out to the garage to dry for a few hours.

Once the form was dry (about 3 hours later) - used 280 grit sandpaper and sanded everything down. Once again, not trying to remove all the dye – just even things out and prep the wood for the next dye.
Using Yellow RIT powdered clothing dye, I followed the same application process and stuck the form back out in the garage to dry overnight.

Tomorrow I will sand the form down with 320 grit and then start applying Wipe-On Gloss Poly. This will deepen the colors and should really make the curl stand out.
As stated – this is an experiment and it either works or it doesn’t. I have my fingers crossed that it will.
Will post photos – instead of snapshots – once the piece is finished.
As always – your opinions, critiques and comments are welcome!
Thanks for looking!

