
Brent Grooms
Member
- Messages
- 46
Well it was cold but productive this weekend. I found that the massive guides that are on my bandsaw are great except for use with 1/4 in blades... I cannot pull the upper guides back far enough so that they will not make contact with the teeth of the blade. But I was able to get things done. Having a bandsaw makes life SO much easier... anyhow on to the picts
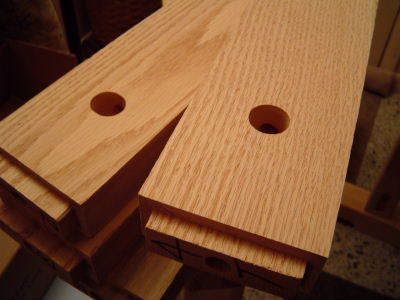
Previously I had decided to switch to benchbolts rather than thru tenons. No problem drilling the holes except for finding a bit long enough to do the job!
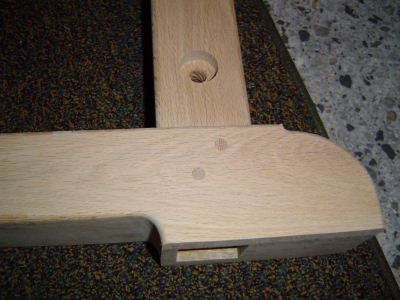
Drawbores for the upper and lower joints in the trestle legs. Note: It isnt that hard to pound the dowels into this joint. Especially with a little glue as a lubricant. It is possible to try to pound the dowel thru the other side of a blind hole! Don't ask me how I know that!

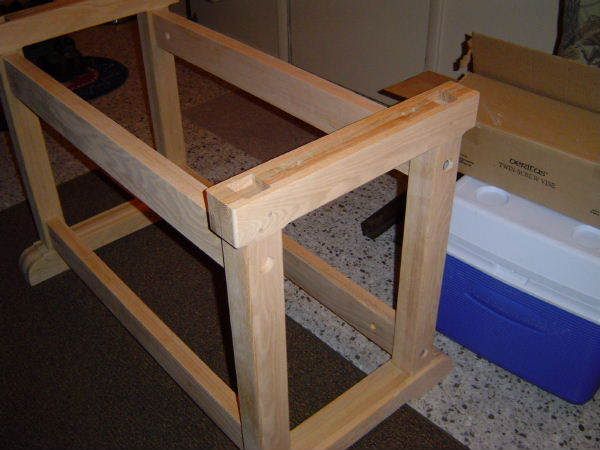
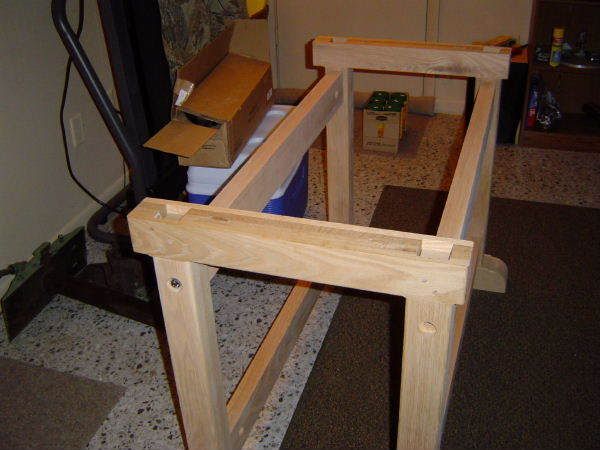
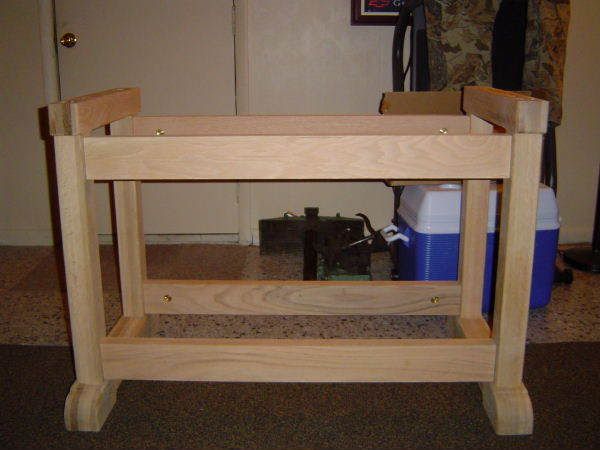
Lastly, the base assembled. In the background of these pictures you can see the twin screw and emmert vises that will be mounted on this bench.
I plan on applying a generous coat of watco danish oil (either in natural or golden oak) and possibly a coat or two of poly, especially in the feet to help keep them from wicking condensation from the garage floor. If I can find an epoxy that might be a better choice. I am planning a cabinet insert into the base for storage, which I will be starting on soon. Look out kreg jig, time for action! At this point, I am thinking along the lines of a six drawer chest with 3 different drawer heights with full extension slides. Any tips /suggestions for doing the drawers on this?
I picked up the 2 saw (japanese dozuki) set that lee valley offers for about $40 that has replaceable blades... incredible cutting with those! about 3 strokes to trim each of the dowels without scratching the faces of the other pieces.
Thanks for looking!
AND DOUG... since I am working so hard on this bench, the least a neighbor could do is to give me a 12hr advanced notice on items for sale
Previously I had decided to switch to benchbolts rather than thru tenons. No problem drilling the holes except for finding a bit long enough to do the job!
Drawbores for the upper and lower joints in the trestle legs. Note: It isnt that hard to pound the dowels into this joint. Especially with a little glue as a lubricant. It is possible to try to pound the dowel thru the other side of a blind hole!
Don't ask me how I know that!
Lastly, the base assembled. In the background of these pictures you can see the twin screw and emmert vises that will be mounted on this bench.
I plan on applying a generous coat of watco danish oil (either in natural or golden oak) and possibly a coat or two of poly, especially in the feet to help keep them from wicking condensation from the garage floor. If I can find an epoxy that might be a better choice. I am planning a cabinet insert into the base for storage, which I will be starting on soon. Look out kreg jig, time for action! At this point, I am thinking along the lines of a six drawer chest with 3 different drawer heights with full extension slides. Any tips /suggestions for doing the drawers on this?
I picked up the 2 saw (japanese dozuki) set that lee valley offers for about $40 that has replaceable blades... incredible cutting with those! about 3 strokes to trim each of the dowels without scratching the faces of the other pieces.
Thanks for looking!
AND DOUG... since I am working so hard on this bench, the least a neighbor could do is to give me a 12hr advanced notice on items for sale


 musta been thinking I only needed 4, one for each of the stretchers.