Stuart Ablett
Member
- Messages
- 15,917
- Location
- Tokyo Japan
I put this here, as it is a combination of flat and spinny, but I did most all of the work with hand tools, I'm loving my nice sharp planes!
Last week, my lovely wife made an off-hand comment that she needed to give something to the pianist at my daughter's choir group, said pianist seems to have gone and gotten herself married and my lovely wife wanted to give her and her new husband something. She called on me to make something, "no problem" was my answer, "what would you like?"
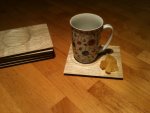
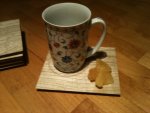
She showed me a picture in a catalog of these coasters with a space on the side for a snack. It seems that these have become quite popular here. I made one up, to the exact specs of the catalog, and we both realized that unless you were using a very small coffee cup, or a tiny Japanese style tea cup, these were on the small side, so I scaled things up a bit.
Now today it is Saturday, and my daughter's choir club meets on Saturday, and on Thursday evening, my wife says to me "Will you have those coasters done by Saturday?"
Time to kick it into gear. I got up nice and early on Friday, and expected to get right on the job...... no chance, one of our fridge units at the liquor shop, decided to spit the dummy and went South, so I had to coordinate with the refrigeration guy on getting if fixed, thankfully, it was only a relay that went poof, so it was not too expensive, and we got the fridge back online by about 3PM, which is the time I start to do deliveries
Last night around 10PM the Monster-In-Law comes downstairs, boy, that is at least an hour early for her, so at the first chance, I beat a hasty retreat and headed to the Dungeon around 10:30 PM. I worked until about 2:30 AM to get these done. I left them on the table downstairs and hit the sack.
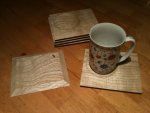
I woke up this morning about 9AM and when I came down for breakfast, I asked my lovely wife if those were OK, she was very pleased with them, but was a bit surprised that I got them done so fast
I said "Well, on Thursday, you said you needed them for Saturday, and the fridge thing kind of killed my Friday morning, so I burnt the midnight oil last night and got them done for you"
She smiled and said "Oh, I did not mean -THIS- Saturday......."
Oh well, that is done, and now she wants some for the house too.......
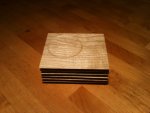
The size is 14cm wide and 12cm deep by about 8mm thick (5 1/2" x 4 3/4" x 5/16")
The wood is some Blue Keyaki left over from my as yet unfinished Genkan bench
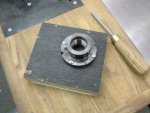
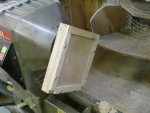
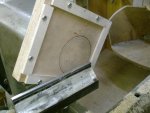
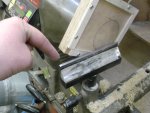
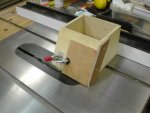
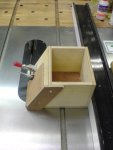
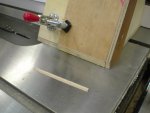
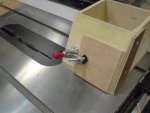
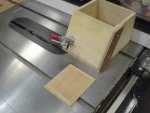
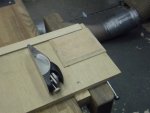
I made up a jig to do the undercut edges on the tablesaw, then I finished all the surfaces with my hand planes. The cut depression was done on the lathe, using my vacuum chuck (man that is sure slick!!).
I sanded only very lightly with a #600 scrubby pad after a coat of sanding sealer and then wipe on poly a few coats.
I'll be making some more, so I'll take some pictures of the process, if anyone is interested.
Cheers!
Last week, my lovely wife made an off-hand comment that she needed to give something to the pianist at my daughter's choir group, said pianist seems to have gone and gotten herself married and my lovely wife wanted to give her and her new husband something. She called on me to make something, "no problem" was my answer, "what would you like?"
She showed me a picture in a catalog of these coasters with a space on the side for a snack. It seems that these have become quite popular here. I made one up, to the exact specs of the catalog, and we both realized that unless you were using a very small coffee cup, or a tiny Japanese style tea cup, these were on the small side, so I scaled things up a bit.
Now today it is Saturday, and my daughter's choir club meets on Saturday, and on Thursday evening, my wife says to me "Will you have those coasters done by Saturday?"
Time to kick it into gear. I got up nice and early on Friday, and expected to get right on the job...... no chance, one of our fridge units at the liquor shop, decided to spit the dummy and went South, so I had to coordinate with the refrigeration guy on getting if fixed, thankfully, it was only a relay that went poof, so it was not too expensive, and we got the fridge back online by about 3PM, which is the time I start to do deliveries

Last night around 10PM the Monster-In-Law comes downstairs, boy, that is at least an hour early for her, so at the first chance, I beat a hasty retreat and headed to the Dungeon around 10:30 PM. I worked until about 2:30 AM to get these done. I left them on the table downstairs and hit the sack.


I woke up this morning about 9AM and when I came down for breakfast, I asked my lovely wife if those were OK, she was very pleased with them, but was a bit surprised that I got them done so fast
I said "Well, on Thursday, you said you needed them for Saturday, and the fridge thing kind of killed my Friday morning, so I burnt the midnight oil last night and got them done for you"
She smiled and said "Oh, I did not mean -THIS- Saturday......."
Oh well, that is done, and now she wants some for the house too.......
The size is 14cm wide and 12cm deep by about 8mm thick (5 1/2" x 4 3/4" x 5/16")
The wood is some Blue Keyaki left over from my as yet unfinished Genkan bench
I made up a jig to do the undercut edges on the tablesaw, then I finished all the surfaces with my hand planes. The cut depression was done on the lathe, using my vacuum chuck (man that is sure slick!!).
I sanded only very lightly with a #600 scrubby pad after a coat of sanding sealer and then wipe on poly a few coats.
I'll be making some more, so I'll take some pictures of the process, if anyone is interested.
Cheers!


 45 was way too steep, and 30 was also off a bit, so I just did what I thought looked right and ran with it. I made a jig to cut the angle on the tablesaw, as I don't happen to have a 27 degree bit for the router table
