Pedestal Table - TDW-2010 Fallout

coming along just fine glenn, i think you need a large walnut slab for your next project like the one in his living room.. i know where you could get one:) and it could be delivered to CA via transport by vaughn perhaps
 
coming along just fine glenn, i think you need a large walnut slab for your next project like the one in his living room.. i know where you could get one:) and it could be delivered to CA via transport by vaughn perhaps
Talk about an offer that you can't refuse. Is Vaughn taking a trip out your way? I can just see him rolling down the highway with a slab of walnut strapped to the hood of the car like a deer :D. Speaking of which, Dad and I need to make a trip to Vaughn's pretty soon.
 
I've watched Garrett Hack use reference lines as a guide for stock removal; kinda lets you know when to stop. Its been working for me for things like hand planing. I used it for rough stock removal bu bandsaw and rasp; worked pretty good.

ak-Ped-Tbl-Shaping.jpgal-Ped-Tbl-Shaping.jpg

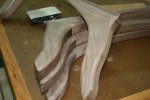
After roughing the shape in with bandsaw, rasps and paper I ran through the grits on one side of this leg to get a look at where I'm going; still needs more shaping. I have the mock up leg nearby as a visual guide so I hopefully won't lose my way.

am-Ped-Tbl-Shaping.jpg

I'll have a better idea at the end on the day as to how long this may take. I expect apparent forward motion will seem to slow way down as there is just a lot of shaping to be done and it takes a certain amount of time :rolleyes:.
 
Wow this is moving along much faster than I ever anticipated :). All legs shaped and sanded to 220 grit. The first two legs are in glue up. LOML and I are off to my mom and dad's for a visit so I will hopefully glue up the other two legs this evening (not likely) :rolleyes:.

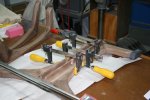
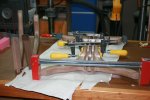
Ped-Tbl-Glueup 002.jpgPed-Tbl-Glueup 007.jpg

This will give me the whole weekend to dress in the leg to post seams and start the final sanding. I may even do what I am supposed to do and get some landscaping done in the backyard . . . no one goes back there but me anyway . . . it can wait ;).
 
Glen ....way to go man...you look like you having way too much fun on this one.

I cannot offer you an opinion on the leg shaping i like both equally.:dunno:

This is going to need a top that special enough to match those legs. ;):D

Btw take a look at these guys for rasps.

Say hi to Jim for me and enjoy the visit.:thumb:
 
Trying to make the most out of this extended weekend. The base came out of the clamps and gets to wait patiently in the hall till its time for the final shaping and hand sanding.

ar-Ped-Tbl-base-b4-hand-sand.jpg

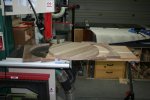
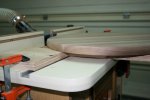
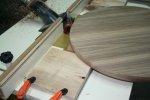
The top gets cut using my circle cutting jig version 3.

an-Ped-Tbl-Top-circ-jig-bs.jpg

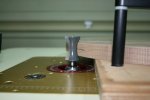
Like a lot of my jigs, I sized this one to be usable with multiple tools. Here, its on the router table. I don't use fingernail edges much but MLCS bits are cheap and this one just showed up yesterday :)

ao-Ped-Tbl-Top-circ-jig-rt.jpg

I put a centerline scratch on the bit and a center height mark on the table top to get aligned. I have a hole in the circ jig to allow access to my lift's crank to align the centers. I made the t-bar bolt holes oversized to allow some adjustment. The two pieces of scrap keep things aligned while being slid forward or back. This allows me to set a maximum depth perpendicular to the bit but I can slide the jig back about 1/4" to allow me to get the workpiece on. I then feed it into the spinning bit and rotate.

ap-Ped-Tbl-Top-circ-jig-rt.jpgaq-Ped-Tbl-Top-circ-jig-rt.jpg

I'll sand the top's edge till I'm happy, then do the top itself. Lastly, the base and then I'll have to come to a final decision on my finishing schedule. :rolleyes:
 
Last edited:
nice piece of work, but you knew Id ask, what size blade did you use in the bandsaw to cut that circle? 1/4 or 3/8?
I like that edge on the table, nice touch. gonna get one of those bits thanx for showing it.
 
Last edited:
nice piece of work, but you knew Id ask, what size blade did you use in the bandsaw to cut that circle? 1/4 or 3/8?

1/4", 7TPI, Timberwolf, tensioned via the flutter method. For the nearly 20" diameter top I could have used a larger blade but the 1/4" was still in there from shaping the legs and it is very well behaved :thumb:.
 
Glenn those legs came out very nice and what can I say the top is great.:):thumb:

Do have a question on the bit. I have never used a bit of this kind where there is no bearing to prevent one digging it in. How do you know or control when to stop or control the depth of cut.

I dont see the circle edge of the top riding on anything so this is just free hand?:dunno:

BTW in the event you missed my post from the Lie Neilson Hand tool event, i saw some rasps they have which are wow in use.

Check these out if you ever want some rasps, they have the conventional type as well. I know they are meant for joints or plane makers but man they sweet to work with. I played with them on all sorts of wood and they cut rather than tear so the finish was way better than i experienced with the conventional rasps i have experienced.


Oh how is the top to be attached to the legs?
 
there is no bearing to prevent one digging it in. How do you know or control when to stop or control the depth of cut.
This bit would normally be used on straight edges with your router table fence to control the depth. I am using the same circle cutting jig I used on the bandsaw to cut the top originally to control the top on the router table.

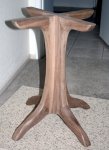
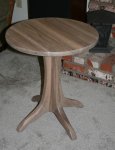
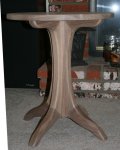
I have finished with the shaping and worked my way up to 220 grit. Now it is just smoothing the final shape with the higher grits and touching up any errant scratches going the wrong direction or missed spots. Hmm, I notice the top is not quite centered in the pics; it is just setting there :doh:

as-Ped-Tbl-base-ready for final sanding.jpgat-Ped-Tbl-base-side-view.jpg

Oh how is the top to be attached to the legs?
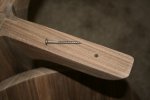
Four #8 washer head screws in an oversized counterbore with a 7/32" through hole to allow for any movement.

au-Ped-Tbl-base-screw-hole.jpg
 
Last edited:
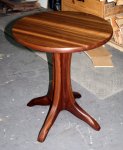
Thanks to all for the kind words and for coming along on the ride. I've never done anything in this style so a lot of firsts for me. It will take several days to complete the build in the finish but here's a sneak peek after the first coat.

av-Ped-Tbl-base-1st-finish-small.jpg

I used a variation on the equal parts mix; 1 part Cabot's gloss alkyd and phenolic modified resin spar varnish. 1 part boiled linseed oil. 1 part mineral spirits. On my test pieces, the gloss really kicked in after a couple coats but I want to keep that satin-ish look if I can pull it off.
 
Top