Dan Mosley
Member
- Messages
- 1,169
- Location
- Palm Springs, Ca
I thought I would have had the whole day to myself for turning and finishing up some projects but it didn't turn out that way. I got about half the day for turning before I had to stop but was able to get several things done and learn a couple things.
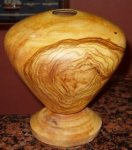
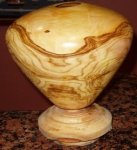
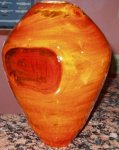
Picture 1-3.... After a 3 day soak in mix of varnish/blo/ms and now inside to dry.....sanded thru 500grit at this point.
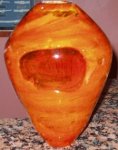
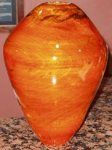
Picture 4-6... are of a earlier vessel turned and sanded thru 320 - very bland piece so I dyed it with analine dye and has many coats of spray Laquer. I was going to buff but I think it looks fine the way it is so ill just leave it like it is I think.
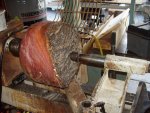
Picture 7 - I had to stop while I was working on this large piece of Olive wood so i sprayed it down with some spray water - waited for it to soak in well and put 2 coats of Anchor Seal on it.
:::::::::::Observations::::::::::::::
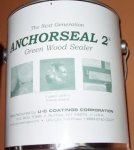
#1----Not sure what the New Anchor Seal #2 is all about but it was the same cost and I got free shipping from Woodcraft.......
#2----I noticed the ends on the sealed olive logs I have stacked outside are starting to crack at the pith. A friend told me I should trim them again....seal them again.....and cover them with a tarp so it restricts the air movement and light exposure so I think ill give it a try on my next day off. Either that or im going to have to start cutting them up into blanks (which I did not want to do).
Thoughts ? ..............Thanks Dan
Picture 1-3.... After a 3 day soak in mix of varnish/blo/ms and now inside to dry.....sanded thru 500grit at this point.
Picture 4-6... are of a earlier vessel turned and sanded thru 320 - very bland piece so I dyed it with analine dye and has many coats of spray Laquer. I was going to buff but I think it looks fine the way it is so ill just leave it like it is I think.
Picture 7 - I had to stop while I was working on this large piece of Olive wood so i sprayed it down with some spray water - waited for it to soak in well and put 2 coats of Anchor Seal on it.
:::::::::::Observations::::::::::::::
#1----Not sure what the New Anchor Seal #2 is all about but it was the same cost and I got free shipping from Woodcraft.......
#2----I noticed the ends on the sealed olive logs I have stacked outside are starting to crack at the pith. A friend told me I should trim them again....seal them again.....and cover them with a tarp so it restricts the air movement and light exposure so I think ill give it a try on my next day off. Either that or im going to have to start cutting them up into blanks (which I did not want to do).
Thoughts ? ..............Thanks Dan