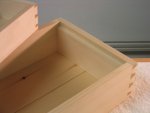
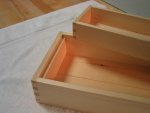
Toolbox - Tray Inside a Tray

Great job Bill!:thumb: I haven't noticed you mentioning what sort of finish are you going to apply if any. Or are you going to leave it raw and let it pick some patina?

Making a travel tool chest is something that is on my "to do" list, but the hardest part is finding what tools should I put on it and what tools shouldn't.

The more the better because there is always that situation where one swears for that tool that left behind thinking; "No way I'm going to need that".:(
 
Great job Bill!:thumb: I haven't noticed you mentioning what sort of finish are you going to apply if any. Or are you going to leave it raw and let it pick some patina?

You missed it Toni, it was four posts above your's. I put on a mixture of BLO, Turpentine & Bee's Wax. The mixture is in a glass jar that is one of the pictures. I have the recipe around somewhere and will try and dig it up.

Making a travel tool chest is something that is on my "to do" list, but the hardest part is finding what tools should I put on it and what tools shouldn't.

The more the better because there is always that situation where one swears for that tool that left behind thinking; "No way I'm going to need that".:(

I know what you mean. This box is only a prototype. When I get it done, actually I have already started, I will put tools into it and start trying to work out of it. This should help me figure out what is missing and what should change. The bench planes are easy to figure out, often it is the little stuff that make you slap your head and say "why did I not bring that"! I am hoping the process of working out of the box now, will prevent that.
 
The bench planes are easy to figure out, often it is the little stuff that make you slap your head and say "why did I not bring that"! I am hoping the process of working out of the box now, will prevent that.

I just wanted to expound on this topic of what to bring and what to leave home. I once left my jointer home thinking I could make do with my jack plane and that was a mistake. Constantly readjusting the plane for the amount I wanted to take off and the fact that it sure is nice to have that length when trying to make sure you have a flat edge or face.

So, my list to take with me:

1. No 4 Smoother set a little coarse (relatively).
2. No 4-1/2 Smoother set really really fine and with a high frog.
3. No 7 Jointer set relatively fine.

and the key bench plane (well, technically not a bench plane) to take that will preform a multi-tasking role, a low angle jack plane with low angle blade profiled for a fine cut, mid angle blade profiled for a rank cut and a toothed blade. I will use the low angle blade for use with a shooting board and the rank profiled blade for removing a lot of material. The toothed blade would be used in case I need to remove a lot of material and I was getting mucho bad tearout. It is easy to swap out the blades and adust on the BU planes, just a tap tap with a plane hammer and you are good to go.

Of course, I would still be needing to find room for block planes, shoulder planes, plough planes, ...etc. I am still trying to come up with a definite list and still fit it all in the limited box space.
 
So if you make a box that sets endo on a hand truck those other 5 hand planes won't bother you so much.:rofl:

Just remember wheels are your friend. Just because your 1/2 neander doesn't mean you have to step back before BC's time before he discovered the wheel. :rofl::rofl::thumb:Make it like an adjustable Gurney it rides on 2 wheels like a hand truck during transport & on 4 wheels during shop use. This also makes it possible to wheel around the shop in use mode, open & ready to work.
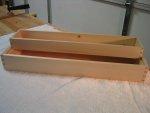
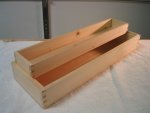
 
I completed the ledger boards that fit in the larger tray and which the smaller tray sits on. I ripped the boards to width on my table saw after hand planing them to the right thickness. I then hand cut them to rough length and then fine tuned the length on the shooting board.

Tray3 3.jpg

Tray3 4.jpg

Tray3 5.jpg

Tray3 6.jpg

Tray3 7.jpg

Here is a couple of pictures with the two trays inside the toolbox. As you can see the larger tray will side from side to side, allowing me to pull out my bench planes that are stored underneath. The smaller tray will slide from front to back allowing access to the larger tray. I grabbed some tools and placed them into the trays to give some idea of the size of everything.

Tray3 1.jpg

Tray3 2.jpg
 
Too bad this box is only a prototype, cause it looks like you've done some really nice work there Bill :thumb: :thumb:
 
Marvelous work Bill. This is really inspiring. I think you should use this one as the final version. Pine holds up just great as a tool box.

I really like how the tills fit and work together.
 
Phew Bill that is sure looking like one sweet tool box. If that is a prototype then i wonder what your final one will be like.

Excellent work. Its so good i would have trouble using it and seeing it knocked around and dented. :eek:

Those are sweet joints. I love the way in pine the end grain gives such contrast in color to make the joint pop more.

You got the fit just right.:thumb: Thanks for sharing it with us Bill. Great set of tools you have there.:):thumb:
 
I think you should use this one as the final version. Pine holds up just great as a tool box.

I still have a better box in mind, mostly in layout, but also in material. Pine is good material, I agree. Would love to work some old growth pine.

My work and home projects will determine when I will make this other box. I would like to start and finish it this summer, as I have a two week woodworking extravaganza scheduled in September over at Port Townsend. A week with Chris Schwarz, the weekend at the annual Wooden Boat Festival and then a week with Garrett Hack.

In the meantime, this box is still not finished as there is a till to make for the upper portion of the box. You can see the small alder ledger in the picture of the trays with tools. I am thinking this till will have drawers in them. This till will have to wait until I get a small gent saw with very fine teeth. Sawing 3/8" thick dovetails was pushing it with my dovetail saw. My technique had to be spot on to make it work. A very light touch with the saw hover over the cut line and in motion to get it to start. Just not enough teeth per inch per thickness of board. I also need to make fixtures to hold my backsaws onto the lid.

I have to do all of this between more important projects, so it might end up being the box I take this fall.
 
Those are sweet joints. I love the way in pine the end grain gives such contrast in color to make the joint pop more.

I found that I really enjoy working the pine. It had its challenges as it will tear out in a heartbeat so you really had to pay attention to the grain direction.

Great set of tools you have there.:):thumb:

Oh Rob, that was just a tease! They have many friends...
 
Hi Bill looking at your box and at the different trays, and knowing that my question may be out of place I wonder what will be or is the total weight of the box empty.

I know you've built it sturdy and to last, I know that pine is a rather light wood but judging from the pics ( and that may be misleading) the whole box will be rather heavy on its own, and although you mentioned that you won't be moving it around much I think that being this one a prototype maybe on your next one you'd like to make it lighter so that you can include some more tools in it.

Maybe it is just my perception and I'm completely wrong.

One more thing; there is another way of making a small tray fitting on top of another one without using ledger boards that take up some room on the lower tray. If you make the top tray the same length of the big one and its bottom thicker so that it protudes about 1/3 of an inch you would get the same nesting effect ( provided that the bottom is fixed inside the sides).

Two strips of wood glued on the bottom would do the same effect, but I know the perfectionist that is in you so please disregard this last one.:thumb:
 
Top