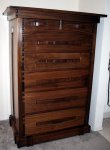
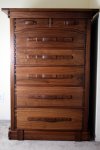
G&G Inspired Chest of Drawers - Build Thread

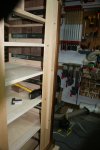
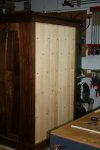
Amazingly difficult at this point to just leave it alone and let the finish cure a bit. I carefully tacked on the back. Hard to see in the pic but, it is made with the lap-jointed slats (shown earlier in the thread) tacked in place with some wrought-head nails. I used a ripped strip of MDF as a spacer and drilled pilot holes to avoid any splits. The nails are a bit larger headed than I would have preferred. If the piece was for a client I would have sought out other, more subtle hardware. As the piece is for me, and it is a no-show back, I took the liberty of using them anyway :eek:. The sledge hammer is pushed up against the webframe to give me something solid to strike against. Would have been a good time for a helper; position the sledge, walk around and whack the nail, re-position the sledge, walk around and hit the nail again . . .

CoD back (1).jpg CoD back (3).jpg

You may notice that the top, rear, carcass frame piece (you can see there are no pegs in the corner holes yet) was left off until the back-slats were in place. It is just setting there for the pic. I will glue and peg this piece after a bit more curing and well before I do any rubbing out. I will have to dress up the peg's surface to match the ones already in place that have a coat of finish on them.

9926
 
Last edited:
Chest is in place

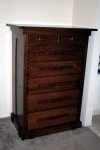
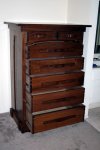
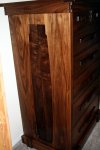
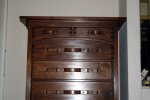
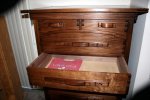
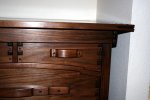
This guy is all smoothed down and waxed. For the life of me I cannot take a decent photograph; these are actually good pics for me :eek:. In my defense I was having to straddle the end of the bed and work around other furniture in my bedroom :)

CoD-Finished-1.jpgCoD-Finished-2.jpgCoD-Finished-3.jpgCoD-Finished-4.jpgCoD-Finished-5.jpgCoD-Finished-6.jpgCoD-Finished-7.jpgCoD-Finished-8.jpg

The color is not quite so dark but, the flash combined with the chatoyancy of the wood is a greater challenge than my pic skills can overcome.
 
Last edited:
very nicely done glenn and every where you look there is a detail to concentrate on, be it figure in the wood or the craftsmanship to make the piece what it is..!!!!:thumb:thumb:
 
Thanks for the kind words all. I will endeavour to get a better picture of the beast. Maybe once I get all the displaced furniture out of the bedroom (which shall happen post-haste). The bedroom has that wonderful perfume of freshly applied paste wax that will soon fade but, I think the piece will be around for a spell ;). Now my other "should have been replaced years ago" IKEA stuff looks woefully out of place. I did get a little better shot. There is a lot of visual movement as you pass by the piece. Freeze-framing this as an amateur makes some of the coloring look more disparate than it is to the non-flash-enabled human eye :). Now you can see a semi-hidden detail; the pulls are taken in order, top to bottom, from a single board.

CoD-Finished-9.jpg
 
Last edited:
Beautiful, striking piece of functional art. Just stopped in and pleased to see your lovely dresser. Push those limits.:D

Thanks Shaz. Great to see you. Any of you folks that haven't seen this man's work are in for a treat. His homepage is linked in the flyout on his avatar.
 
Last edited:
glenn, i have re read most all of this thread and saw a couple things i need answers to:) plus you need this to be up frnt and center again:) first of i saw some black foam handles on your clamps, where did you get those? and how did you anchor the top of your dresser to the rest of the carcase?
 
glenn, i have re read most all of this thread and saw a couple things i need answers to:) plus you need this to be up frnt and center again:) first of i saw some black foam handles on your clamps, where did you get those? and how did you anchor the top of your dresser to the rest of the carcase?

I was asleep at the switch on this so Larry caught up with me on a PM. I will share what I answered him here: The handles on the smaller clamps are grooved and dipped in Plasti-Dip. The K-body grips are from Rockler. I thought they were over-priced at a buck or so apiece but, the Plasti-Dip is about $15 a can and if I had to do a dozen handles, the price wouldn't be that much more for the pre-made ones. The price on the Rockler ones was really good for me as someone got them for me as a gift :thumb:

The top is held with figure 8 connectors, two at the top of each side panel and teo on the center divider for a total of six. Orientation is to allow wood movement. I use a Forstner bit to make a mortise in the top edge of the sides and divider, attach the figure 8 connectors, set the top in place and screw up from below, pilot holes and so forth first, of course. Here's an example I added to someone else's SketchUp file at their request for info.

figure 8 example.jpg
 
Top