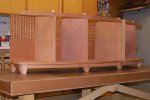
Mahogany Credenza - Build Update - Done

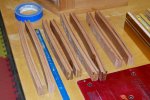
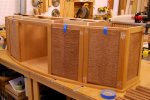
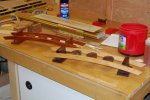
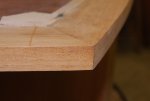
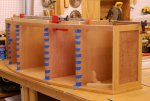
Today was primarily alignment and anchoring of the internal panels and massaging other parts to final fit. I ran some thin resawn mahogany thorugh my drum sander to get it to 1/32" to use for edge-banding the front edge of the panels. The photo shows the banding 'clamped' in place with blue tape. The other clamps on top are simply holding the panels in place; MDF spacers are between the panels.
asmbly08a.jpg

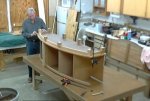
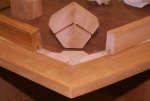
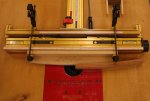
I ran a radius on a piece of MDF to use as a fence for the curved top and bottom rails of the doors. I plan to run the dado in the rails tomorrow.
asmbly08b.jpg

With all the stuff I've scattered about, it was time to do a bit of cleanup at the end of the day.

See y'all tomorrow! :wave:
 
Part of Thursday's effort was running the slots on the curved rails for the doors.

asmbly09a.jpg


I also trimmed the stiles to length, fit the panels into them and set them on the front of the cabinet to make final measurements. Only one 'oops' on these, so far. I had to make two new stiles; one for each of the front corners. I made all of the stiles 1.5" wide but the far left and far right needed to be wide enough to bevel the outer edge to match into the cabinet side.

asmbly09b.jpg


Friday will be spent on creating a jig to hold the curved rails so I can cut the tenons on the ends to mate with the stiles. Bevels need to be cut on the other stiles to match the cabinet. I'll have enough to keep me busy, I think. :)
 
MAN that is going to be one great piece when it is complete Bill, looking good:thumb::thumb::thumb:
Thanks, Tom! :)

yeah he just keeps teasing us with the little things so we can see the main event yet:):rofl::thumb::thumb:
Look! I might be slow, but I'm sure!!! (...or is that 'sure slow'?...) :eek:

Not a lot to show for today's shop time. I started doing tenons on one of the curved door rails and decided to change course. It should be fairly straight-forward on the bandsaw, but it's a slow process. I have an adjustable grooving bit for my table router and decided to try that approach next. Also did some measurements for final cuts on the door panels, etc.

On a more positive note, I contacted AFF about the hinges that Rob found and got a call from one of their sales guys. They're still building their website and the hinges are not in the store yet. The price he quoted me is comparable to Soss, but Soss doesn't have 3-way adjustment. I'll call him back tomorrow to place an order.
Update: 11/05 - After seeing the costs, LOML made an executive decision that Euro hinges will be just fine since nobody will see them unless the doors are open. Well, duh...
:huh: :doh:

Anyway, it's Friday afternoon. It's beer:30 and I can sip a brew while sanding some small parts for gift items SWMBO says I need to work on. I like to keep her happy! :D
 
Last edited:
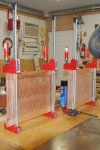
Monday and Tuesday are combined here. I was in the shop most of Monday with only a little effort on the credenza. Mostly, it was test-fitting doing final trims on door panels and cutting tenons on the curved rails. As a result, I got the first two doors glued up today.
asmbly10a.jpg
Almost as much fun as watching glue dry, huh? :rolleyes:


At least it looks like the rails and stiles are coming together as intended. A little sanding will massage them just right.
asmbly10b.jpg

Toward the end of the day, I got those doors out of the clamps and started fine-tuning the adjacent doors to fit.


The little guys below are part of the distraction from the credenza. These are holders for votive candles that I'll post in a seperate thread when they're finished. I post this photo as evidence that I haven't been goofing off entirely! :eek:
asmbly10z.jpg


See y'all tomorrow! :wave:
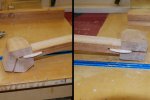
 
OK, so finally a little more progress on our credenza! Now that I have an 'official' assembly table, it's easier to get to all sides of the cabinet. When I moved it to the new assembly table, I set it on its top so I could work on the feet and radius pieces. I got all of those aligned and trimmed to match today. Next step is to decide exactly how I want to profile the bottom portion of the feet - probably a simple taper, but who knows?

asmbly11a.jpg

Anyway, I'll have a week to think about it. We'll be heading out for a Thanksgiving visit so there won't be much shop time for a while.

Y'all have a good one! :wave:
 
i almost thought he finished it and just wasnt gonna show me that veneer job with finish on it.. but i see he is still making sure that everything fits just right:) you can have thursday off bill and rest after the big meal:)
 
i almost thought he finished it and just wasnt gonna show me that veneer job with finish on it.. but i see he is still making sure that everything fits just right:) you can have thursday off bill and rest after the big meal:)
No way I'd secretly finish this project and not show it off! Most of my projects don't go as quickly as I'd like because too many other things pop up in the middle of them. :huh:

Oh, and thanks for Thursday off! :wave:
 
Bill i cannot thank you enough for your posts. We often discuss organizing our shops, but another part that i get from seeing a guy like you work is process. Not having had any woodworking training other than what i learnt in school many years ago there is a great deal to be gained from observing how accomplished woodworkers tackle projects of substance.
If anything contributes to being more patient and thereby accomplishing more and better quality of work its following posts like these for me. Thank for all the effort it takes to do.

Sent from my MB860 using Tapatalk
 
Bill i cannot thank you enough for your posts. We often discuss organizing our shops, but another part that i get from seeing a guy like you work is process. Not having had any woodworking training other than what i learnt in school many years ago there is a great deal to be gained from observing how accomplished woodworkers tackle projects of substance.
If anything contributes to being more patient and thereby accomplishing more and better quality of work its following posts like these for me. Thank for all the effort it takes to do.

Rob, thanks for your comments. Like you, I learn from following forum threads and saying, "I'm going to do that someday!" My only "formal" wood shop training was when I was 13 in 9th grade. I didn't start doing "serious" projects until I was about 45 and only after a lot of reading and forum participation.

Patience is not a trait I was ever accused of having until I started creating projects that used better woods. Being very frugal (cheap!), I took my time thinking through a process, sometimes maybe too much. I still managed to butcher a bunch of wood over the years! ;)
 
on a more serious side bill... i too like to see how you attack a project,, and like looking in the back ground at what else is going on there.. sometimes just seeing where the tools are laying or what tools are out can lead to ahint that something else went on first that may or may not have been one of the things i have done in the past..am really looking forward to seeing your shop in person one day..its gonna be like looking at the maloof shop and not threw a magazine..some places had dust others didnt.. those that dint were the ones that we need to look at closer..
 
on a more serious side bill... i too like to see how you attack a project,, and like looking in the back ground at what else is going on there.. sometimes just seeing where the tools are laying or what tools are out can lead to ahint that something else went on first that may or may not have been one of the things i have done in the past..am really looking forward to seeing your shop in person one day..its gonna be like looking at the maloof shop and not threw a magazine..some places had dust others didnt.. those that dint were the ones that we need to look at closer..
Larry, thanks for your comments. Most of the stuff in the background of my shop seems to be clutter, although I'm working on it bit by bit. Nothing fancy going on here - just another hacker making a nice, big piece of wood into smaller pieces and hoping something decent comes of it. :eek:
 
A little footwork

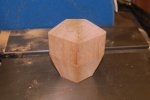
After a week or so away from home and shop, it was nice to get back to work on Monday. The focus for the day was shaping the feet for the credenza. Below is a graphic depicting the overall shapes I'm using. On the left is the basic foot with the flat portion at the top being about 1.75" and the bottom tapered part about 1.5". Two front feet and the four back feet are simple rectangular blocks of wood. The two front corner feet started as a glue-up of two milled pieces of 8/4 so I could make it the size I wanted to intercept the curved front stretcher and the straight side stretcher.

asmbly12a.jpg


After adding a piece of MDF to the miter slider, I adjusted it to 75* to give me a 15* (90-75) angle for the taper of the feet. I used a stop block to cut two sides of each of six blocks, then changed the position of the stop block for the remaining sides. This worked well for the two front feet and four back feet that are identical.

asmbly12b.jpg


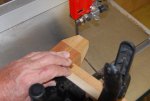
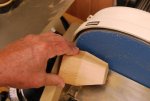
The front corner feet were giving me a little brain freeze trying to figure out how to band saw them to shape. I finally decided to have a go at shaping them using the disk sander, which worked like a charm!

asmbly12c.jpgasmbly12d.jpg


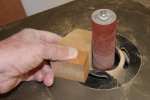
I cleaned up the saw and disk sander marks using the spindle sander. No photo, but I finished the sanding using an ROS and hand sanding to 220.

asmbly12e.jpg


Here's the outcome so far.

asmbly12f.jpg

Today, I'll finish cutting slots in the feet and stretchers to accept biscuits for attachment to the bottom of the cabinet.

See ya later! :wave:
 
Making more headway (footway?)

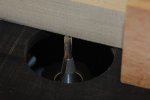
Today started with routing slots in the rest of the stretchers and feet for the bottom of the credenza. I used a 1/8" straight bit in my table router and made the first pass on each foot and stretcher. Then, I shifted my Incra fence 1/32" to make a second pass so the biscuit would fit.
asmbly13a.jpg


This photo shows how I routed each piece for the biscuits.
asmbly13b.jpg


A quick step back before I started doing the glue-up. The edges of the bottom panel were still unfinished, so I routed a 1/8" round-over on the bottom edge before starting to glue the feet and stretchers to the bottom.
asmbly13c.jpg


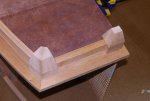
Here you see a nicer edge on the mahogany frame as well as the joinery. The corner foot sits in place; a curved front stretcher joins to it and the bottom; a straight stretcher runs from the corner foot to a rear foot.
asmbly13d.jpg


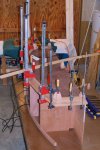
Well, somebody said, "You can never have too many clamps." I started the glue-up with the center curved piece to ensure everything came out, well ... centered! Next, I set the two center front feet in place and clamped them. I continued to the right, adding each piece in turn then went back to the front and added the pieces to the left of center. I re-checked all of my clamping of the front pieces, then added the back foot. I decided a single foot in back would be sufficient, but had to get creative with my clamping and use a caul from the front of the cabinet, over the back foot with a clamp running down to the assembly table.
asmbly13e.jpg


I left the clamps in place for about two hours. After removing the clamps, I checked everything for tightness and did a little sanding.
asmbly13f.jpg


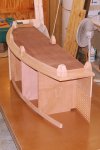
Since all of the feet seemed tight, I rolled the cabinet over to prepare for tomorrow's work.
asmbly13g.jpg

I think it's coming along OK in spite of breaking away for a while today to work on a couple of gift items.

Are we having fun, yet??? :huh:
 
i can almost smell the lacquer:)
Larry, remember -- it's the journey. Yeah, I know -- this journey is taking a while! :rolleyes:

Actually, if I follow the finish schedule I've planned, the first thing you'll smell is BLO/Naphtha. Next will be shellac, thinned and a little TT Mission Brown added. Finally, topcoat with lacquer. Does that sound reasonable? :huh:
 
Top