A Little Upgrade..

A Little Color..

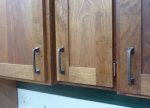
Well we are starting to see what these things are going to look like...
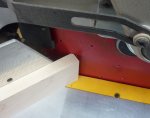
But before the BLO we need a little sanding.
I really like my Festool set up. Makes for no dust in the air.

sanding.jpg

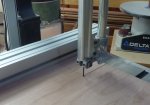
No shop is complete with out some high tec jigs.
Here's one of mine.
A chunk of peg board that has been converted to a shelf pin jig.

drilling pins 1.jpgdrilling pins 2.jpg

And finally a pic of these starting to come to life.
No big finishing secret here.
BLO cut with 1/3 turpentine.. Quick and easy.
Slop it on and wipe off the excess.

blo on cabinets.jpg

And the most important thing I did tonight.
Get rid of the oily rags! Off to my burn barrel outside.
I've seen what these can do if they decide to spontaneously combust.
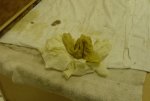
oily rags.jpg

Things are moving along quite nicely.
This weekend I hope I get some good shop time.


.
 
A Few More Carcasses.

Well I was able to pick up a couple more sheets of cherry ply today.
That made me happy. What didn't was these last two sheets are a little thinner.
Not much, but tons because of the way I make my carcasses.
I will really have to watch as I am making the pieces so they will all fit into the dados I make.
As per Rob's request here is the way I make my carcasses.
There is a ton of different ways to do it, here is one...
All dados and glue, no dowels or screws.
My sheet goods have to be a manageable size to put through my table saw so the all are knocked down.

carcass 1.jpg

I was lucky and the thicker sheets are going to make up all the sides.
The two thinner ones will be all the horizontal pieces.
This is enough for 5 more lowers.
A little deceiving as the smaller pieces are four deep.

carcass 2.jpg

Thats all I had time for tonight but at least I got every thing knocked down.
Oh, by the way these five lowers will be the base for my chop saw station.
The uppers were done last year.
As I think of it these lowers sure are going to be lighter for a year or so as they darken and catch up with those uppers....:(

Tomorrow I hope to have all these pieces machined.
We will see how we do.


.
 
Start of 5..

So my morning shift went pretty well.
All the parts are made for the next 5 carcasses.

I started by getting the sides the right height.
39". This is the height I prefer to have my chop saw at.

carcass 3.jpg

There will be 3 different widths of cabinets in the chop saw station.
Now I cut all the horizontal pieces to the 3 different widths.

carcass 4.jpg

With that done I can cut all the pieces to the proper depth.
Four of the cabinets are 23" deep and the narrow one 21 1/2" deep.
Lots of cuts on the table saw but these five are now ready to have the dados put in.
To get to this point took me a couple of hours.

carcass 5.jpg

Happy Thanksgiving to everyone!
Big supper tonight so no shop time tonight.


.
 
Last edited:
A Lot of Dados...

So the last phase before I glue up these 5 carcasses is done.
All the dados done this morning.

The first thing done was cutting out for my toe kick.
Set the bandsaw at 4" and take all the corners out.
I save these little chunks as they make good blocks for my glue ups..
Two of the cabinets will have the back corners cut out for my dust control.
But this will be cut out just before I glue them up.

carcass 6.jpg

First set of dados are the bottom ones. Very straight forward.
I've got to remember on these first cuts that we are doing mirror images....

carcass 7.jpg

Next I attach a sacrificial board to the fence to get my top cuts done.

carcass 8.jpg

After a whole swak of pushing these sides through the table saw we have all the dados we need.

carcass 9.jpg

With the sides all done each cabinet needs two horizontal pieces to have cuts made to accept the back pieces.
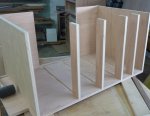
Because everything is sitting in dados the boxes just square themselves up when clamped together.

carcass 10.jpg

Lastly we rip the final pieces to make the drawer holes.
And a quick test fit before the carcass gets glued up.

carcass 11.jpg

Quick and easy way to make a bunch of carcasses....
These will be the last carcasses , hopefully, to be made for this winter upgrade to my shop..
Hope every one gets some shop time today...

.
 
No metal slides Allen.
All the drawers will be hand cut dovetails that are fitted just so.
A little wax on the bottom and they slide fine.
When I make the parts for the drawers I make a few extra pieces and have them sit around for a couple of weeks.
If any move a bit and are not straight they are discarded.
 
Finally....

Well we finally got all the carcasses done!
15 in total.
6 for my morticing station and 2 uppers to make the transition from my neander haven to the morticing station.
7 for my chop saw station which will include a TV cabinet and DVD cabinet.
Too many times I have watched something in the house ran to the shop only to forget a step....
And I get those evil looks when I take the macbook to the shop to watch something.

So here are the last five.....
The night went well. Lots and lots of clamps make it quite quick.

miter station carcasses.jpg

In hind sight I wish I would of done two drawers in the end cabinets.
The narrow one is going to hold my Jessem miter gauge and I needed that much height to make sure it will go in.
Not really thinking the ends were made the same.

With these all done we can now settle down for a leisurely build....


.
 
In hind sight I wish I would of done two drawers in the end cabinets.

Well . . . metal slides could take care of that ;). Thanks for all the pics Gary. I am really enjoying tagging along. Now that you have those pesky "required" carcasses out of the way you can have some fun with the drawers:thumb:.
 
Thank you Gary for all the pics and details i appreciate all the effort you have taken to post and share your approach.
Still following along.

Sent from my MB860 using Tapatalk
 
Drawer Guides

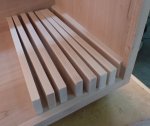
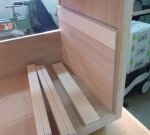
Not a lot of time in the shop the last couple of nights but we got the drawer guides in a couple of the lowers.
As my drawers will not have any metal slides all I do on my shop cabinets is build out the carcass to the frame.
My scrap cherry comes in handy for this.
Planed down a bit of it to 1/2" and this gives me a flush surface.
The scraps of plywood from the carcasses make handy wedges to hold everything as the glue dries.

drawer guides 1.jpg drawer guides 2.jpg

drawer guides 3.jpg

Now on to the sliding shelves that will be behind all of the doors.
Made a quick stop after work to one of my favorite places. LV.
I picked up some of the hinges for the doors and the slides for the first two carcasses.
These two will have two sliding shelves each built out of maple.

drawer guides 4.jpg

You got to love the Lee Valley stores.....
Kind of like a candy store for us weekend wood working warriors.

Game plan is to get these 4 shelves built in my next couple of sessions.


.
 
Gary i am very grateful that you are posting these pics.

This is a new method for me so i am eager to learn and understand what you do so please bear with me for the dufus questions which may be obvious to you.

So you build the cabinet and add a face frame. Going back to the build part when you assemble the two sides you only add the cross members in the front. Correct?

When do you add the pieces that i now see form the "shelf" for the draw to run on?

Then the cherry you mention being planned down and inserted is the piece that is going against the side to keep the draw from moving side to side i gather.

Is that side cavity that you created with the face frame also going to serve as a place where the slide attached to the draw will fit? Or are the draws going to simply slide on the shelf?

Is there any specific width to the piece you insert in the dadoes for the "draw shelf" I see some shelves are solid is this only for the ones that end up above an opening draw?

Going to back to the picture of your mitre saw cabinets all set up in a row, there is one cabinet that is shallower if thats what we call it than the rest. Its also very narrow. Why?

Do you have a cut list for how you break down your ply sheet?

I have been working with your dimensions and method and it seems there is no optimum yield layout or i have something wrong as usual.

I am trying to compare your method to the one that Tom Clark uses and consider the ply usage yield. Your method saves on draw slides and frankly i like that given the issues i have had because i used the kitchen type slides when i should have used the proper ball bearing type slides.

Am i correct in my understanding as well that the back of the cabinet is not a full sheet but two half pieces so there is a cut out in the back which essentially is ply saving too. What width are those pieces? Do they work into the cut layout for your sheet of ply or are they just scraps of whatever is around?

Nice neat cabinets and i take back my point about the draws in hindsite i am starting to see what you up to.

Your approach of buying a wad of ply and getting it done in one swoop gets the complete storage issue out of the way. The bits and pieces method works for some shop character but man its a nightmare to me. I need to put proper order in place. You have given me loads of food for thought.

How did you come to the decision on what width to make your cabinets/ draws.

Can you confirm if i have it correct you are at 39 inch high and 23 inch deep or from the wall. Then vary width to suit i guess.
But i suspect that the 23 inch fits into your ply sheet cut list for optimum yield somehow or not?:dunno:

Sorry for all the questions but i aint a cabinet maker like some here are.
 
Thanks Rob.
The cabinets are staggered in a few places just to show off the 1/2 lap joints.
That narrow cabinet is going to hold my Jessem miter gauge and I don't need a wide cabinet for that.

sliding shelves 7.jpg

When the uppers were done a year ago I took this into account and there is also a narrow cabinet up there.

I add the lower pieces for the drawers after the carcass is done just for ease.
All the parts sit in nice tight dados so every thing lines up just so. A solid lower piece is added just to keep the carcass nice and straight. No drawer slides for the shop cabinets. As long as the drawers are square and only a 1/16" short in height they slide well and don't tip much as they slide out of there holes...
No cut list when I do anything. Pretty much just build as I go. With the plywood the scraps are used as need and really cut down the waste.
After doing al these carcasses there is very little waste. I have a couple of pieces that are 7" and the rest is only 1-2" wide.

The backs are not full piece, really no need for it. They are again what ever is left over is used. Width has already been determined when the carcass pieces are made. This way everything is the exact width.
Hope this answers a few of those questions..

.
 
Sliding Shelves.

The last thing I want to do with these lowers, before the BLO bath, is to get the sliding shelves made.
Clean blades cut a lot better than dirty so before I start working with this maple we give this rip blade a quick spray to clean the junk off it.
I tend to clean my blade a lot as it only take a few minutes.

sliding shelves 1.jpg

A bit of jointing and planing and the stock is ready for final machining.
3/4" thick which will be proud of the face frame by 1/4"

sliding shelves 2.jpg

The side pieces are 2 1/4" and we will need 8 of these.

slding shelves 3.jpg

After the side pieces are cut to length I chop the back corner off.
Behind the face frame there is always a bit of glue squeeze out.
By cutting the corner off I know the sides will sit flat against the carcass.

sliding shelves 4.jpg

To get the height of the sliding shelves the same for the two upper shelves I just use a plywood template.
Cuts down on a lot of measuring and takes all the guess work out.

sliding shelves 5.jpg

Last thing I do in my shop time today is rip down all the pieces for the sliding shelves.
These need to be 2".
Not a bad couple of hours by the morning shift.

sliding shelves 6.jpg


Hope everyone is getting a little shop time today...


.
 
Last edited:
Slow day...

Not a ton of shop time today but we did get all the slides in.
Fall yard work is really getting in the way...
Plywood jigs again to give me a consistent height and make the job easy.

slides 1.jpg slides 2.jpg

slides 3.jpg

Don't know why but these took longer to put in than I expected.
And as a side note my wife was asking me why her kitchen doesn't have sliding shelves.:D
Do you think they may be added to my winter project list...


.
 
Last edited:
A Couple of shelves.

Well these sliding shelves are close to being done.
A little bit of a hassle but in the long run these will be well used.
Quick clamp job last night got three of the four shelves ready to go.

shelves 1.jpg

A scrap piece of plywood makes the side runners easy to install.
Just a tad over 1/2" down and this will make the shelves level with the side fillers.

shelves 2.jpg

These shelves are just glued and screwed.
To hide the screw holes I just put in buttons.
If I use a clamp to drive them home instead of a hammer there are no marks left after they are installed.
Slow easy pressure and they just pop in.

shelves 3.jpg

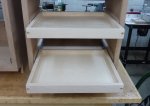
And a quick look at how these carcasses will look with sliding shelves.
One thing I hate is stuffing cabinets and losing things at the back.
I'm thinking these will keep things real organized...

shelves 4.jpg

Next will be to do a few doors.

.
 
Last edited:
Looking great Gary. I can attest to the usefulness of those pullouts. Be careful though, LOML saw mine in the shop and now she and her mom both have a kitchen full of them . . . my kitchen has only two ;-)
 
those pullouts would be a great idea in my downstairs pantry closet.
I can never see what is in the back and my wife keeps yelling at me not to mess things up in there.

Im just afraid to put one or two in there, because shed have another project on her list.
 
Top