Stickley #599 Trestle Table Build

A Cap Goes On.

With a little shop time tonight I got one of the caps on.

I have two options for my dowels.
The first is to rip some strips and rough shape them with a chisel then put them through a dowel plate...
A lot of work to me.
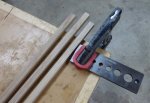
dowels 1.jpg

The second is to buy an oversized dowel and put it through the dowel plate.
I hunted through all the dowels at the lumber store and found what I was after.
Cut a bunch to a smaller length and then fired them through the dowel plate.
I now have dowels that are a consistent size...
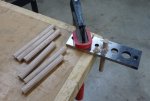
dowels 2.jpg

Putting on a high tech depth gauge we drill our holes.

dowels 3.jpg

After the three hole are drilled I have to elongate the outer ones to allow for movement.
Quick and easy all I do is rock my drill back and forth and then clean it up with a round file.

dowels4.jpg

Glue on only the middle mortice. The middle dowel gets glue on the whole dowel.
Outside ones have just a bit on glue on the last 1/2" to just hold them in place.
After we cut these off we will finally call this leg done....

dowels 5.jpg

Hope everyone is getting some shop time.

.
 
Coming along beautifully. Like you, I try to make a little progress when and where I can. That top is gonna really pop.
 
Stretcher Mortises.

After a quick glue up I have my two stretchers.
2" thick 4" high and 62" long.
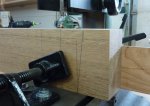
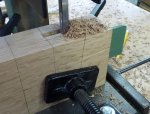
Now to punch the mortises for the tusks to slip into.

The twist in these is the one side is angled which will add a pain to this step.
As I don't want to adjust the mortiser or fence once I'm started I use a spacer block.
Cut the first row and then remove the spacer and then do the second row.
Keen eyes will see I went by my lay out line on the one side.
This is to make sure the mortise is inside the leg and the tusk will tighten properly.
strecher mortices 1.jpg

stetcher mortices 2 .jpg

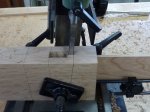
After all the vertical cuts are made we tip the mortiser over to just under 9 degrees to do the last cuts.
This is why I used a spacer.

The full width can be done without having to swing the mortiser head back and forth..
No way we would be consistent doing this....

stretcher mortices 3.jpg

So now with the mortises done we will make the tenons on the ends.
Hope everyone is getting some shop time...

.
 
Last edited:
Through Tenons.

Tonight we got all the tenons done on the stretchers...

I've never done tenons that are 5 1/8" long and never tenons that long that are going threw something....
Being that these stretchers are quite long, I want them to have as little friction on the table saw as possible.
I use this stuff. Spray on and wipe off.

through tenons 1.jpg

From one of the cut offs I make sure my miter gauge is set dead on and get my depth that has to come off.

through tenons 2.jpg

Now fire all four ends threw the table saw.
A little sanding with 100 grit to remove the machine lines and we are ready to see how these fit through the mortices.

through tenons 3.jpg

through tenons 4.jpg

through tenoons 5.jpg

All in all pretty good.
Thats a lie... I'm real happy the way these turned out.
Nice and tight.:)

Now I will sand the stretchers to 180 and get ready to do the tusks....
You got to love it when a plan starts coming together!


.
 
Test Fit...

So tonight I got a good look how this table is going to look.
All sanded to 180 and 200 run lightly over all the edges just to knock the sharp edges off.
Looks like this beast is going to be rock solid. Even without the tusks there is very little rocking.

table 1.jpg

table 2.jpg

I got the :thumb: from the boss tonight.
She likes it.:D
But then quickly asked when her small buffet and hutch was going to get started for her kitchen.....

Looks like I am going to get away with a lot of shop time over the next while..


.
 
well done gary, and every time i see your shop in the back ground i get green with envy ..mostly because i know some of what is behind those doors:) i now have more time than used to have so i need to get busy on my projects they are stacking up once folks found out my appt book was opened up:) looking forward to the rest of your build on this and the other pieces the boss has just ordered:)
 
I just got caught up on this thread Gary, and wanted to add another thumbs up to you for documenting the process so well. :thumb: The tqable is looking great. :clap:

Cute little mini-horse, too. When I was about 6 years old, we had horses, and I was chomping at the bit (pun intended) to break a horse. My dad arranged for us to board a yearling miniature horse mare that was barely halter broke, and she became my "horse breaking" project. I was young so I don't remember a lot of details, but I do remember one time when she ducked under a rail fence that was missing the bottom rail and effectively wiped me off her back at a dead run. It was also when we had that horse when I learned the phrase "snotty little wench" from my dad. :p
 
Tusk Time...

The tusks that hold the table together are done.
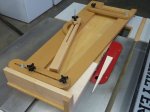
Simple process with a taper jig. I used a scrap piece of 1/2" ply to get my angle correct.

tusks 1.jpg

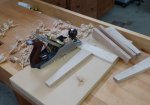
I machined the stock just a hair thick and now get them to the right thickness with my 4 1/2.

tusks 2.jpg

Traced the profile of tusk and a quick trip to the band saw and we have our final shape.

tusks 3.jpg

The profile is not exactly to my liking. I would of liked a rounder top on the tusk.
But keeping to the original we will stay with the way Gus S. did them.


Now to do a top.
One big thick slab 84" X 42" X 1 3/4"....
For this I am going to need a partner to put everything through my planer..


.
 
Thats my kind of table Gary.:thumb: Nice and big and heavy and will host a bunch of people.

Looking forward to seeing how that Oak finishes up.


BTW you really should do a full shop thread sometime. :) I would like to get a sense of how your whole space works out now with all the cabs etc. Your place looks way to spacious and clean.


Also trying to figure out your taper jig. Is that for left hand cutting on the table saw or is it me and the picture is opposite? Do you find the single arm sufficient to hold a piece in place? I am used to seeng this kind of taper jig.
 
Thanks Rob.
This time the pieces (tusks) were too small to use the hold down but when needed I have not had any issues with only having one hold down.
And yes the jig is to the left of the blade.
After I get the cabinets for my chop saw station done we will do a little shop tour.:thumb:
 
Love the tusks. Beautiful fit. I grew up with a large Spanish-style, tusk-tenon, trestle table and have always loved the solid stance appearance of them. The match up of that material and your workmanship are resulting in a wonderful piece.
 
Start of a Top.

Last to do on this small project is the big slab of a top....
Our rough stock is starting out at around 70 BF.
Net on the top if we get close to a 1 3/4" thickness will be close to 52 BF.
I have machined a couple of extra pieces to make sure we have a nice selection to give us a good looking slab.
Extra pieces will be used for the chair build that will go with this table.

After a couple of nights of cutting off the sap wood and flattening one side this is where we are at.

table top start.jpg

Simple glue up is what we are after.
But handling these big chunks of white oak is not the easiest thing I have done...
Sometimes one wishes they have a jointer bigger then 8". This is one of them, would be nice to have the extra bed length to do these long sticks.
Sunday with a helper we will run everything through the planer and will ready for a bottle of glue and a bunch of clamps.


.
 
Last edited:
A Little Glue Up For A Big Top.

So I kept the time it took to flatten, plane and then joint these long sticks.
I was surprised when it took around twelve hours.:eek:
Either I'm getting old or just real slow...
Planing was the fast part. The jointing took a long time and I used a lot of spray on the jointer bed to cut the friction down to a minimum..
But with that all aside we started to glue this puppy up yesterday afternoon.
Not a complicated process, just slow given the size of the stock.
Keen eyes will notice that the boards are not flush on the ends of the small glue up.
When I was laying everything out I noticed a check on one of the ends.
The stock is long so when we trim the ends the flaw should go away.

table top glue up.jpg

This will take me a few more nights.
To be on the safe side and to make sure the joints are nice and flush I am going to do the glue up in a bunch of sections.
We need 11 pieces to net out the 42" wide top.
Lots of dominos to aid in alinement. (no glue on the dominos)
Two per night now, so we should be done on Saturday.

We are getting closer to the end now....
Hope everyone is getting a little shop time.

.
 
A Big Top

Took a little time but we have this beast of a top all glued up...
Being 42" wide my clamp inventory was way short to do the last section.
I had a couple of choises. Buy 6 more 50" Bessey K bodies @ $55.00 a piece or pick up six of of the clamp extenders at $15.00 a piece.
I've got lots of 24" K bodies so the extenders won hands down....

glue up 1.jpg

Doing the glue up in sections gave me a real flat result that won't take a lot of time to get to a finished state.

glue up 2.jpg

This was one of the biggest and for sure the heaviest glue up I have done.
Lots of dominos to help with the alinement.
The boss had to help flipping it over to scrape the glue of each section after a couple of hours.
This last section was the limit we could do...

glue up 3.jpg

Tomorrow I will start the sanding process and trim the ends.

Then try to figure out how to get this thing into my finishing room....


.
 
hey gary,, sections are good huh:) but i have to ask why is that one clamp look so tweaked the second to the right from your straight edge.. looks like its bent or something.. and i wish i had a domino,, but that wont happen for many moons:)
 
Top