- Messages
- 7,986
- Location
- falcon heights, minnesota
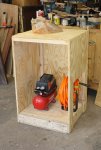
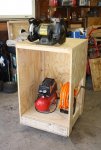
it may not be the prettiest, but it gets the job done.  i felt the need to do something a little cheerier than the last project, and this idea had been kicking around in the ol brain pan. i had some leftover plywood, and a 2x2 platform that i had made, but not used. i needed some place to put the compressor, and as they say, necessity is a mother. the platform is big enough for the compressor and the line reel that i got from my dad, who got it from my brother. i figure all i need now are a couple of connecting ends, and a short line to run from the compressor to the reel, and i'll be in business. no more tangled up line. there will be a shelf or a quick and dirty drawer in the space below the top, and just above the compressor. haven't decided which yet. originally, i was going to put just the grinder there, but found that there will be enough room for both the grinder and the belt/disk sander. i have some casters from the original benches that will work out ok, as they will not need to support the weight that the other benches handle. like i said, not the prettiest, but it gets the job done. i'll have another pic once it is completed. this was done in about an hour or two. sorry about the pic quality, i took it with the not too smart phone.
i felt the need to do something a little cheerier than the last project, and this idea had been kicking around in the ol brain pan. i had some leftover plywood, and a 2x2 platform that i had made, but not used. i needed some place to put the compressor, and as they say, necessity is a mother. the platform is big enough for the compressor and the line reel that i got from my dad, who got it from my brother. i figure all i need now are a couple of connecting ends, and a short line to run from the compressor to the reel, and i'll be in business. no more tangled up line. there will be a shelf or a quick and dirty drawer in the space below the top, and just above the compressor. haven't decided which yet. originally, i was going to put just the grinder there, but found that there will be enough room for both the grinder and the belt/disk sander. i have some casters from the original benches that will work out ok, as they will not need to support the weight that the other benches handle. like i said, not the prettiest, but it gets the job done. i'll have another pic once it is completed. this was done in about an hour or two. sorry about the pic quality, i took it with the not too smart phone.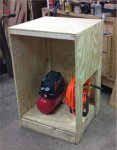
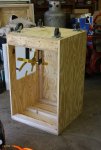
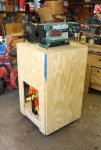
 , we stopped off at the borg for lag screws, and a few other things. then she said she wanted to visit with her friend again (who am i to say no on that one), so last night was shot. while she was in school today, i went over to pop's and worked on it until i had to pick her up from school. i got the reel attached, then turned it upside down (not easy, this thing is getting heavier by the minute) attached the casters. after putting it up on it's new feet, i tossed in the compressor, and attached the grinder, shortly followed up by the sander. then things got really sidetracked.
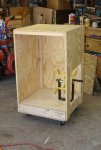
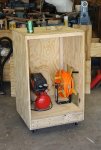
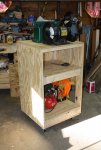
  one of my dad's friends stopped by to ask him about fixing a rusty spot on his truck, and it wound up with us going over ideas for the headboard he wanted to make (first idea will be posted soon). then it was time to pick up herself from school. then after lunch, it was back to pop's house. then i popped in a rather quick and dirty shelf, which worked out ok. then i turned (no pun intended) to the big spinny thing, and organized all of the stuff that accumulated (bottles of pen finish, denatured alcohol, and such for sanding and finishing spinny stuff) onto the new shelf area, and the big spinny thing is free and clear to do spinny stuff, and i have better pics as i took the camera with me this time. it's one of those i don't take calls on the camera, and i don't take pictures with the phone.