Kitchen Hutch - Build Thread - Done

i think you have told me glenn but when you use the mortis pal you go with 3 passes to get to the final depth with a up cut spirl at 5/16's wide correct?

I do use an up-cut bit. The folks at Whiteside make some extra long up-cut spirals which used to be just for the Mortise Pal and ordered through RG Jig Co. It seems I see them as part of the usual catalog now. I use a couple methods and combine them for deeper mortises. These are 1-1/4" deep but, only 1/4" wide so, I do the first 1/2" or so by plunging at one end and moving across 2 or 3 times to get to 1/2". I do the rest by "drilling" side by side, overlapping holes using the plunge feature on the router. I then move from one side to the other to clean out the waste.

As with most power mortising operations the problem is spoil. I have a small vacuum hose hanging near the bench that works off of a foot pedal. I do a few passes and then move the router aside and hit the opening with the vac to clear the spoil. This gets repeated every so often as required.

For larger mortises I do it about the same as I would be using a 1/2" bit which can really hog out some material. For smaller mortises like face frames or picture frames, I drill the overlapping holes full depth and then make one pass to clean out.
 
Last edited:
Glenn just for this rookie can you clear up something on your panels for me. I read you making them to fit but how tight in the frame from side to side and top to bottom. I have yet to make a panel so i thought we were to leave space and have it float and use those spaceball things to allow for wood movement.

I dont see how you have taken this into account? Also are you finishing the panel center part before you put it in the rail and stile cause if not what about movement?
 
I have hundreds of space balls :). If I am trusting to the raised panel profile I will leave about 1/16" all the way around and let the raised profile wedge into the frame groove. The panels on this piece are thin and fit in the slots snugly but are not wedged by any raised profile (a lot like a plywood panel in a frame) so, I leave a fat 1/8" all the way around the panel and use space balls. I have laid out lines of silicone rubber and cut up my own spacers but, if you watch for a sale, space balls are cheaper, more consistent and are always ready so, I quit bothering with the shop made versions.

This is probably a problem with my choice of words. When I say I am "fitting" things (joinery, panels, drawers, etc.), I mean I am doing the final sizing, fussing, futzing :D. This does not necessarily mean a tight fit. Sorry for the confusion. The grooves for the panels are a generous 3/8" deep. The space balls compress to a skinny 3/16". This leaves the panels centered with a decent amount of retaining frame and the space balls handle the movement.

I will apply finish to the floating panels before glue up. I do this with any parts that allow for movement; large bridle joints, pockets for ebony splines that dress up gaps between parts with perpendicular grain direction like bread board ends and table tops. Anything that may move and allow a peek at an area that would not get covered if not pre-finished. I also pre-finish any areas that will be a pain during the overall finishing process; tight, detailed inside corners, cubbies, rabbets that accept backing panels and so forth.
 
Last edited:
Thank you Mon Ami. Phew you had me worried everything you guys have taught me I had misunderstood. Now i am relieved. Yeah i had learnt correct. I hear ya on the space balls. I would do the same when time comes. Sorry i misunderstood or misinterpreted your post and got concerned i had the bull by the udders. Ok now get on with it i cannot wait to see those panels pop. This Peacan is shaping up to be a nice change around here from the chocolate. :)
 
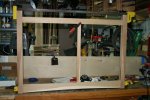
This should make everyone else feel good about their progress no matter what they are working on. I am in those spots where you seem to work a lot but see little return that shows in pics. Here's the front frame. The asymetrical vertical stile is just a piece of scrap held up for example. The false drawer boxes will be different widths for visual interest.

Kit-Hut(41).jpg

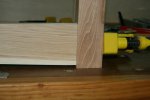
Here's a shot showing the arched lower stretcher and its relation to mother earth as was discussed here and in Larry's dresser thread.

Kit-Hut(42).jpg

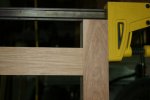
The lower portions "top" will set on top of the legs as you see the clamp bar doing now. The gap between the upper stretcher and the top will be filled with a full-width pullout similar to a built-in kitchen's cutting board. This is to provide a work area or temporary space while preparing things in the kitchen. I know that sounds vague but, it should all tie together in a month or so . . . .

Kit-Hut(43).jpg
 
Last edited:
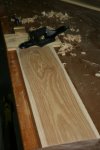
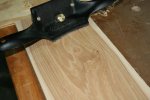
I would say the jury is definitely in with a big :thumb: on this Lee Valley Scraper I received. This piece is just a blank for an upper panel but, it matches the other blanks that are to be used in that area. I managed to put a ding in it about 1/32" deep through my own clumsiness. Fortunately being in the "blank" stage it and it's cousins are still oversized. I took after it with the LV scraper and ended up with a very usable piece of material :). Much more fun than making another set of 4 matched blanks. A few swipes with a smoother and this will be finish-ready.

Kit-Hut-(44).jpg . Kit-Hut-(45).jpg

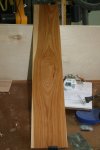
I also ran my surface-prep protocol on a reject and applied my finish of choice. If I was unhappy with the look I wanted plenty of time to percolate on what I might do differently before I go anywhere near having to make that decision . . . yes, I am a pathetic planner-type personality :eek:. I am happy with the result and will use this method. It is the same finish that I have used on many other pieces and I have gotten used to what to expect. I just wanted to be sure about this batch of pecan. This is a 1:1:1 modified phenolic resin, BLO, mineral spirits blend that I mix up as needed. The lack of dyes or pigments lets the natural look and feel of the material show through.

Kit-Hut-(46).jpg
 
Last edited:
Pretty sweet looking reject :thumb:

I've never used pecan before. It doesn't fit the style of furniture I build but it sure is pretty wood.
I wish that I was half as meticulous as you are Glenn.
 
What did you do beat it with a sledge hammer?:rofl::rofl: You sure you got pecan Glenn? When I was doing my kitchen cabinets I never had a problem with dings as the wood is so hard. As a matter of fact I dropped the drawer front for the sink cabinet from my bench and it hit the floor with the corner of the front. On any other type of wood I would have been making a new one but with the pecan all I did was brush it off and installed it.
 
What did you do beat it with a sledge hammer?:rofl::rofl: You sure you got pecan Glenn? When I was doing my kitchen cabinets I never had a problem with dings as the wood is so hard. As a matter of fact I dropped the drawer front for the sink cabinet from my bench and it hit the floor with the corner of the front. On any other type of wood I would have been making a new one but with the pecan all I did was brush it off and installed it.

Amen to that Alan. This stuff is tough. I was doing something else and snagged the corner of this piece as I went by. I launched it and it hit, on the show side of course, against a sharp corner of a machine stand leg. You are right that with something like walnut, that would have made it firewood. I'm thinking pecan might make a good choice for kids furniture for someone who wanted a step up from the usual BB Ply offerings for such things(?).

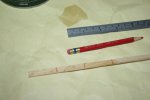
I forgot to include a picture of my sophisticated finish measuring/mixing system. Mark three lines equally spaced on a stick. Drop the stick into the container you are going to use. Pour in each ingredient till it hits a mark giving you a 1:1:1 blend. Once you have all the ingredients in you can use the stick to stir it with. See? Its a measuring/mixing system :D.
 

Attachments

  • Kit-Hut-(47).jpg
    Kit-Hut-(47).jpg
    59 KB · Views: 44
Last edited:
I usually just sit back in these builds and just absorb, but your 'measuring/mixing system' makes me throw out a kudos..so simple yet effective{said while doing my 'coulda had a V8' move} :thumb:

Thanks Ken. For more complex mixtures, you just use more marks. For example 7 marks at 1/2" intervals could let me mix 4 parts varnish, 1 part dye and 2 parts thinner. Just use intervals that fit your see-through container. The diameter doesn't matter as long as it is fairly consistent like an old peaches, mason or spaghetti sauce jar. I keep a record of the finishes I use for a given piece. This method makes it very easy to duplicate a finish in pretty much any amount. Very handy when you mix too little to start with but, only need a few ounces more to complete your effort.
 
I had received a question about the mill marks on the left hand vertical and the floating panel in this picture; as to whether they were the result of a helical cutter. These are mill marks on the material as it comes from the lumber yard. These pieces happened to have a side flat enough (that would also end up inside the cabinet and covered by other internal structure) that I just used it as a reference surface for my milling. I have developed a method of work where I accept a less than perfect surface on parts that do not effect construction and cannot be seen :whistling:. Laziness? I prefer to think or it as effective use of shop time :cool:.

I do have a Grizzly 15" planer with a spiral insert head. I get similar marks that are much smaller and closer together. These are from the serrated outfeed roller and not caused by the type of cutterhead. I have the head tension backed off to where I only get them on softer woods like mahogany. The marks imposed by my planer will disappear with a swipe of two from a sanding block or a card scraper but, I would really rather not have them at all. I wish someone made an inexpensive after-market rubber roller for this planer format. For the type of work I do a rubber roller would be adequate. For the type of work the planer is designed for, the rubber would probably get destroyed :).
 
ok when you say phenolic resin,, can you give use a example glenn? i am headed this way my self on some pieces..and its not laziness glen its just doing it the way they used to in the furniture shops.. i have even seen saw mill marks left inside out of the sight of consumers.
 
ok when you say phenolic resin,, can you give use a example glenn? i am headed this way my self on some pieces..and its not laziness glen its just doing it the way they used to in the furniture shops.. i have even seen saw mill marks left inside out of the sight of consumers.

ok glenn, what do you use as the phenolic resin???
 
Top