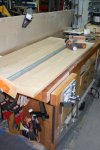
Kitchen Hutch - Build Thread - Done

I have got to ask but why even bother running a plane along the edges before you glue up the panels when the jointer will do just as nice of a job?

Excellent question. And there's actually an answer :). The material I was able to get will not tolerate being milled completely square AND leave me the thickness I want. That's right, the boards in the top and the pullout are not perfectly square but, they are very close. This presents a challenge in that I cannot use a machine like the jointer that provides a perfect 90* edge to a perfectly true reference face riding against the fence. This is the same problem that I roll my eyes at when people say the jointer fence doesn't have to be true(???); a deviated path results in a deviated edge.

At any rate, the un-true faces cause the edge to machine-joint "almost" square. This means if I put them in the clamps and crush the edges tightly together as they come of the jointer, the faces will be forced even more out of true once the pressure is released because the edges are not uniformly out of true :(. At any rate (and this is a "cheat") by clamping the pieces to be joined face to face or back to back and jointing the two edges to a common plane by hand, the boards can now be set in their "almost" flat resting position and the edges come together tightly without force.

The 5/4 I usually get is generous enough to mill to 3/4" without issue. If I find material I really like but it is a bit thin, I will just move up to 6/4 and lose the problem in spoil during milling. In this case, I could get neither and so many boards in this piece are under 3/4" or, where I really need the thickness, "cheated" as described. Following glue-up the faces of the boards are no worse off than before glue up :). Once I hit them with a cabinet scraper they are acceptably flat, even for me ;).
 
Last edited:
So by not perfectly square do you mean they still had a twist in them? I can't remember the last time I checked my jointer fence for square. I always run one board face towards the fence and the next board with the face away from the fence. That way if the fence is at 89 degrees thats what it cuts on one board and the other is cut at 91.

I can't believe your having a hard time getting 3/4" stock out of 5/4 material. I did my kitchen out of 4/4 and had no problem getting getting 7/8" thick material over 5' long straight and flat. All my doors and the raised panels finished at 13/16" thick.

Correct. The boards do not have a reliable face to use as a reference. I'd keep doing what your doing Alan because you turn out some beautiful stuff. The so-called 5/4 material started at a skinny 13/16" so, not much room for correction over 48". I felt better getting the panel glued up and then flattening by hand ;-)

They were still a little more uneven than I was happy with after the scraper but, a BU smoother brought them in line quick enough ;).

Kit-Hut-(70).jpg
 
Last edited:
you need to change lumber yards.
5/4 material should be 1 and a 1/4 rough. 13/16? My 4/4 lumber rough is thicker than that.
I now purchase alot of my cherry 4/4 preplaned, and its around 7/8th, so glue up for panels leaves me just enough room to run through sander to smooth out to size.
 
you need to change lumber yards.
5/4 material should be 1 and a 1/4 rough. 13/16? My 4/4 lumber rough is thicker than that.
I now purchase alot of my cherry 4/4 preplaned, and its around 7/8th, so glue up for panels leaves me just enough room to run through sander to smooth out to size.

Sorry for the confusion, my fault. The pecan was 4/4 (yes I did say 5/4 in the previous post, doh!) and came in at a skinny 13/16" This is indeed unusual for the yard I prefer where most materials are S2S so, 5/4 is about 1-1/8". Walnut, cherry, maple, etc. all run to the sizes we would expect. I just had the urge to make this unit out of pecan and it was skinny :).

They were in fact without any pecan for about a month and I thought I had gotten myself in hot water as I had fallen short on my board foot estimates. There can be a fair amount of waste in pecan when you want a certain appearance and I am stubborn about the look I want :eek:. They got another batch in but, it was a mixed blessing; there was a ton to choose from so getting good looking material was a cinch but, it was all a skinny 4/4. I would love more selection as to sources for lumber around here but, the other yards (with one exception that doesn't carry pecan) that are within reach are in LA and Orange County. This adds at least an hour to the trip in the best of traffic plus, being a native I instinctively avoid getting near LA and Orange County unless it is absolutely necessary. I vote for a quality sawyer and yard right down the street. Who's with me :thumb:.
 
Last edited:
just saw your own glenn then you can see each bord and pick from the best of the lot but one draw back,, if you wait to long you forget where it is at:) and sorting threw more than one pile is tuff:)
 
Thank you Mon Ami. Phew you had me worried everything you guys have taught me I had misunderstood. Now i am relieved. Yeah i had learnt correct. I hear ya on the space balls. I would do the same when time comes. Sorry i misunderstood or misinterpreted your post and got concerned i had the bull by the udders. Ok now get on with it i cannot wait to see those panels pop. This Peacan is shaping up to be a nice change around here from the chocolate. :)

"i had the bull by the udders." Boy you were really mixed up!!!!
 
ok, didnt mean to sound rude.

I deal with what I believe is the largest yard in NYC limits. There are no more yards on LI that sell rough lumber.(the yards near me charge double for finished lumber, prices are insane, but they are really not for someone who is building something out of cherry, its more for a contractor who needs one or two pieces to complete something and doesnt have a jointer or planer to prepare it)
I try not to make the trip since I have to go over a bridge, pay a 6 dollar toll, and get involved with bronx traffic near the busiest bridge on the planet.

I understand you not wanting to have to sit in so much traffic and waste so much time for lumber.

having said all that, the pieces is coming along I see and I already know its going to be a showroom piece when done.
 
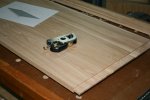
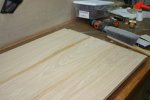
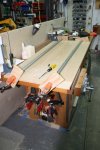
I have been getting a little time here and there on this. Things have ramped up at work and I am pretty beat when I get home . . . or maybe I'm just old :p. Even though I have planed and scraped the top I still wipe the seams with mineral spirits before I move past the stage where problems are easily fixed. If I have glue problems I want to know now and not when the finish hits the wood.

Kit-Hut-(71).jpg

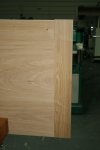
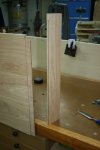
The top and the pullout will have breadboard ends. This is the look I am after on the top. The breadboards extend past the front about 1/8". I will use a stopped dado and a stopped tenon on these.

Kit-Hut-(72).jpg . Kit-Hut-(73).jpg

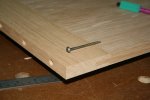
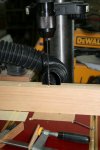
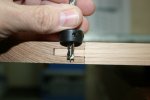
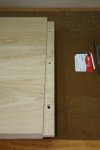
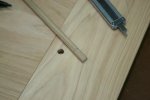
I will use dowels to secure the breadboards and allow for movement. I use a depth stop on a bradpoint bit to make the holes just shy of the top surface. I temporarily clamp the breadboards in position to drill the holes from the bottom side. Once the holes are in, I elongate the middle and rear holes. This is a variation on fastening hard at the center and allowing each end to move. Here I want the alignment of the front edge to stay so I will allow the movement to be towards the rear.

Kit-Hut-(74).jpg . Kit-Hut-(75).jpg . Kit-Hut-(76).jpg

to be continued . . . .
 
Last edited:
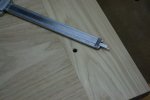
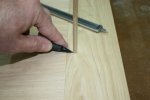
A caliper makes it easy to measure depth to size the dowels but, its easier to stick the dowel in the hole, hold a pencil against it and give it a spin.

Kit-Hut-(77).jpg . Kit-Hut-(78).jpg . Kit-Hut-(79).jpg

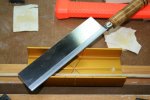
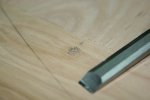
I use one of those $20 mini miter boxes to cut small items like this. Three strokes with the saw and you'r done. I glue the front 4 inches of the tenon and glue the front dowel. The other dowels are held in with a little drop of glue at the end of the hole but, not enough to squeeze out and prevent free movement in the elongated holes. I clamp it up just snug enough to hold things still while the glue dries and then pare the dowels off with a chisel. The dowels will not be visible so I just used a commercial white oak dowel that I had in the rack.

Kit-Hut-(80).jpg . Kit-Hut-(81).jpg . Kit-Hut-(82).jpg

That's it for right now.
 
Last edited:
ok. this is gonna sound silly, but how do you cut anything with that mitre box without dulling saw.. its aluminum right and to cut threw your gonna cut the box???
 
There's a groove under each position that is about 1/8" deep. I guess you are just supposed to stop when your cutoff comes free and I usually manage it. If you go on through you do hit the aluminum but, it doesn't seem to do any damage to the saw teeth. You can see in the pic where I got off track in the 90* position when I first got the little guy but generally, it works fine. It came with the saw, otherwise I would just use a bench horse made out of scrap :dunno:. I have since seen the saw alone for about $12. Nothing fancy but, I just use it for little things like this.
 
well i feel better now glenn, i was cutting some ash the other day with a japanez style gent saw and lost two teeth on it in different spots... and that was just cutting wood..
 
Finally getting back to this guy. I can't complain as I got a few things done that will help cover some of the things I recently picked up.

The hutch will have a wide pullout for temporary use like . . . somewhere to set bags of groceries when hauling them in from the car or . . . setting out dishware enroute to the table. Most of the time it will be hidden inside the lower carcass. It is breadboard construction but, the demand on the breadboards will be more than on a typical table top as the glides will attach to them. This means I will use mechanical fasteners and more of them than I might normally.

I'll do the slots for the tenons on the tablesaw this time although there are plenty of ways to accomplish this. I use a piece of scrap from the breadboards to finesse the fit. I find my tenons are not as perfect as they might be but, a bullnose plane takes care of that pretty quick.
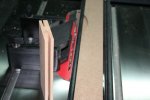
Kit-Hut-(84).jpg . Kit-Hut-(85).jpg


Once again stop blocks assure accuracy and speed things up. I know I repeat things about my methods of work but, when I read/see other folk's methods it often gives me ideas. I hope to be able to supply the same help to someone else. The holes are planned so as not to interfere with the glide screw positions. The breadboard screws will recess capturing an inch of solid material between the screw's washerhead and the tenon. A long drill bit takes care of the through holes.
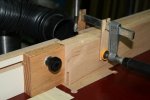
Kit-Hut-(86).jpg . Kit-Hut-(87).jpg . Kit-Hut-(88).jpg

To allow for wood movement but still retain the strength required to support the 40-odd inch wide pullout I use a method I picked up from a Gary Rogowski article. You make the through hole fan shaped so that the screwhead stays put but the shaft is allowed a bit of flex as the seasons change. I used this method on some bedside tables that I built years ago. I saw them just the other day and they are doing fine. I snagged a diagram from his article which gives you the idea.
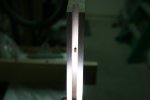
Kit-Hut-(89).jpgKit-Hut-(90).jpg

The front hole is not "fanned" and the front 3" - 4" of the M&T gets glue. The plan is that the front edges of the panel and the breadboard stay even with each other allowing for expansion toward the rear where it is not seen.
Kit-Hut-(91).jpg

Even with the screws, I'll add a clamp for the glue area to assure a good bond.
 
Last edited:
Top