
Jim C Bradley
Member
- Messages
- 4,945
Here I Are Again,
This is a green wood greenie question:
Look at pics then proceed---I have reduced the diameter about 3/32 and I still have these imperfections. How deep do they usually go? I assume they are there from the original rough turning (to make the piece cylindrical).
My plans are:
Easily changed
To make the walls basically vertical (cylindrical). The top will NOT be a nice uniform circle (like a halo). It will undulate (like the wall of China) as the limits of the wood dictates.
No bark will remain
To make a 5 ilnch foot 1/4 to 5/16 high
To make the inside of the bowl a cylindrical cavity with slight cove between horiz. and vert.
To, at least look at it, with 1 inch thick walls and almost flat top.
I am absolutely sure that more questions will appear. So in the meantime you can quiver in fear of what I will ask in the next, "Here I Are Again."
Enjoy,
JimB
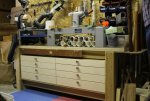
Attachments


Last edited:
")


.jpg")