Our Garden re-Birth Project

Very nice work Frank - you should be pleased with the results. I hate to add to your list but you are gonna do something about the green plastic chairs aren't you - please - for me!:)
 
Way cool Frank.

Now my english vocabulary has been increased, thanks for the info.

The pergola I'm thinking about making will measure 5x5mts (16x16 feet) aproximately.

I'll come back with some questions if I may.
Yep Toni, 5 metres by 5 metres makes it a pergola and not an arbour. You certainly may ask questions -I only hope that I have the answers.
 
Very nice work Frank - you should be pleased with the results. I hate to add to your list but you are gonna do something about the green plastic chairs aren't you - please - for me!:)
Thanks Ian, it's nice to hear from you.

Don't worry, the green chairs will be relegated to backup duty. I will either make some chairs over the winter or we will purchase some next spring.
 
Spring 2009 Update

In May, I managed to steal enough time away from working on the book about my hometown, to build a walled rose garden in the front.

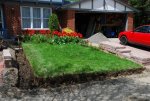
Here I have started work on the wall: Trench dug for wall on east side of front garden -small.JPG

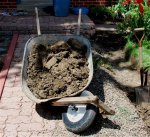
Part way through the job, my cheap wheelbarrow (which I have repaired several times) collapsed: My old whellbarrow collapsed on the job.JPG This is how I moved the last three loads of dirt -small.JPG

I took the last few loads with the wheelbarrow supported on my dolly, but I am not going to do that anymore. It’s time for a new wheelbarrow.

Here is the new wheelbarrow in use to place limestone in the tench: Preparing the limestone base for the wall.JPG

Here I am pouring a concrete pad for the sundail which is to go in the middle of the garden: Mixing concrete for the sun dial footing -small.JPG

You can see that the old wheelbarrow now has a new role in life as a cement bucket. ;)

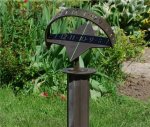
Also, it is amazing how well the sundial works: The Sun dial in use -small.JPG

The garden looks really good with the sundial in the middle. In this photo, I have removed the tulips and am starting to plant roses, but I have not quite finished the wall: The sun dial is in and some roses have been planted -view from in front -small.JPG

I should mention how good the other walled front garden that I built a cpouple of years ago looks and how little maintenance it now requires: The rock garden is blooming nicely -small.JPG

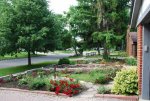
Here is a view of both front gardens (with the wall completed): View of both front gardens from across the street -small.JPG

And here is a picture taken in late June with many of the roses in blume: Rose garden in late June -2 -small.JPG
 
Last edited:
Very nice, Frank. :clap: The gardens really dress up the front of your house. Next year the roses should be even nicer as they mature a bit.

How late do roses bloom in your part of the world? As long as I deadhead them weekly or so, mine will bloom pretty much year-round. I force mine to sleep a bit, though. About the end of January, I'll prune them back again to several bare 18" to 24" tall canes per plant. After about 6 weeks of rest and recuperation, the blooms will be back, and by midsummer the plants will all be 4' to 10' tall again, depending on the variety.
 
Thanks, Vaughn and Bob.

Vaughn, the roses that I planted are ever-blooming carpet roses that only grown to a height of about 2.5 feet. Roses generally bloom here from late May to mid November. Having said that, we are having a mild autumn, and there are a few buds right now on some of the rose bushes.
 
How late do roses bloom in your part of the world?
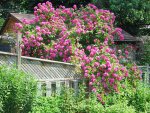
Pretty much til first freeze, depending on the variety. Some will only bloom for a month or so. These pics are of a John Cabot Explorer rose (maybe should have been called Exploder). Very hardy, early buds will survive freezing rain, blooms through June.

Arbour03_06d.jpgArbour03_06b.jpg

And this shot was used for the local Garden Society's Y2K yearbook cover (lots of Photoshop work removing telephone and cable wires).

ArbourLateJune.jpg
 
Autumn 2009 Update

(post 1 of 5)

From mid October until early November, I built the long promised arbour at the garage side of our house. I built according to this plan: Arbour 00 -Arbour plan cover -small.jpg which I purchased from Lee Valley. I'm sorry to have to say that the instructions with the plan are not very good. :( However, the drawings are OK, and (with some improvisation) I was able to figure out how to build the arbour.
Since, this is actually a woodworking project, I will cover it in more detail than I have done for most of the other work described in this thread.

The arbour was made out of Eastern White Cedar from the Ottawa region, mostly rough sawn.

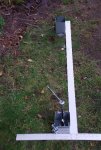
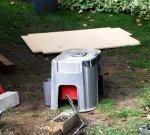
I cut a template of the arbour’s interior footprint out of cheap plywood . Here it is in location. One corner of the arbour will be on our neighbours property but that’s Ok with them and with us. We already have a somewhat shared garden between our two houses. Arbour 04 -Abondoning the old site and pouning the support stakes further into the ground -cropp.JPG

I pounded four metal post supports with adjustable tops at the four corners of the template, squared them and adjusted the bolts: Arbour 05 -Squaring the rotating stake support tops at the new site -small.JPG

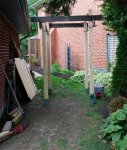
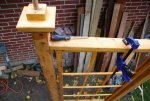
Next, the four 3.5 inch by 3.5 inch corner posts are temporarily in position with boards clamped to the top approximately in the position of the real top cross pieces: Arbour 08 -Temporary set up to see if folks like it -small.JPG

The wood for the trellis screens at the sides is supposed to be knot free, but I could not easily locate a source of knot free cedar. I did have a 2x6 dressed clear white pine board on hand, so I used it. Arbour 09 -Cutting 1x1 lattice pieces out of a piece of clear pine -small.JPG

Next, I rounded over the edges of the posts with a 1/4 inch roundover bit on a hand-held router: Arbour 10 -Rounding over the edges of the posts -small.JPG

Every piece is being sanded with 80 grit paper and, in cases where I am not rounding over the corners, I am sanding the knife edges.

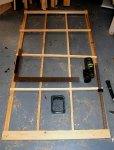
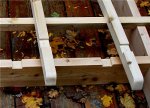
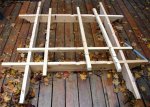
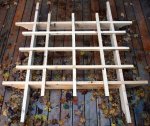
Here, one of the two side screens is being assembled on the floor: Arbour 13 -Assembling a screen section on the floor -small.JPG
 
Last edited:
Autumn 2009 Update

(post 2 of 5)

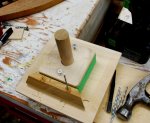
The instructions and diagrams showed that somehow pieces of 3/4 inch dowel were involved with the post caps, but I could not determine exactly how the dowels were to be used. So, I came up with something that would work and utilized 1 inch dowel rather than 3/4 inch. I decided to drill a hole for the dowel into the top of the post then right through the cap and into the beam above it.

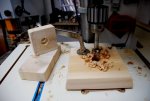
Here, 1 inch holes are being drilled through the centres of the parts that will be used to make the caps: Arbour 21 -Drilling hole for dowel in the cap pieces -small.JPG

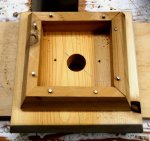
Using a small piece of 4/4 wrapped with a few layers of masking tape in order to simulate a post with a loose fitting cap, I hammered trim into the bottom of the caps: Arbour 22 -Hammering the cap trim that will surround the post into place -it is to beslightly lo.JPG Arbour 23 -A Cap from the bottom -small.JPG

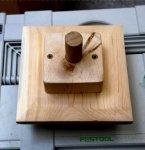
Next, I screwed the cap tops into position: Arbour 24 -A Cap from the top -small.JPG

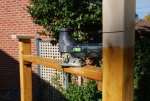
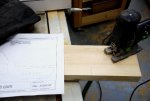
The next task was to cut all the posts to a uniform level. The instructions suggested that I might want to use a circular saw to to do this job. I don't want to use a circular saw when standing on a ladder, so that was out. The alternative offered in the instructions was a hand saw and that would have worked. But, I guess that whoever wrote the instructions had never heard of either a Festool or Bosch jig saw with long, wide, strong, and guided blades. I first scored each post on all 4 sides then cut all the way through. The results were very good! Arbour 27 -Cutting the tops off the posts with a jig saw -small.JPG

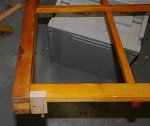
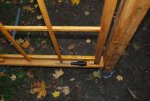
Next, the screens were attached. I want them to be easily removable. The instructions claim that they are, but I could not figure out how they managed this in spite of looking very closely at all the drawing and the pictures. So, I screwed 2 small blocks to the bottom spline, then I attached the bottom of the screen to the bottom cross rail with screws through the two blocks. Two more screws, through the top cross rail into the top spline, completed the job.
Arbour 28 -Attaching the screens -1 -small.JPG Arbour 29 -Attaching the screens -2 -small.JPG

Using a partly completed cap as a guide template, 5 centimetre deep 1 inch diameter holes were drilled into the tops of all the posts. Then, the completed caps were placed on top of all the posts with the dowel extending up above the cap about 5 centimetres. Arbour 30 -Using partly completed cap as a guide for drilling a hole in the top of the posts -sm.JPG Arbour 31 -Attaching the screens -3 -small.JPG
 
Last edited:
Autumn 2009 Update

(post 3 of 5)

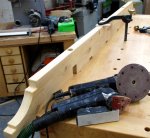
Four beams, four braces, and six rafter pieces were cut with a jig sawafter transferring the full size fancy end patterns to the wood using tracing paper:
Arbour 32 -Cutting beams, rafters, and brace having first used tracing paperr to transfer the ap.JPG

I made a small drilling jig then used it to drill holes to accept the dowels into the bottoms of two of the beams: Arbour 33 -Drilling holes for dwels in the bottom of a beam -small.JPG

Six centimetre deep 42 millimetre wide notches were cut into the top of these two beams just above the position of the posts. I had previously milled all the lumber to be used for the beams, rafters, and braces to 40 millimetres so this left 2 millimetres of play with each notch. Here two beams are in place on the posts and the other two beams are being checked for position in the notches. Arbour 34 -Marking location of notches to be cut into a cross beam -small.JPG

After cutting all the beam and rafter pieces to length and shape and assuring myself that the notched beams fit properly on the posts, I moved the operation to the deck outside the woodworking shed. The plans called for the rafters to sit on top of the beams and to intersect with each other with notches on the top of one set and on the bottom of another set. I decided to do something slightly different, that is, to cut small (1 centimetre deep) notches in the top of the beams and in the bottom of the rafters: Arbour 36 -Letters written in bottom of notches -small.JPG

I think this looks a little better and it makes for easier positioning of the finished rafters on the beams on their final position on the posts. And, it will take fewer screws to hold the rafters in place. Notice that I lettered the notches just in case the pieces turned out not to be fully symmetrical (it turns out that they were symmetrical, but it is better to be safe).

Here is the bigger picture that the above close-up was extracted from: Arbour 35 -Laying out beams and rafters on my deck -small.JPG

And here is a photo of all the rafters in position o the beams and intersecting with each other: Arbour 37 -Final layout before routing and sanding beams -small.JPG

Now that I knew everything had been cut properly, it was time to route chamfers on the top edges of all the beams and rafters and to sand everything (to 80 grit). Many sanders were put to use: Arbour 38 -Many sanders were used -small.JPG

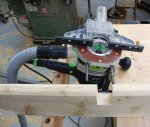
I used the guide that you see attached to the router in order to navigate past the notches. Arbour 39 -A chamfer was routed on the top edge of the beams and rafters -small.JPG

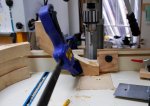
There were no instructions about how to mount the braces. I decided to drill two 3/8 inch holes part way through the wood on both ends of the braces leaving about 4 centimeters of wood in the bottom of each hole. Here the holes are being drilled on my drill press: Arbour 40 -Drill holes into braces -small.JPG

A coat of Sikkins Cetol 1 078 Natural stain was applied to all the beams, rafters and braces then left for about a day to dry. I will apply a second coat to the entire arbour in the spring. Arbour 41 -Beams, rafters, and braces stained -small.JPG
 
Last edited:
Autumn 2009 Update

(post 4 of 5)

No screws at all were used to attach the beams to the posts -the dowels and deep notches did the job and, just in case, the braces to be installed later will secure the beam assembly to the posts Because of the notches in the beams, it was possible to hold all the rafters in place with only 6 screws.
Arbour 42 -6 screws secure all the rafters -small.JPG

The red arrows point to the screws.

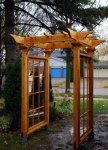
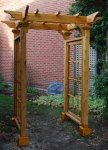
Finally, the four braces were screwed into place. Here is another of photo of what I thought at the time was the finished arbour: Arbour 43 -Finished -really small.JPG
 
Last edited:
Autumn 2009 Update

(post 5 of 5)

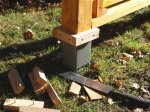
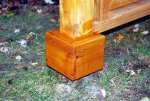
Margaret thought that the post support caps detracted from the overall appearance. Once that was pointed out to me, I did agree. So today, I added something that mostly hides them. First I had to saw off the portion of the shims that projected above the caps. Then 1" x 2" strips were screwed around the post just above the caps: Arbour 46 -Hide the metal supports -1 -small.JPG Arbour 47 -Hide the metal supports -2 -small.JPG

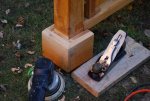
Thin (about 1/2 inch thick) prices of cedar were then screwed into the strips and into each other to, thus boxing the caps on three sides. Then, since again I thought I was finished, stain was applied. Arbour 48 -Hide the metal supports -2 -small.JPG Arbour 49 -Hide the metal supports -4 -small.JPG

But, it was pointed out to me that I should have bevelled the tops of the skirts that surround the metal post caps. :eek: So I did. Arbour 51 -Bevel the skirt around the metal post caps -small.JPG

Also, more than one neighbour asked me why I had only enclosed three sides of each cap, so I added a fourth side to all the skirts. Now, it is finished. Arbour 52 -With skirts around the metal post caps bevelled and enclosed on the 4th side -small.JPG

In the spring I will apply another coat of stain, put in a walkway and plant clematis to climb up the arbour.
 
Last edited:
Top