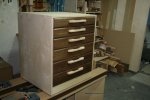
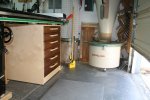
Tablesaw Under Wing Drawer Unit

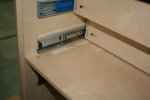
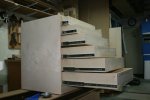
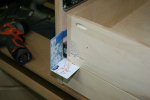
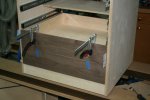
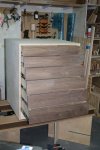
Thanks for the kind words all . . . With a carcass this wide and no face-frame for support, I add a sort of 'stretcher-panel'. This attaches to the sides with pocket holes and runs about 2/3 of the depth of the cabinet. The drawer box heights and spacing are designed with this in mind. The false fronts will disguise this deviation in spacing.

Tomorrow I can start on the false-fronts and pulls. Once I have the drawer positions fine tuned, I'll attach the back and give the outer shell a topcoat. The inside faces of the drawer parts and the drawer bottoms were finished with shellac prior to assembly.
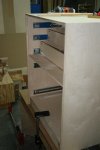
TS drawers (16).jpg . TS drawers (17).jpg . TS drawers (18).jpg . TS drawers (19).jpg

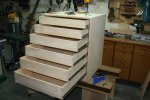
The height was determined by the clearance required for my fence DRO. The width was determined by the room I had available once I had assured that I could easily reach all of the saw controls without banging into things. The depth is enough less than the depth of the saw to allow me to set the cabinet back a few inches so I can stand and work in that area without kicking the cabinet.
 
Last edited:
Just what is needed in my shop. Glenn what did you settle on for net depth of draw. ?
Its something i am wrestling with. I am thinking to make new draws but have them no deeper than a single tool that is going in them is thick with a small clearance. That way i cannot go backwards to double stacking tools indraws. :)

But i would like to hear your thoughts on this. I have noticed you make room for in draw organization so dunno??

Sent from my MB860 using Tapatalk 2

I am a proponent of certain things when it comes to storage. For cabinets and shelves I find that, for me, 18 inches is the maximum realistically usable depth. Even in my fairly organized shop, the one 24" deep cabinet I have holds items in the back recesses that can vanish for months or years. I have re-bought certain items because they crossed the 18" depth limit and vanished into the Twilight Zone only to reappear shortly after their replacements have arrived :D.

When it comes to drawers, I also have dimensions that I consider "too deep", top to bottom or "too deep" front to back. With the use of full extension glides, these dimensions can vary. I had once re-tasked some rack-mounted server glides and made 36" deep drawers. Even though these were shallow, top to bottom (to control overall weight), it seemed to take "forever" to get them all the way open and closed to get to items at the rear. As to deep drawers, top to bottom, these I reserve for a few large items. I go ballistic if I have to remove two layers to get to the item at the bottom. That is a broken use of deep drawers as far as I'm concerned :).

So, to your question (finally), I settled on 22" deep, front to back, by 24" wide drawer boxes in a 24" deep carcass. The usable internal drawer height progresses from just under 3" to just over 5". There will be some dividers or fixtures in some of the six drawers as I envision them holding all manner of tablesaw paraphernalia including blade wrenches, throat plates, feather boards, push blocks, stop blocks/clamps, boxed dado stacks, etc.

Although I have built in a lot of drawer organizers around the shop, I have started stealing the idea from Bart and others to make fixtures that set into the drawers. That way these dividers, racks, little boxes, etc. can be re-organized within a drawer unit or redeployed to other drawers for other purposes as the never ending shop evolution continues.

One of the things I am considering is a short 3 blade rack. This would allow for a rip, combo, general and crosscut blade to be kept near at hand assuming one blade is on the saw at any given time. This fixture will fit against the rear of a 4" deep (top to bottom) drawer that is at least 18" deep, front to back. I already have a wall mounted rack so, the jury is still out of this one.

Right now I am concentrating on drawer fronts and pulls and hope to have this in service by the end of Sunday.

blades in drawer - short.jpg
 
Last edited:
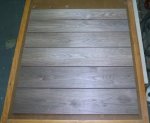
The plywood looked boring to me so I went digging in the scrap bin. I found enough walnut to make some drawer fronts that match reasonably well.

TS drawers (20).jpg . TS drawers (21).jpg

I think spacing doors and drawers was the topic of a recent discussion. Lowe's Gift Cards; the gift that keeps on giving.

TS drawers (25).jpg

There are a lot of ways to attach false fronts. I start at the bottom, space the first one to the frame and work my way up. I use washer head screws and counterbore from the back so the screwheads don't interfere with the interior space.

TS drawers (22).jpg

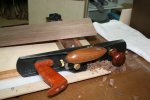
The Shooting board makes fine tuning the fit a matter of a few strokes.

TS drawers (26).jpg

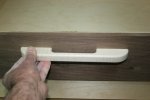
I'll remove the drawer fronts and profile the edges. The pulls will be counterbored and screwed through the drawer-box, false-front and into the pull. Speaking of pulls . . . now I'm thinking about whipping up some shop made . . . maybe maple for contrast?

TS drawers (23).jpg
 
Last edited:
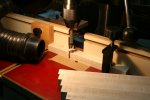
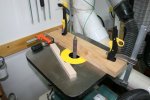
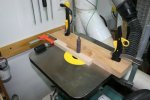
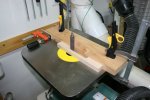
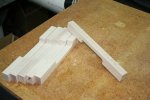
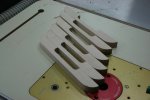
I went rooting around in the scrap pile and found a small piece of maple. Turned out to be enough material to get the six pulls out of so I went at it. You all know I'm big on stops and setup blocks for quickly getting through repeated tasks. This holds true for these pulls at the drill press and at the spindle sander.

TS drawers (27).jpg . TS drawers (28).jpg . TS drawers (29).jpg . TS drawers (30).jpg . TS drawers (31).jpg

I knock the outer corners off and use a 3/16" roundover bit at the router table.

TS drawers (32).jpg

A little touch up where the maple scorched and I end up here.

TS drawers (33).jpg

I slowed the router bit speed down but, still picked up a bit of "toasting" as I rode past the end grain. A scrub with some 180 grit takes care of it.
 
To quote Paul Newman as Butch Cassidy "Well, that oughta do it".

I'll let it sit overnight, hit it with some wax and move it into position. Ya gotta love that scrap bin . . . This was a lot more fun than just another plywood drawer unit :thumb:.

TS drawers (34).jpg

What a shame. LOML over-did it at the gym last night and doesn't feel up to going out for lunch. I told her to not feel too bad about cancelling; I would get over it.
.
.
.
Then I ran back out to the shop and installed the new drawer unit. I have so much open space at that end of the saw now :thumb:

TS drawers (35).jpg
 
Last edited:
Oy Vey here i was with you all the way to the point of the walnut fronts and you are plain evil ;) with those maple handles very clever and real nice...dont know how you see that as "shop furniture " i see a little Gary influence taking root in your shop Glenn. :)

Sent from my MB860 using Tapatalk 2
 
Thanks Rob. The bulk of my shop fixtures are pretty basic. I take the comparison to our Mr. Zimmel's beautiful shop cabinets as quite a compliment. The hardwood drawer fronts and handles were just for fun but, it did get a few pieces out of the scrap bin and put to decent use. I may try this tack again in the future as I'd rather build something out of some of this overflow than just send it to the stove due to lack of room :D.
 
You embarrass me....i thought scrap was offcuts of plywood...not useable walnu:) One mans scrap is anothers treasure :) Good save anyhow. :thumbup:

Sent from my MB860 using Tapatalk 2
 
Glenn, I post #28 I see your dust collector. How often do you have to dump it out? Like in your hutch build, you are using all wood and must be creating a ton of shavings from the planer.
 
That's the short barrel and I dump it about every month and a half during "normal" work. If I am milling down boards for a larger project I will empty it after I finish the bulk of the milling. I don't plane off a lot of thickness. If I have to reduce thickness by 1/8" or more, I re-saw about 1/32" over and then plane the saw marks off. The thin stock becomes veneer or scrollsaw material.

Even so, the cyclone gets the bandsaw, tablesaw and planer (I have a separate DC for the jointer) so a milling session can load 'er up. I am glad I didn't opt for the larger drum. When this one is about 3/4 full of hardwood spoil, it is a pretty good effort to lift it up to empty it onto the waste company's green barrel. Any bigger and I would have to resort to bags.
 
Top