Start Of A Little Reno....

Finally Getting Back to our Reno....

Well after a 8 month break and with Cowboy Action Shooting over for the season I finally am back at our little reno.
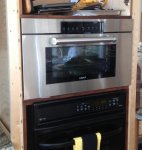
During the summer a couple more of our appliances did come in so we now have a drawer microwave.
This was another last minute change so the island was built to accept it.
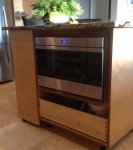
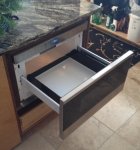
IMG_2114.jpg IMG_2119.jpg

The other appliance to come in was a new generation steam oven.
This puppy makes a sweet meal:thumb::thumb:
And even better it has bumped up my brownie point count big time.:D:D

IMG_2118.jpg

This will match the main oven when it comes in.
Last account from Wolf was the new ovens will be made next April....
I guess good things take a long time.

I have spent the last few weeks building the last wall of carcasses.
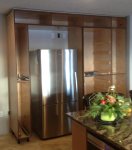
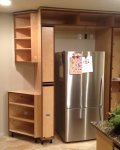
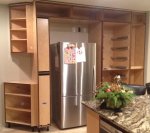
We had yet one more change from the boss. The original plan was to put a 36" fridge in. But my wife decided see wanted a bigger fridge so we went to 42".
Not the end of the world but I did have to move the electrical outlet for the larger unit and change my design once again.
That all said we hauled the everything from the shop and got a peak at how this will come together.
The boss is Real happy....
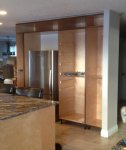
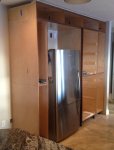
IMG_2113.jpg

IMG_2112.jpg

IMG_2111.jpg

Now with this set done we will make the last carcass to the left side of wall unit.
And get the the slideouts and shelves finished.

Hope everyone is getting a little shop time!

.
 
Last edited:
Happy Day in the Shop!

So after an eternity of making or modifying carcasses my plywood days in the shop have come to a close...
Laundry room 12, Three bathrooms 10, and 36 in our kitchen. 58 in total.:D
The last two for the fridge wall are now done and in the house so I can level everything and get the sub zero installed.
Being this close to xmas that will be early in the new year.

IMG_2133.jpg

IMG_2135.jpg

I am hoping I don't have to work with plywood for a long, long time.
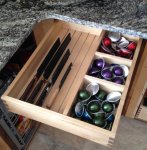
As we are crawling along the boss is making me do some more custom work in the drawers.
The one holds her Japanese knives and coffee pods for the Nespeso machine.

IMG_2127.jpg

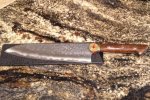
These knives have a Rockwell Hardness of 63-64 and are hand made in Japan. Real sweet tools to use in the kitchen.
This one is a Masakage Zero and was made by Kurosaki San.

IMG_2136.jpg

Hope everyone is getting some shop time.

.
 
Last edited:
You wanna come live at my house for a few months, Gary? We could use some new cabinets; you have lots of experience. :D
 
Your Kitchen reno thread just reminds me why I will stick to dickering in my shop as opposed to taking on a home project for the missus. :)

Excellent job you got going there Gary.
 
I just love what you have done in your house Gary.......still like your shop better though:) (don't tell your misses:p) I sure have been enjoying this thread:thumb:
 
Thanks Tom.
And now all the pretty stuff gets built.
There are a ton of doors, drawer fronts and end panels to make now.
That will start next week.
You got to love a walnut kitchen.....
 
With all my carcasses out of the way I have finished the 8 slideouts that will be the pantry.
Each slide out has close to 4 square feet of storage space so the boss will get 32 square feet in this one cabinet...:thumb:
I will make her a couple of more shelves for the far right cabinet. She is already finding homes for all her kitchen gadgets.

IMG_2149.jpg

To the left of the fridge I made two narrow/tall slide outs that also have adjustable boxes for storage.
With the boss wanting a bigger fridge this was all the width I had to work with...

IMG_2152.jpg IMG_2151.jpg

Being so close to Christmas my shop will be very quiet for the next 12 days.


A Merry Xmas and Happy Holiday season to everyone!


.
 
With the holiday season coming to an end I got some shop time in to start my doors, drawer faces and end panels.
All will be raised panels and I have 86 of them to build for the kitchen..... Holy Crap....
The first batch will be 12.

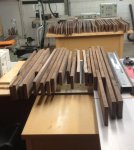
Quick rough cut to have the pieces a more manageable size. I was disappointed on how much of the walnut was garbage to me.
I think I put $300.00 of it into my burn barrel. :(

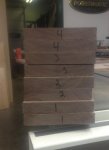
IMG_2155.jpg

A bunch of jointing and planing and I have enough to get me started.

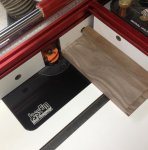
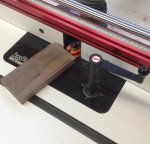
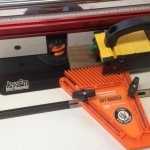
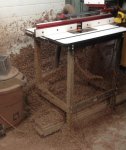
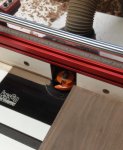
Now I set up my router table with my first bit. Because I don't use these bits that often I put the letter "A" on the one that is used first.
"R" before "S" , rails before stiles. I need all the help I can get so I get the order correct. I put a "U" on the side that will be up every time it goes threw the router and make sure I use a piece of scrap to prevent tearout.

IMG_2163.jpg

With all the rails machined I use my test piece to set the second bit very close and make my final adjustment with a second piece of scrap.

IMG_2168.jpg

IMG_2167.jpg

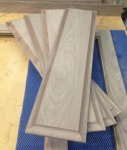
And quick like a bunny I have all the rails and stiles done for my first batch.

IMG_2169.jpg

Next trip into the shop I will start making the 12 raised panels for these.

Hope everyone had a Happy New Year!

.
 
Last edited:
Wow, I missed the previous update, looking good Gary! :thumb: I'm sure she's loving all that storage and ease to get to it. Might be stealing a play from your playbook soon.
Bummer on the walnut, hopefully you can find a good supply somewhere.
 
Way to much sapwwod Bill. Must of been a bunch of small diameter trees....
I knew I was going to get some sapwood but the amount was disappointing. Most of the wood was 3.5 to 4" wide and my rails and stiles are a min. of 2 3/4" so there was not much to play with.
 
Last edited:
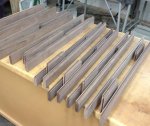
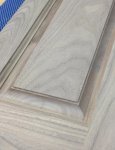
My last few shop sessions I started to make some of my raised panels.
As I have a ton to do and only so much shop space I'll do them in groups.
When I start rough cutting them I mark them so I will get panels made from the same board.

IMG_2202.jpg

As the bit is quite large I slow the router down to 12,000 rpm and take two passes to get my final cut.
I also have to lower the bit just a tad and run all the panels through once again so the panel will fit into the groove on the rails and stiles.

IMG_2204.jpg

In short order we get my first set done.

IMG_2184.jpg

IMG_2185.jpg

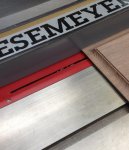
I want to give the panel some depth after the finishing process is done so I make a trip to the table saw and knock the corner off the panel to give me a 1/8" reveal.

IMG_2203.jpg

This will give me the look I am after.

IMG_2186.jpg IMG_2208.jpg

And my finished product.
Now I will final sand my panels and oil them first before doing my glue ups..

Hope everyone is getting some shop time.

.
 
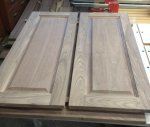
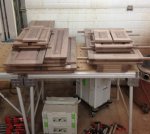
The only thing in my life now is making a ton of doors, side panels and drawer fronts.
Here are the fruits of the last few weeks of the shop time I can get.
The first 20 all made and ready to have the panels pre oiled before glue up...

IMG_2225.jpg

I forgot how dirty the shop becomes doing all the raised panels.

IMG_2226.jpg

Three more and then we will clean the shop up and get ready to finish these and get them installed.
I have to do it in stages as 86 in total is something I can't wrap my head around..

Hope everyone is getting a little shop time.

.
 
Top