Sander Stand with Drawers and Shelves

glenn bradley

Member
Messages
11,543
Location
SoCal
Many have heard me lament machine stands that offer no storage. This tale is one of those with a twist. Not only does the tool come with a stand that only offers a shelf for storage but, I had to get rid of an old faithful rolling, drawered, work table to make the new sander fit in the shop. The contents of that old faithful standby (pun intended) have been in my way for the last several weeks contained in some plastic storage containers.

19-38-stand(4).jpg

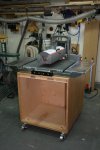
The Supermax 19-38 drum sander is a dream to use but, it takes up a fair sized footprint.
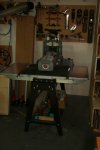
19-38-stand(2).jpg

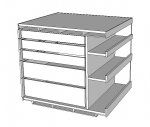
My plan is for something sort of like this. Please excuse the representative shapes for the sander; they suited my needs.
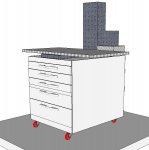
stand conceptual drawing.JPG . stand conceptual drawing-rear.jpg

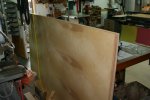
Building this serves two purposes; it gets me a mobile stand with storage AND gets this darn plywood out from behind my bench ;).

19-38-stand(1).jpg

Nothing fancy here. Just standard rabbet and dado panel construction.
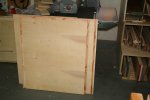
19-38-stand(3).jpg

I will see if I can dig up enough scrap for some fancy drawer fronts again like the tablesaw wing drawer unit. I have the feeling the scraps may be pecan this time around :yes:.
 
Last edited:
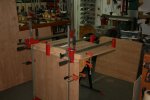
Finished cutting the larger panels and started the carcass assembly. I didn't get too far as I took time to crosscut a couple more cutting boards and get them in the clamps (upper left of pic).

19-38-stand(5).jpg

I'm using curved cauls in each direction of the rabbet joint along the corner/edge for glue-up. Man is it hot out there!
 
You folks that normally work with sheet goods have got to be rolling on the ground laughing when you see how I approach these things :eek:. I've seen your guy's work and you make it look a lot easier, and a lot better, than I do :rolleyes:. I should have taken more progress shots like showing the quasi-torsion box construction for the top. The drawer opening is 25" or so and a nearly 200 pound machine mounts dead center front to back. This meant I wanted some reasonable stiffness across that span. My approach was like so:

19-38-stand(9).jpg

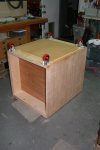
Here's the carcass on the bench:

19-38-stand(6).jpg . 19-38-stand(7).jpg . 19-38-stand(8).jpg

The last pic is a view from the back with the carcass laying on the right side. The holes in the "top" are for the sander mount positions (bolts on from below). The 1/4" skin of the torsion box has 1" access holes cut to allow access for a socket wrench.
 
Last edited:
OK, so I have wheels and it rolls:

19-38-stand(10).jpg . 19-38-stand(11).jpg

Now I just need the trim, some drawers, and the little shelves on the back where the sandpaper rolls will get stored.

19-38-stand(12).jpg

Here's a reality check; even though this thing looks huge, it is still smaller than the actual footprint that the sander takes up :eek:.
 
I lost a couple days being down with a sore throat. Got caught up a bit after work and got the shelves in the rear. The three black dots along the top piece of trim are screws/washers that allow access to the mounting bolts. I was going to glue in the trim since I did build in access holes from below. I just had visions of losing a bolt or a washer in that torsion area between the skins and so chickened out. I was hoping to hit the drawer boxes this Sunday as Saturday I have other domestic duties :rolleyes:.

19-38-stand(13).jpg

I somehow let Mom's birthday sneak up on me . . . again. I'll have to let the drawers for this guy wait whilst I concentrate on a cutting board for mom :eek:.

19-38-stand(14).jpg

I always knew those shaving creme can lids would come in handy for something; beats the heck out of rubber bands :rofl:.
 
Last edited:
OK, so I have wheels and it rolls:

View attachment 78363

Hey you better take those back to the store, Glenn, those pivot wheels look defective to me... ;)

You save your shaving creme lids!? No wonder your shop is so crowded... :scram:

You're right, that is a big footprint. I'm curious to see how it will turn out!

...art
(who's shop is so small that he dispensed with fixed wheels on all his mobile stuff...)
 
Hey you better take those back to the store, Glenn, those pivot wheels look defective to me... ;)
...art
(who's shop is so small that he dispensed with fixed wheels on all his mobile stuff...)

I know just what you mean. A few items of mine had all four corners swiveling for just that reason. For items that have to really be mobile, four-corner-swivel is the way to go :thumb:. This guy should really only be pulled out from the wall for use and then pushed back. My large bandsaw does the same and so far so good but, I hardly ever move it :crossed:.
 
I got a friend to swing by with me over lunchtime and move the sander from the open metal stand onto the new drawer unit. I had prepared by removing the feed belt assembly and the infeed/outfeed tables last night. I was as sure as I could get about the mounting hole positions and I lucked out; they lined right up. I put the feed belt and tables back on and she's all set except for the drawers. At least I can get the metal stand broken down and stashed out of the way.

19-38-stand(15).jpg

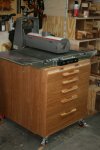
Now it easily rolls out where I have plenty of room to navigate my stock.

19-38-stand(16).jpg

And it tucks out of the way when not in use. Same footprint and I get almost 14 cubic feet of storage.

19-38-stand(17).jpg

He will have to go without his drawers for a bit :eek: while I catch up on a couple of things. I had planned to just put all the stuff that came out of the old rolling worktable drawers right back into this guy. Now I'm thinking maybe this will become 'abrasives central' and all the different places I have abrasives stashed around the shop can hold the 'other stuff' instead. Eventually either the compressor or the vac will move to that position so I can shift him to the left and free up access to my hand tools . . . or the hand tools will move . . . or . . .
 
Last edited:
Thanks Rennie. I just got done running some cutting boards. I raised the height about 5" and the difference on my back after standing at the machine is obvious. Very happy, I highly recommend it ;-)
 
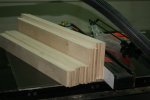
My old buddy the Tall Router Fence comes into play again. This lets me make quick work of some oversized drawer parts blanks using a drawer-lock router bit.

19-38-stand(18).jpg

These oversized blanks let me knock out drawer box parts pretty quick.

19-38-stand(19).jpg

I was going to use false fronts made out of scrap but, despite having boatloads of pecan cutoffs, the figure variation was so extreme that I decided to just go with the shop ply.

19-38-stand(20).jpg

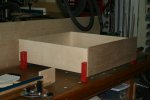
These fronts are actually the front of the drawer box and include the drawer-lock profile with an overlay. Drawers made this way are self squaring and very quick to build. the downside is that if you goof up a bit, there's no false front to help you "adjust" ;-)
 
Last edited:
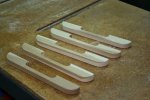
Well, I probably would have finished this today but, I started having fun with the 'scrap bin' pulls.

19-38-stand(21).jpg

So, a couple pieces of trim tomorrow and I can start to load her up.

19-38-stand(22).jpg

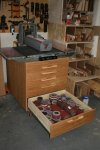
Mondo drawers.

19-38-stand(23).jpg

The next day . . . .

Feels good to get all those storage boxes out of the middle of the shop :). I basically rounded up a lot of abrasives and accessories that were stored here and there around the shop and centralized them here. I'm sure I added close to 100lbs of "stuff" to the drawers and rear shelves but, it still moves easily so I'm a happy guy.

19-38-stand(24).jpg . 19-38-stand(26).jpg . 19-38-stand(25).jpg
 
Last edited:
Top