Stickley mantle clock - Epilogue

Coming along nicely. I also experience tearout or blowout when working QSWO if I am not extremely diligent. The same figure that makes it so beautiful makes it a bit troublesome to work.
 
Stickley mantle clock

First time I ever cut tenons with the board vertically using dado blade and fence. Turned out pretty well, I think. Just needed a little cleanup with a sharp chisel.
y6utysyg.jpg


And, after
ysyba5ev.jpg
 
Stickley mantle clock

Before closing up shop for the evening I was able to finish chamfering the tenons and making the raised panel back. The back fits into a groove and will be removable so the batteries can be accessed more easily.
6u9uma3e.jpg
yzatuhyh.jpg
hezegy6a.jpg
 
Today I started work on the door. Once planed down to 3/8" thick I cut the door to 1/16" over size. The author of the magazine article (Glenn Huey, managing editor at Popular Woodworking, who has been very gracious in answering my emails regarding questions I had on this build) attached the paper template directly to the door and made all his cuts with a jig saw and then cleaned everything up with a file. That scared me a bit, but I liked Larry's idea of first making a template and using the router to make the final cut. So, I got out a piece of hardboard and got started.

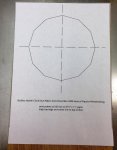
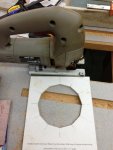
First I attached the template with spray adhesive.
IMG_1005.jpg
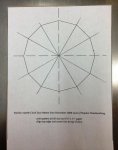
I then added lines intersecting the points to give my old eyes something to follow with the jig saw
IMG_1007.jpg
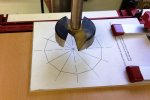
Next it was time to get out the monster fostner and remove some unneeded material
IMG_1008.jpgIMG_1010.jpg
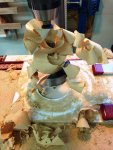
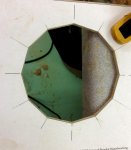
Then I used a jigsaw and a fine blade to get in as close to the lines as I dared.
IMG_1011.jpg
A little clean up with the file and I was ready for the big time!
IMG_1012.jpg
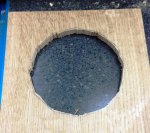
Following the same proceedure, I made a very rough cut with the jigsaw
IMG_1013.jpg
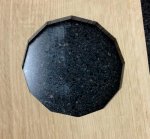
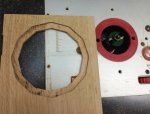
Then I attached the template with some double stick tape and used a 1/4" carbide spiral pattern bit in the router table. After just a little fine tuning with a file...Success!:thumb:
IMG_1014.jpg

Tomorrow I'm heading over to the stained glass supplier and pick up what I need for the little window in the door. A new experience for me!
 
Stickley mantle clock

I did not get much time in the shop this weekend. However, I was able to finish the openings in the door and mortise the door for the hinges. I also went out and purchased the supplies for the leaded glass window. That will be a new experience for me

Today I hope to finish the ramped mortise for the hinges. Something else I have never done before.
gaty4uqu.jpg
 
Rennie is that QS Oak old or punky? It looks it from the way it came out the forstner bit and the image of it in the hinge cut. Looks to me like to got the cut out perfect.

But i am confused with the dovetail joints in the picture that shows the cut out. Are the pins not supposed to be proud of the tails or do i have it the wrong way round. In earlier images you posted they were proud was that just a specific view?

When you say you cut the second cut out using a router bit, did you just free hand it with the pattern stuck on as a guide?

I like the look of this clock. Wonder how it would look in some other woods. Maple for example with maybe some walnut highlights in places. BUt i do like mission oak very much, probably my favorite finish not that i can do that finish.
 
That came out great!
Thanks! I found out after this was posted that my template shifted (or I didn't set it square) and the points were not square to the edges of the door. Fortunately I had cut the door a bit over-sized so I needed only figure out how far I was off (1/32" over the length of the door) cut one side in a taper, rip the other side parallel, then trim the ends square. Whew, another catastrophe averted!:doh:

Rennie is that QS Oak old or punky? It looks it from the way it came out the forstner bit and the image of it in the hinge cut. Looks to me like to got the cut out perfect.
Punky? :eek: The wood I traveled all the way to Michigan to buy? From a trusted source?!?! Perish the thought!

But i am confused with the dovetail joints in the picture that shows the cut out. Are the pins not supposed to be proud of the tails or do i have it the wrong way round. In earlier images you posted they were proud was that just a specific view?
They were cut a bit proud on purpose and will be sanded flush.

When you say you cut the second cut out using a router bit, did you just free hand it with the pattern stuck on as a guide?
The final cutout for the dial was done using a hardboard template and a patternbit mounted in the router table. I used a small diameter bit (1/4") so I would not have to do a lot of clean up to make my points sharp.

I like the look of this clock. Wonder how it would look in some other woods. Maple for example with maybe some walnut highlights in places. BUt i do like mission oak very much, probably my favorite finish not that i can do that finish.
The finish I use is pretty simple and I'll detail it later. I actually think this clock might look great in cherry - and probably easier to build!
 
Not a lot getting done the past day or so as I have been dealing with a few design decisions. First, I had to get a clock face. I thought the original supplier listed in the Popular Woodworking article had gone out of business, but I stumbled upon them at a new address and was able to order the dial. $21 with shipping! :eek:

Second, I had to decide whether or not I was going to put glass in the door in front of the clock face. The original Stickley design did not have it, neither did the PW piece. I was concerned that, over time, the dial would get dirty or the hands might be bent by either a well meaning OCD time correcter or an inquisitive child. I finally decided to go with the glass and took the advice of the author and simply rabbeted out a 1/8" deep setting for the glass. My plan is to get a round piece of glass and set it using silicone dabbed into the points.
Glass rabbet.jpg
 
We all have those periods where we seem to be working but, have nothing much to show for it. It'll get there. I can certainly see why many call the router the most versatile power tool on the shop. I am always coming up with more things for them to do for me.
 
Top