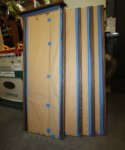
Bryan that upper floor is that oak glued and biscuited to the edge? Yes Is all the melamine chipboard? Yes do u get this stuff from the borg or a better supplier. Stuff i have seen at the HD is not great melamine surface.3 sheets of 5/8" from HD, Columbia Forest products. I get them partially cut there so it fits the f150 and easier to handle on the saw. The melamine surface for the interior stands up OK. Way better than a lacquer surface if I used oak veneer ply. But spraying , there is a lot of masking to be done.
Now an important question i need to ask.
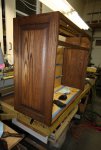
When you got asked to make this, and once decided on the design. What thought process did u go through to decide on where to start.
Did you do detail drawings or just rough pencil sketch. pencil sketch. I was given 4' x7' x 18" deep with drawers in the middle on a scrap of paper. I usually look for an image similar to what is wanted to use as a guide.
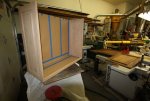
Did you size off the finished panels, thinking here of faceframe ? I really like the way u go about things your sequencing seems logical and easy to follow but would like the skinny of your approach to getting there. from the sketches, opening for the door sizes input into door calculator software ( Rockler ) that calculates the door parts. Once the doors are mounted, I will make the drawer fronts to match width of doors.
Seems to me you cut material as and when needed rather than all off a drawing. Looks to me like there are huge advantages to doing that.?The mid divider is made to fit. I have to redo it, made a mistake in depth, and used the mistake part to reposition for best look and calculate for the new one.


")


 I cut a 1/16 off the side of the snug drawer. Still tight so cut a 1/16 off the other side. Then it fit OK, so I made a new one to that size.