item 5 of 9 for the state fair

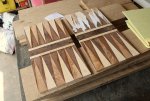
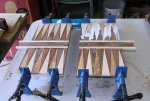
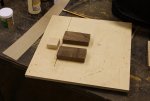
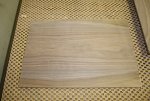
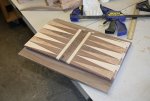
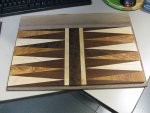
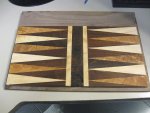
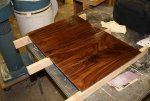
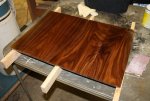
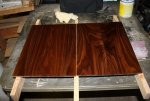
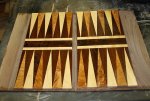
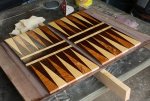
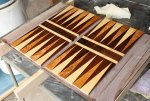
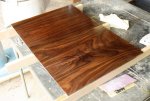
i had a little bit of time on my hands last night, so i put it to good use. i glued up the bookmatched panels, the dividers, and the four playing surfaces. now it is just a little bit of fitting and sanding.
 

Attachments

  • 037 panel one glued up.jpg
    037 panel one glued up.jpg
    72.8 KB · Views: 15
  • 045 playing surfaces and dividers laid out.jpg
    045 playing surfaces and dividers laid out.jpg
    80.9 KB · Views: 19
  • 044 playing surface four glued up.jpg
    044 playing surface four glued up.jpg
    55 KB · Views: 19
  • 043 playing surface three glued up.jpg
    043 playing surface three glued up.jpg
    72.3 KB · Views: 18
  • 042 playing surface two glued up.jpg
    042 playing surface two glued up.jpg
    63 KB · Views: 15
  • 041 playing surface one glued up.jpg
    041 playing surface one glued up.jpg
    53.4 KB · Views: 15
  • 040 divider two glued up.jpg
    040 divider two glued up.jpg
    75 KB · Views: 14
  • 039 divider one glued up.jpg
    039 divider one glued up.jpg
    69.2 KB · Views: 15
  • 038 panel two glued up.jpg
    038 panel two glued up.jpg
    70.2 KB · Views: 15
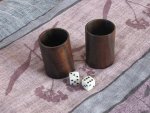
after all of the fun with cutting the chair parts, i decided to do something a little bit more fun, and turned the dice cups for the backgammon set.
 

Attachments

  • 046 dice cups turned.jpg
    046 dice cups turned.jpg
    84.7 KB · Views: 13
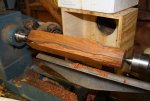
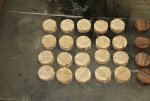
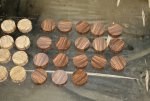
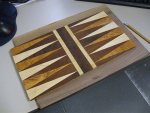
more work done on this project. while i was picking up new glue, picked up the hinges and hasp. cleaned up the edges of the playing surfaces, and glued them to the center dividers, and then trimmed the center dividers. then it was on to turning the blanks for the checkers, first the cocobolo, showing detailed steps of how it was done, and then the olivewood checkers blank (couldn't pass it up, what with the nice grain patterns running through the blank). next thing is to make a pair of jigs, one for cutting the checkers on the bandsaw, and the other to hold them so they can be sanded.
 

Attachments

  • 053 playing surfaces trimmed.jpg
    053 playing surfaces trimmed.jpg
    129.9 KB · Views: 18
  • 052 olivewood checkers blank ready.jpg
    052 olivewood checkers blank ready.jpg
    110.8 KB · Views: 15
  • 051 olivewood checkers blank ready for turning.jpg
    051 olivewood checkers blank ready for turning.jpg
    101 KB · Views: 15
  • 050 cocobolo checkers blank ready.jpg
    050 cocobolo checkers blank ready.jpg
    99.1 KB · Views: 12
  • 049 sizing up the blank.jpg
    049 sizing up the blank.jpg
    108 KB · Views: 12
  • 048 start of turning cocobolo checkers blank.jpg
    048 start of turning cocobolo checkers blank.jpg
    101.8 KB · Views: 12
  • 047 playing surfaces glued together.jpg
    047 playing surfaces glued together.jpg
    118.4 KB · Views: 13
got a little bit more done today (more to do tonight). put together the jig for cutting the cocobolo and olivewood checkers. tonight will be even more fun.
 

Attachments

  • 054 jig for cutting checkers.jpg
    054 jig for cutting checkers.jpg
    92.7 KB · Views: 10
  • 055 olivewood checkers cut.jpg
    055 olivewood checkers cut.jpg
    134.9 KB · Views: 10
  • 056 cocobolo checkers cut.jpg
    056 cocobolo checkers cut.jpg
    142.2 KB · Views: 10
did a bit more on this tonight. got the sanding started on the playing surfaces and got them leveled out. then started the sanding of the panels.
 

Attachments

  • 060 start of sanding of panel b.jpg
    060 start of sanding of panel b.jpg
    134.6 KB · Views: 7
  • 059 start of sanding of panel a.jpg
    059 start of sanding of panel a.jpg
    78.1 KB · Views: 7
  • 058 start of sanding of playing surface b.jpg
    058 start of sanding of playing surface b.jpg
    86 KB · Views: 7
  • 057 start of sanding playing surface a.jpg
    057 start of sanding playing surface a.jpg
    82.3 KB · Views: 7
got the playing surfaces and panels finish sanded today. then it was on to the boiled linseed oil. once they are set up, it is time to start marking off where the playing surfaces and dividers will be laid out.
 

Attachments

  • 061 playing surfaces and panels sanded.jpg
    061 playing surfaces and panels sanded.jpg
    101 KB · Views: 13
  • 062 panel a with boiled linseed oil.jpg
    062 panel a with boiled linseed oil.jpg
    112.2 KB · Views: 13
  • 063 panel b with boiled linseed oil.jpg
    063 panel b with boiled linseed oil.jpg
    117.3 KB · Views: 13
  • 064 playing surface a with boiled linseed oil.jpg
    064 playing surface a with boiled linseed oil.jpg
    109.2 KB · Views: 13
  • 065 playing surface b with boiled linseed oil.jpg
    065 playing surface b with boiled linseed oil.jpg
    106.8 KB · Views: 17
with a little bit of time on my hands last night, i got a bit more done. first i laid out the lines about 3/8" from 3 of the sides (as the 4th will be used for the checkers and such), checked the playing surfaces against the lines, then glued them to the panels, weighted them down with a few reams of paper, and oh happiness and joy, another step towards finishing this project was done.
 

Attachments

  • 069 playing surface b glued to panel.jpg
    069 playing surface b glued to panel.jpg
    128.7 KB · Views: 7
  • 068 playing surface a glued to panel.jpg
    068 playing surface a glued to panel.jpg
    126.5 KB · Views: 9
  • 067 playing surface glued to panel.jpg
    067 playing surface glued to panel.jpg
    86.8 KB · Views: 9
  • 066 laying out location lines on panel.jpg
    066 laying out location lines on panel.jpg
    129.7 KB · Views: 8
not to be bearer of bad luck dano, but i am not sure that glue will stay flat.. the grain you have on top might be moving in the opposite direction of the bottom.. you can tell better than me but be aware of this possibilty..
 
while taking a couple of breaks from mortising, i got the coat of seal coat, and 2 coats of shellac on both the panels and the playing surfaces. another coat or two will go on tomorrow.
 

Attachments

  • 075 second coat of shellac.jpg
    075 second coat of shellac.jpg
    117.5 KB · Views: 10
  • 074 second coat of shellac on.jpg
    074 second coat of shellac on.jpg
    128.8 KB · Views: 12
  • 073 first coat of shellac.jpg
    073 first coat of shellac.jpg
    114.4 KB · Views: 10
  • 072 seal coat on.jpg
    072 seal coat on.jpg
    110.7 KB · Views: 10
  • 071 first coat of shellac.jpg
    071 first coat of shellac.jpg
    124.6 KB · Views: 11
  • 070 seal coat on.jpg
    070 seal coat on.jpg
    121.8 KB · Views: 11
verrrrry funny bart, now lets delete it so no one thinks the wrong kind of thing. got a little bit more done today, got the last coats of shellac on the panels and playing surfaces.
 

Attachments

  • 076 last coat of shellac a.jpg
    076 last coat of shellac a.jpg
    138.8 KB · Views: 3
  • 077 last coat of shellac b.jpg
    077 last coat of shellac b.jpg
    144.3 KB · Views: 5
  • 078 last coat of shellac c.jpg
    078 last coat of shellac c.jpg
    113.9 KB · Views: 2
Top