jardiniere stand

Dan Noren

Moderator
Staff member
Messages
7,985
Location
falcon heights, minnesota
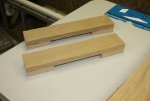
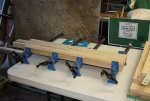
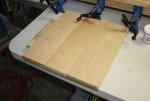
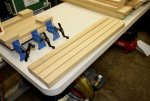
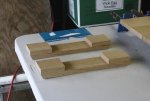
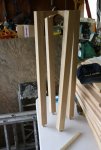
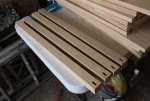
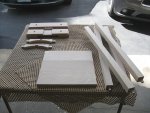
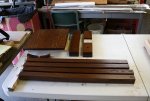
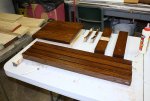
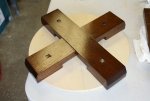
now that the boards have been finally been planed to thickness, i started cutting the parts for the jardiniere stand. starting with the top, then the feet, upper supports, and legs. got the legs glued up, and tomorrow it will be the turn of the top to be glued up.
 

Attachments

  • 002 jardiniere top parts cut.jpg
    002 jardiniere top parts cut.jpg
    99 KB · Views: 29
  • 003 jardiniere feet cut.jpg
    003 jardiniere feet cut.jpg
    81 KB · Views: 26
  • 004 jardiniere leg parts cut.jpg
    004 jardiniere leg parts cut.jpg
    101.1 KB · Views: 28
  • 005 jardiniere legs in clamps.jpg
    005 jardiniere legs in clamps.jpg
    106 KB · Views: 30
  • 006 jardiniere top ready to be glued up.jpg
    006 jardiniere top ready to be glued up.jpg
    87.1 KB · Views: 26
  • 001 jardiniere design.jpg
    001 jardiniere design.jpg
    31.8 KB · Views: 39
Last edited:
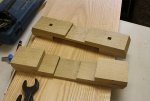
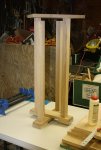
a bit more work done on the jardiniere stand today. glued up the top, glued the foot pads to the feet, and planed the legs to size and cut them to length. the only things left before finishing, is to cut the half laps and mortises for the legs in the feet, and cut the mortises for the cross members and tenons on the legs, and cut the half laps, arcs, and tenons on the cross members.
 

Attachments

  • 010 test set up.jpg
    010 test set up.jpg
    102.6 KB · Views: 22
  • 009 legs planed and cut to size.jpg
    009 legs planed and cut to size.jpg
    100.1 KB · Views: 17
  • 008 feet glued up.jpg
    008 feet glued up.jpg
    92.5 KB · Views: 18
  • 007 top glued up and in clamps.jpg
    007 top glued up and in clamps.jpg
    91.9 KB · Views: 17
Ah--jardiniere is just a fancy word for plant stand. Had to look that one up.

It's looking good.

I remember in old cowboy movies some character calling a piano, a pie-ann-y.

I think it was Festus on Gunsmoke.

I thought maybe jardiniere was something like that--lol

Geez-oh-man I really miss America like it used to be...

 
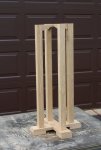
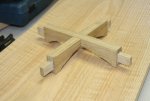
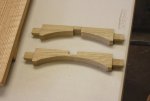
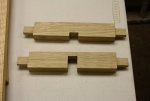
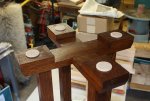
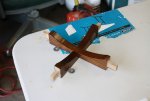
i don't know about that jim, since i am the holder of all time record of english ivy plants killed (3 of them). after the warm up with the soup stir stick, got to work on the jardiniere stand. got the tenons on the legs cut, then the mortises. after that it was on to the upper supports. cut the notches and tenons, then cut the arcs and sanded them to the lines. after a quick test fit of the upper supports, and upper supports with the legs (i know, i know, looks kind of wobbly), then it was on to cutting the mortises in the feet, and the half laps. those were fun, as the one could be done with the router (with a prior pass on the table saw to establish where not to go), and the other was a combination router (to get what i could) and table saw (to get what i couldn't). then it was a final test fit of the base, and plopped the top on it to see how it would look. now all that is left for this is to sand everything to 220, and finish it the same as the clock.
 

Attachments

  • 020 test fit of base and top.jpg
    020 test fit of base and top.jpg
    105 KB · Views: 20
  • 019 test fit of legs feet and supports.jpg
    019 test fit of legs feet and supports.jpg
    84.7 KB · Views: 12
  • 018 half laps cut in feet.jpg
    018 half laps cut in feet.jpg
    106.8 KB · Views: 10
  • 017 mortises cut in feet.jpg
    017 mortises cut in feet.jpg
    100.6 KB · Views: 9
  • 016 test fit of legs and supports.jpg
    016 test fit of legs and supports.jpg
    92.8 KB · Views: 11
  • 015 test fit of supports.jpg
    015 test fit of supports.jpg
    100.7 KB · Views: 12
  • 014 arcs cut and sanded.jpg
    014 arcs cut and sanded.jpg
    77.7 KB · Views: 12
  • 013 notches and tenons cut.jpg
    013 notches and tenons cut.jpg
    80.3 KB · Views: 12
  • 012 mortises cut.jpg
    012 mortises cut.jpg
    110.2 KB · Views: 11
  • 011 tenons cut.jpg
    011 tenons cut.jpg
    112.2 KB · Views: 11
squeezed in a couple of hours on this one today. got all of the parts sanded to 220 and dyed. next steps are the sealcoat, gel stain, sealcoat, 3 coats of clear shellac, paste wax, then final assembly.
 

Attachments

  • 021 all parts sanded.jpg
    021 all parts sanded.jpg
    137.1 KB · Views: 8
  • 022 all parts dyed.jpg
    022 all parts dyed.jpg
    114.6 KB · Views: 11
after 5 hours of fishing this morning (14 sunfish, with 8 big enough to be keepers), and a couple of hours at my cousin's for the 4th, dinner, and a quick nap, got over to the shop and put the first coat of sealcoat on the parts. tomorrow morning they will be hit with the coat of gel stain.
 

Attachments

  • 023 all items sealcoated.jpg
    023 all items sealcoated.jpg
    122.1 KB · Views: 5
another busy day today. now that the dye was dry, it was time to give it a coat of minwax walnut gel stain. hours and other projects worked on later, gave it the next coat of sealcoat. all that is left is to give it a light sanding, 3 coats of clear shellac, assemble and wax. with that done, this will be another project ready for the fair.
 

Attachments

  • 025 second coat of sealcoat applied.jpg
    025 second coat of sealcoat applied.jpg
    104.8 KB · Views: 7
  • 024 gel stain applied.jpg
    024 gel stain applied.jpg
    106.4 KB · Views: 7
to get warmed up for the goblet, i gave everything a quick rub with 220 and gave it the first of three coats of shellac. hopefully i will have this project assembled in the next couple of days.
 

Attachments

  • 026 first coat of shellac.jpg
    026 first coat of shellac.jpg
    111.3 KB · Views: 4
Since this is for the fair... Were I judging, I'd mark it down for the (lack of) grain match in the top. The center board just doesn't go well with the 'flashier' quartersawn outer pieces.

Of course, that's just my opinion...
 
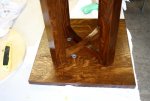
well, another project in the books! first thing was to hit it with paste wax and buff it out by hand. then it was add the table irons to the supports, and glue the supports together. then it was glue the feet together and assemble the base. once the base was assembled, it was on to centering the base on the top (making sure that it was bottom side up), locating where to drill for the table irons, and attaching the top. before turning it right side up, i added the felt floor protector pads. not a bad little plant stand.
 

Attachments

  • 033 floor protectors in place.jpg
    033 floor protectors in place.jpg
    97.2 KB · Views: 7
  • 032 locating table irons in top.jpg
    032 locating table irons in top.jpg
    95.5 KB · Views: 7
  • 031 base assembled.jpg
    031 base assembled.jpg
    132.5 KB · Views: 7
  • 030 feet glued together.jpg
    030 feet glued together.jpg
    88.4 KB · Views: 7
  • 029 supports glued together.jpg
    029 supports glued together.jpg
    79.3 KB · Views: 7
  • 028 table irons in place.jpg
    028 table irons in place.jpg
    73 KB · Views: 7
  • 034 finished jardiniere stand.jpg
    034 finished jardiniere stand.jpg
    94.5 KB · Views: 7
Top