YAB-a yabba bowl...

Ned Bulken

Member
Messages
5,529
Location
Lakeport NY and/or the nearest hotel
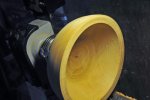
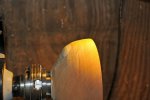
My friends Helen & Scott gave me another cherry log the other day, and Helen even cut it in half for me! Here's the first blank roughed out... about to go out and start the other half. Approximately 8-8.5" initially. I really need to work on my rounding cuts on the bandsaw, it was really unbalanced when I first spun it up.

OTL_1478.jpgbigger cherry rough1.jpg
 
Well it's round now Ned! :D Hope you get your heater done for your shop soon...or you'll be freezing out there when you return these. :cold::cold:
 
Keep on crankin' them out, Ned. :thumb:

I typically would go with a bit thinner walls on a roughout to lessen the chance of cracking. It's always a roll of the dice until you see how much a particular batch of wood wants to move. I realize you're leaving it thick so you have enough wood to re-turn it round after it dries, but if the walls are too thick, it'll crack instead of warp. Since you have a fair amount of wood to play with, I'd suggest trying some with thinner walls and some with thicker walls. Doing so can help you find the "sweet spot" between cracking too much and warping too much.
 
I went with roughly 10% of the bowl diameter (gleaned from bill g's DVD) in this case it is .75 or 3/4" . I might be a shade over that... But I can easily chuck it back up tonight


Ned

Generally the 10% is a good starting point, but for a bowl that small, 3/4" walls may still be prone to cracking...it really depends on that particular batch of wood and how much it wants to move. Similarly, being a relatively small diameter, it's less likely to warp than a larger bowl. After some experimentation on both sides of that 10% number, you'll have a better feel for how that batch of wood responds. (And I corrected the suggestion in my previous post to say try some thinner and some thicker.) One of the fun (and challenging) things about drying green turned pieces is that it varies by wood species, moisture content (freshness), and of course, climate. What works for me in the desert southwest might be totally wrong for you on your side of the country. That why I'm suggesting trying a few different things to see which is better for you.
 
Looks great Ned, and I'll second what Vaughn is saying for sure.

One of the big mistakes I kept making when I started to roughout green bowls was to leave the base too thick, this was the source of many of my first failures at roughing, as the sides of the bowl were about right for thickness but the base was twice that or more, the sides moved a lot and cracked.

Are you going to DNA dunk the roughed out bowls? I found with fruit wood, and maybe cherry is or is not fruit wood, the DNA bath helped a lot with the roughed out blanks NOT cracking.

Keep at it!

Cheers!
 
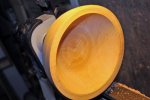
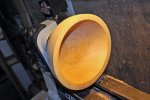
Here you go guys, I re-chucked it, and fought the already moving blank into submission. I took the rim down to about 1/2" and the base is at about 3/4. I have to wait until next paycheck to pick up some DNA and a project bucket at the Borg, looking forward to accelerating the process!

bowl thinner 1.jpg
fair curve1.jpg
fair curve 3.jpg
cherry .jpg
bowl thinner 1.jpgfair curve1.jpgfair curve 3.jpgcherry .jpgcherry 2.jpgcherry 2.jpg
 
Looking good, Ned. :thumb: Get that baby wrapped up in paper if you haven't already. :)

Personal opinion, but when I stopped using the DNA bath and just started wrapping the bowls in paper, I saw no significant difference in how fast rough-outs dried or how much they moved while drying. It seems that with the DNA bath it took about 3 months for a piece to dry, and without DNA it took about 12 weeks. ;) And I was pretty unscientific about the paper wrap. I'd wrap the bowl in three or four layers of paper, then punch a hole through the paper with my finger in the inside of the bowl to allow air to reach the inside of the bowl. (By letting the inside of the bowl dry slightly faster than the outside, it helps "pull" the wood in, which helps reduce cracking.

Keep in mind that there are more ways of drying rough-turned bowls than there are woodturners. :) Try a few and see what works best for you. :thumb:
 
Those proportions look a lot closer to correct to my eye.

One other caveat is that any "square" or "sharp" edges seem a lot more likely to crack. Not sure if that's bad luck on a small sample size but it generally seems true.
 
This is cool stuff.

Can a dry hunk of wood be turned ???

I saw a video of a bowl factory today that uses green wood but steams it after it's turned to eliminate any cracking. Is this viable for a small shop ??

I'm glad you are getting shop time Ned. You've been putting in crazy hours at work.
 
This is cool stuff.

Can a dry hunk of wood be turned ???

I saw a video of a bowl factory today that uses green wood but steams it after it's turned to eliminate any cracking. Is this viable for a small shop ??

I'm glad you are getting shop time Ned. You've been putting in crazy hours at work.


Bob,
I don't know about steaming for a small shop... heck, I don't know much about turning, Period!

However, I can say that turning Dry wood is definitely possible. It just isn't nearly as much fun. wet blanks give you nice big curly shavings... dry gives more sawdust sorta shavings.
 
Top