My CNC Build - Update

I used a spray teflon on my machine. Very slippery and doesn't attract dirt. That was a suggestion from Onsrud from whom I bought CNC cutters. Found it at a local industrial supplier but that was long before the days of Mr. Google. Don't recall that it was all that expensive either. WD40 is a very poor lubricant. Remember the 'WD' stands for 'water displacement. Its intention was to retard rusting. But clever marketing can get people to believe whatever it takes to sell the stuff.
 
I used a spray teflon on my machine. Very slippery and doesn't attract dirt. That was a suggestion from Onsrud from whom I bought CNC cutters. Found it at a local industrial supplier but that was long before the days of Mr. Google. Don't recall that it was all that expensive either. WD40 is a very poor lubricant. Remember the 'WD' stands for 'water displacement. Its intention was to retard rusting. But clever marketing can get people to believe whatever it takes to sell the stuff.

Yep, I've got a can of dry lube I got mainly for my table saw, but have used it on other machines. A can of WD40 was sitting close by this morning, so that's what I grabbed. WD was originally developed for water displacement but it sure does a god job for any application where one needs a light lubricant.
 
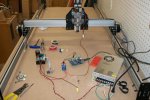
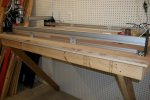
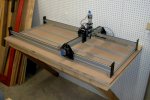
After taking the weekend off for the most part, I got back into my shop this morning. My first effort was to finish the bench/shelf for my CNC machine. I trimmed a couple of leftover pieces of 3/4" plywood to use as a sub-top, then cut some new MDF for the top of the bench. After getting that into place, I worked on the Y-axis components. First, I cut down the makerslide to the 60" length I wanted. I anchored the GT2 drive belts on one end of the rails, slid the gantry into place on them and guided the belts through the guides and pulleys. With all of that in place, I mounted the end plates to the rails and started placing some 20mm x 20mm extrusion to support the waste board. I need to pick up some L-brackets and other hardware to tie the extrusion together permanently. Here's what my system looks like as of now:

CNC_Bld_0011.jpg


One of my next efforts needs to be getting the power supplies and electronics arranged and protected. Originally, I was planning to put all of it in a box together, but now I'm thinking about mounting the power supplies under the CNC bench and running the output lines into the electronics box. That would take care of the major source of heat.

More as it develops!
 
I use a dry lube spray.

I know silicon is bad on wood so don't let it drip - that is too much anyway.

Any dry lube is ok

All wet lube will cake on the dust - bad

I REALLY THOROUGH cleaning of the ways and means (screws, rack) is ALWAYS a good thing
 
:lurk: sure looks like fun Bill :thumb:

You making excellent progress Bill cant wait to see what u get up to with it. :)

Sent from my SGH-I337M using Tapatalk


Thanks, guys! I haven't posted anything for a couple of days because most of my activity on the CNC has been small stuff and waiting for a few supplies to arrive. Also, I had a doctor appointment Wednesday morning - follow-up on my stents, then labs Thursday morning. I'm also working on a pen for a friend as I feel led to do so.

Yeah, Rob, I'm waiting to see what I do with the machine also! I'm getting more comfortable with the software processes for 2D items but need to learn a lot more about doing carving type work.
 
Not a ton of stuff to report today. Most of the past few days have been spent studying more about software operations. So far, I like the SketchUcam extension for Sketchup, have made 2D CAM files and exported the grbl code. All of that looks good but I haven't been able to take it "live" on my machine yet.

Last evening, I received a few parts I ordered from Inventables. I tested the spindle relay which allows the gcode to turn the spindle on and off. The photo shows (from left) the spindle speed control, the spindle relay and 48VDC power supply. All of this stuff is working as it should.

CNC_Bld_0012.jpg

Oh, today I also cut some 3/4" MDF for the main bed for the machine. I'll anchor it to the support rails beneath it, then stick spoil boards to it when I make actual cuts.
 
:lurk: Been enjoying seeing the progress and learning of new plugins. I'll check-out the SketchUcam plugin, I've used the older version Phlatscripts, but was pretty clunky the last trial.
 
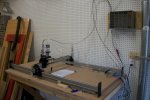
I got back on my CNC project today after being lazy for a few days. My objective today was to start getting the permanent wiring in place and see how well it would work hanging from the ceiling above the machine. So far, so good. The next step will be adding a few tie-wraps to keep all of this together.

CNC_Bld_0015.jpg


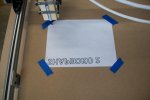
This is the first time I've had the whole machine powered up and on the Y-axis rails, so I ran the Shapeoko "Hello World" file. As you can see, I've got a little something to figure out! Using the gcode sender software, I jogged the axes to determine how they were working and had to tweak a setting to have positive in the right direction on all of them. Gotta do a bit of research to see why the file printed upside down and backwards with the axes jogging correctly.

CNC_Bld_0014.jpg


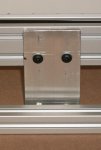
The makerslide rails are reasonably solid on their own, but I added a little insurance with some mid-rail supports. I made these using some 12ga aluminum stock that is 2" wide. I cut four pieces to a length of 3.75" and attached them to the rails using the lower notch and assembly nuts. To anchor them to the bench, I used some Stanley L-brackets. The rails are plenty firm now, for sure.

CNC_Bld_0013a.jpgCNC_Bld_0013b.jpgCNC_Bld_0013c.jpg


Hopefully, I can make my first real "live" cuts tomorrow!
 
Actually, Jay, I had my head on sideways!!! Thanks to a couple of folks on the CNC forum, I got my thinking straight. For whatever reason, I kept getting my X and Y criss-crossed in my mind and now I know what's happening. It has to do with my view of my "sideways" CNC build. Tomorrow, I'll reverse my Y axis polarity and all should be fine. :huh:
 
First, I got some 'splainin' to do. I played hooky yesterday - well, all afternoon anyway. Not to rub it in to you folks up north, but it was 80° with a mostly clear sky and a light breeze. So, LOML and I decided to catch up on some yard work. Yeah, yard work - not beach time!!! I did manage a bit of testing yesterday morning, then the day went other directions.

So, today has been shop time - so far!

As a follow-up to my last post, I made some changes. After further online conversation on the Shapeoko Forum, I changed my configuration. Several people who have built systems with a long axis and a shorter gantry designate the long axis as X and the gantry as Y. In my situation with one side of the CNC being against the wall, it's easier to envision the left-right axis as X and the front-back as Y since that's the way one would view a graph on paper. The only real drawback is interpreting installation or troubleshooting instructions correctly. Implementing the change meant nothing more than swapping the X and Y cabling at the gShield card.

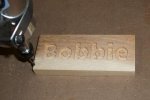
I did a little testing on some MDF this morning. By the time I got through with stuff criss-crossing, the MDF was kinda trashed, so you aren't going to see any of that! I will show an item I did - as further testing - and using a piece of real wood. This is a piece of 3/4" thick cedar about 3" by 5" with subject matter near to my heart!

CNC_Bld_0016.jpg

Since this is a small piece, I did the whole process using Easel, the free software that Inventables makes available. Easel is limited to a 12" by 12" workspace and is easy to set up for smaller items like this.

My next major task on this project will be building the box for the electronics and a shelf for the power supplies.
 
Last edited:
Top