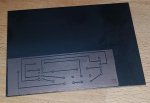
Laser Printed Circuit board

I apologize in advance for the $100 dollars you're going to spend on an FX888D and tips. Let me know if you need a recommendation where to buy from and exactly what tips to get. :)

The hakko looks pretty nice. I do have a weller wesd51, seems about comparable?
 
The hakko looks pretty nice. I do have a weller wesd51, seems about comparable?

Oh, you're all set. I switched to Hakko many years ago when Weller started futzing around with production and their tips started disintegrating. I think it's back under control now, though. That Weller is a nice station too. My main station is a JBC, now though I still use an older Hakko FP101 in the guitar section of my shop. That particular Weller is pretty standard issue for tech benches. It may well be the most popular tech solder station in North America.
 
I apologize in advance for the $100 dollars you're going to spend on an FX888D and tips. Let me know if you need a recommendation where to buy from and exactly what tips to get. :)

John, A soldering novice here grateful for your videos. Very glad you jumped in here. Just finished the first two and thought they were great. I got a bit choked up when I looked up the price on the JBC. Got a good source for the FX. That sounds like it will suite my hobbyist needs for soldering pick ups for cigar box guitars and amps, right??
 
John, I'm so glad I checked back in on this thread ... and that I've known of you on here and SMC for years. You've just given me some awesome late night youtube viewing... thank you!

And to spare some searching for the rest of the folks, here's john's soldering playlist:

https://www.youtube.com/playlist?list=PLgJuY2mH_KJNmpqizft5MwuA3H2jZXzdm

Hey, Jason! You're very welcome. It should work well for your purposes. I practically put myself to sleep filming it. I thought I'd knock it off in an hour or so. The epic just sorta' happened. :D
 
John, A soldering novice here grateful for your videos. Very glad you jumped in here. Just finished the first two and thought they were great. I got a bit choked up when I looked up the price on the JBC. Got a good source for the FX. That sounds like it will suite my hobbyist needs for soldering pick ups for cigar box guitars and amps, right??

Hey, Ted. It will suit professional needs too. I do a LOT of soldering, and some of it is on pretty beefy copper pours with beefy components. I need to be able to get on and off quickly to prevent damage, and a station with great thermal recovery is the ticket. Its tip and temperature changes are also very fast, and I do that very often. I can also get long length tips, which I need in certain situations. In other words, the JBC is a Ferrari. I'd only recommend it for pros that can really use it's capabilities or guys with some loose change burning a hole in their pockets. This Hakko, and Brent's Weller, are like F-150s....sturdy, reliable and gets the job done with no problem. Back when I had a respectable job, I outfitted our new lab with all Hakko equipment, and I could have basically bought anything I wanted.

Here's what I'd recommend:

http://www.tequipment.net/HakkoFX888D-23BY.html
http://www.tequipment.net/HakkoT18-D24.html
http://www.tequipment.net/HakkoT18-D32.html

That's the station and 2 additional tips (it comes with a 1.6mm tip, good for small PCB work. The 2.4mm tip will be your all around, general purpose tip for most things. The 3.2mm tip will work miracles for soldering to the back of pots and other heavy duty jobs).

It comes to just a shade over $100, and you'll get free shipping over $99. :) You can find this station elsewhere for a little bit less, and other places for a LOT less. Buyer beware... The workhorse model Hakkos (936 and FX888, now both discontinued, and the current generation FX888D) are absolutely notorious for being copied and counterfeited. The counterfeits are garbage. Some may not even be safe. TEquipment is very reliable, as are some other sources, their prices are excellent and the free shipping over $99 is nice. They're also very nice people.

Now answer me this...how come every picture I've seen of you has something funny going on with your hair? :huh:
 
Last edited:
...I'd post it here but I don't really want to spam the forum, even though none of the videos are monetized. I just want to help if I can.

Just for future reference, I don't think anyone would object to links to videos like yours. It's obvious you're offering the info to help the members here, not to make yourself famous or rich. :thumb:
 
Hey, Jason! You're very welcome. It should work well for your purposes. I practically put myself to sleep filming it. I thought I'd knock it off in an hour or so. The epic just sorta' happened. :D


You're telling that to a guy who just put the final touches on video part 45 (technically 48) of an ES-335 tribute build I've been working on since last November. I know all about the epics! And i appreciate you putting it out there! :)
 
Your method can be expanded.

Little paint, some laser etching, battery charger, Q-tip dipped in vinegar/salt mix rubbed over the etched surface and you can "engrave" all kinds of metal surfaces.

Connect the battery charger - one lead to the work. Other lead to the Q-tip (wet part). Watch which lead +- goes to the Q-tip. It matters and I forget at the moment which way it goes.

That is a great idea Pete.

I actually did that with a brewing kettle of mine to to make gallon marks on the inside of it. I used little vinyl stencils for that. I hadn't thought about using this to do that though.
 
Still playing around with this. Well, as it usually goes with these things, I'm still having issues getting the little wifi module to work properly. I think I need to re-flash the firmware, and have seen on the web where someone soldered up a jig to make it a little easier to do than running a bunch of jumper wires on the breadboard.

I figured this would be a perfect opportunity to learn how to use a program to both document the circuitry for the jig, as well as design the pcb.

So I'm using 'fritzing', an open source tool for designing electronics.

It's very breadboard friendly. You can design your tool in a breadboard mode and work in schematic and PCB modes. It will also generate all of the files required for creating PCB's.

So, I'm going to burn this one and give it a shot.

Breadboard Mode
fz01.png

Schematic Mode
fz02.jpg

PCB Layout mode.

You can see here that since I've got it as a single sided copper PCB, I had to add in some 'jumpers' in order to get this to route the traces. Alternatively, I could have done a double sided board and would not have had to have done the jumpers. Not sure I'm up to the task of double sided boards yet.

fz03.jpg

so I exported that design to an SVG file, made the traces a little bigger, exported to a png file, inverted the colors and created a bitmap that I used to create the G-code file.

esp01 programming jig_etch_copper_bottom_mirror_inverted.jpg

Now to see how this all works!
 
I'm a rank beginner with no real L'ectronics knowlegde. I'm just trying to learn some stuff and having fun.

My motto has always been to 'Never let a lack of skill or knowledge stop me from trying something. Here, Hold my beer, watch this!'
 
Got a pretty good burn on it. It did take about 4 hours, so I need to see what I can do to reduce that. Obvously there is a lot of extra 'white space' on this board, so I could compress it just by moving things closer.

Might be able to speed up the laser a bit too. I increased the amps to 1.3 and it really seems to do a decen job of paint removal.

20150905_232854.jpg
 
Got a pretty good burn on it. It did take about 4 hours, so I need to see what I can do to reduce that. Obvously there is a lot of extra 'white space' on this board, so I could compress it just by moving things closer.

Might be able to speed up the laser a bit too. I increased the amps to 1.3 and it really seems to do a decen job of paint removal.

View attachment 92148

Go back and re-read what I wrote about copper pours. Look them up online too. It will save you a LOT of time, and you will also get better etching. Removing a lot of copper makes the solution weak. Ideally, you'll hook up the copper pour to ground, and also attach all your ground pins to the copper pour with thermal reliefs (fancy name, but very easy to do).
 
I could see how that would save time. This was a bit ridiculous, time wise, since it looks like I was removing 99% of the pain on the board.

I could have easily gone in and edited the image to reduce the amount of paint being removed. The advantage to that is the software that generates the gcode can tell the machine to move faster when it's not using the laser to remove paint.
 
Top