- Messages
- 7,985
- Location
- falcon heights, minnesota
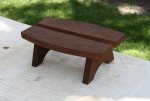
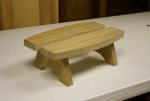
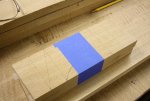
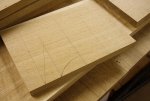
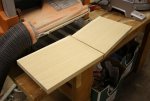
well, i guess that this is the first of the furniture projects to be done. i cut the board i had set aside for the top into blanks for the top. cut the curve, and sanded to the line, halfway done! then it was on to the sides. used a pair of scrap end cuts for this. planed them smooth, and jointed the one edge. then i laid out the lines of the side, and the bottom curve (i can thank folgers for that one). taped them together, and cut the angles on the miter saw, and the curve on the band saw, and sanded to the line. all done but the sanding, gluing up, and finishing. the finishing is someone else's  job for a change.
job for a change.Attachments
-
 001 board for monitor stand top.jpg109 KB · Views: 20
 -
 009 first set up.jpg69.5 KB · Views: 27
 -
 008 all parts cut.jpg73.7 KB · Views: 20
 -
 007 side angles cut.jpg88.3 KB · Views: 20
 -
 006 ready for cutting.jpg103.5 KB · Views: 20
 -
 005 side laid out.jpg99.3 KB · Views: 20
 -
 004 side boards planed.jpg98.4 KB · Views: 20
 -
 003 boards for sides.jpg104.6 KB · Views: 20
 -
 002 top laid out.jpg87.6 KB · Views: 21