Al Navas
Member
- Messages
- 147
- Location
- Between St Joseph and Savannah, MO
Thanks for looking!
LOML needed a 48-inch cabinet and lots of drawer space. So, I designed something quickly to fulfill the need . Two banks of three drawers, 48 inches wide, 36-1/2 inches tall, 24 inches deep.
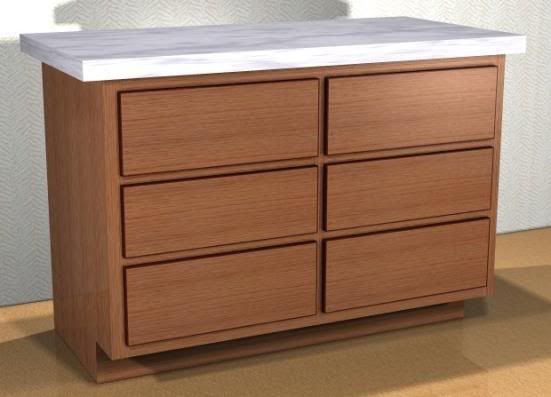
1. The design concept (done in eCabinet Systems software as a learning project): Not shown in this "sketch" is the old countertop we re-used, as it was still in good shape:
And some photos of the work-in-progress:
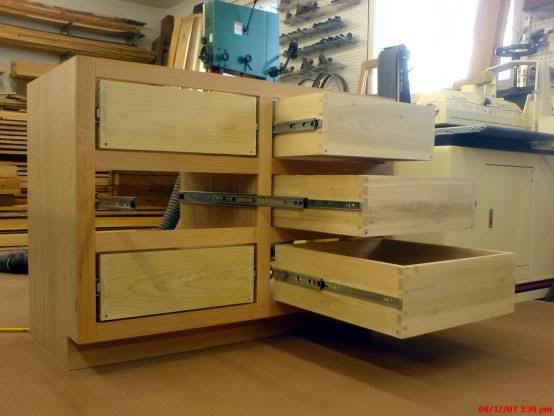
2. I used full-extension slides:
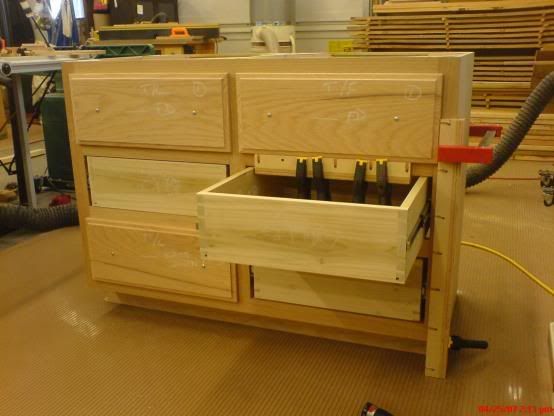
3. Home-made jigs to properly center the false drawer fronts:
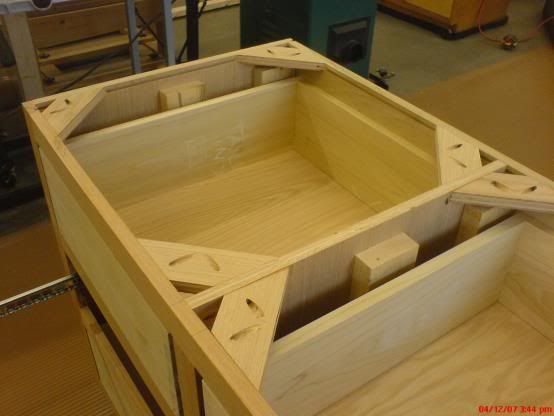
4. Corner blocks on the top, and a peek at the 2 X 4s used to mount the slides:
And now for the completed project:
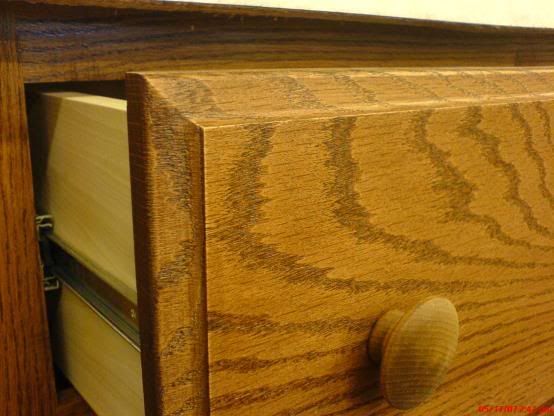
5. I used a door edge profile bit to decorate the drawer edges:
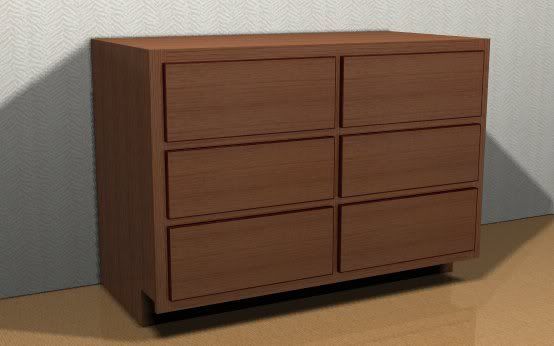
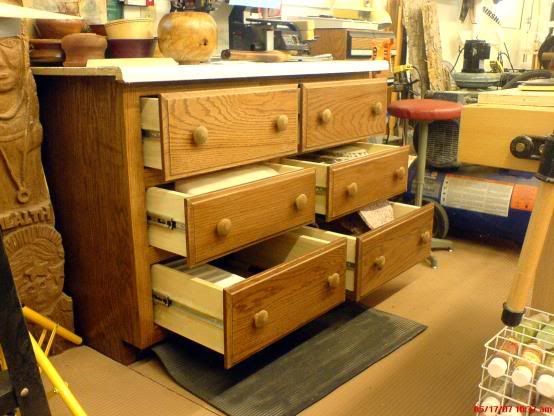
6. The finished cabinet, loaded with whatever LOML wanted to put in it :
:
This was a fun project. Finished with Minwax Special Walnut stain, two coats of Target Coatings' waterborne shellac, and four coats of Target's Super Clear waterborne polyurethane. Finally, buffed with 600 grit wet-dry sandpaper.
.
LOML needed a 48-inch cabinet and lots of drawer space. So, I designed something quickly to fulfill the need
. Two banks of three drawers, 48 inches wide, 36-1/2 inches tall, 24 inches deep. 1. The design concept (done in eCabinet Systems software as a learning project): Not shown in this "sketch" is the old countertop we re-used, as it was still in good shape:
And some photos of the work-in-progress:
2. I used full-extension slides:
3. Home-made jigs to properly center the false drawer fronts:
4. Corner blocks on the top, and a peek at the 2 X 4s used to mount the slides:
And now for the completed project:
5. I used a door edge profile bit to decorate the drawer edges:
6. The finished cabinet, loaded with whatever LOML wanted to put in it
:
This was a fun project. Finished with Minwax Special Walnut stain, two coats of Target Coatings' waterborne shellac, and four coats of Target's Super Clear waterborne polyurethane. Finally, buffed with 600 grit wet-dry sandpaper.
.