- Messages
- 11,635
- Location
- Constantine, MI
The first step always scares me!
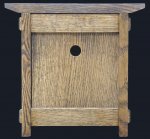
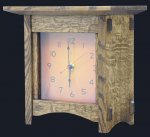
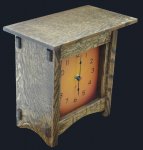
Here's a few pics of a clock I am currently building. I love building clocks and have several I am selling on Etsy. However, I needed something smaller than I usually build that was at a price point more in tune with a modest budget. This is what I came up with. Sized to fit into a free postal service priority box to facilitate shipping it stands a little over 10" tall and 11" wide. It is my take off of a rather popular design.

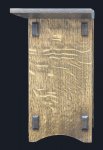
I spent some time designing it to be easy to build. I made a router jig to cut the mortices in the sides and they are only 3/8" deep. They hold faux tenons that hide the screws that hold the horizontal rails in place. The smaller trim pieces are all installed using Titebond instant glue for wood using an accelerator.
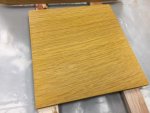
The first step in my finishing process is the application of Honey Amber Dye (TransTint). Had I never done this before I would be very stressed over the color. Next up is TransTint dark mission brown dye followed by several coats of walnut Danish Oil.
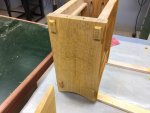

This is kind of a prototype. Still working with some of the design elements. One thing I am not sure of it the faux tenons - they seem a bit too wide at 1/2" and 1" tall. I'm thinking 3/8" might be better, but that will require me buying a new router bit.
Here's a few pics of a clock I am currently building. I love building clocks and have several I am selling on Etsy. However, I needed something smaller than I usually build that was at a price point more in tune with a modest budget. This is what I came up with. Sized to fit into a free postal service priority box to facilitate shipping it stands a little over 10" tall and 11" wide. It is my take off of a rather popular design.

I spent some time designing it to be easy to build. I made a router jig to cut the mortices in the sides and they are only 3/8" deep. They hold faux tenons that hide the screws that hold the horizontal rails in place. The smaller trim pieces are all installed using Titebond instant glue for wood using an accelerator.
The first step in my finishing process is the application of Honey Amber Dye (TransTint). Had I never done this before I would be very stressed over the color. Next up is TransTint dark mission brown dye followed by several coats of walnut Danish Oil.


This is kind of a prototype. Still working with some of the design elements. One thing I am not sure of it the faux tenons - they seem a bit too wide at 1/2" and 1" tall. I'm thinking 3/8" might be better, but that will require me buying a new router bit.
Last edited:


