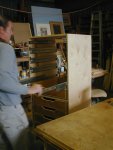
Client needs new drawers

Shaz, not an empty house from where I'm watching...just sitting back trying to learn, and without much useful to add. (I know, I know, that never stopped me from speaking up before.) ;)

Also, been busy enough with other parts of the forum that I get behind on some of the serial threads like this one. (I'm also hopelessly behind on all the Sketchup tips and tricks Dave's posted oner in the Design forum.)

Keep the story coming...
 
I think most of us just like to sit back and learn, only interjecting when we feel like we have something that may be helpful.

With regard to whether my employment is anything like your client's, my answer would have to be no. One of my first jobs was as a dental lab technician, and I have several friends in the dental "industry", so I've seen different systems for keeping the plaster casts. I used to take the casts and make up dentures . . . if you can keep your real teeth, I highly suggest it! :D
 
Last edited:
Shaz, not an empty house from where I'm watching...just sitting back trying to learn, and without much useful to add. (I know, I know, that never stopped me from speaking up before.) ;)

Also, been busy enough with other parts of the forum that I get behind on some of the serial threads like this one. (I'm also hopelessly behind on all the Sketchup tips and tricks Dave's posted oner in the Design forum.)

Keep the story coming...
Thank you Vaughn,
It is obvious that you have been busy, and oh by the way, you have done a really great job on organizing this whole place, Thanks.
Shaz
 
We have 4 -4'x4' pieces that we have to cut into drawer fronts and backs. To get the right distance we subtract 1" -1 1/16" for the drawer guides, and the thickness of the two drawer sides, because the front and back fit in between them. For me that is 21 1/8" wide. I will have 23 1/2" between the two walls of the cabinet. I will crosscut and end up with 8 pieces 48" x21 1/8".
Moving forward, we will now set up and rip all of our drawer sides, our fronts and backs at the same setting on the table saw...4 1/2".
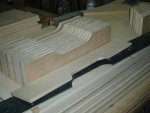
We have these two piles, 8 pieces 48"x21 1/8" for the front and the back and 8 pieces 23 13/16"x 48" for the sides. Rather than making a 4 1/2" ripping off a 48" piece let us cut each 48" length into smaller pieces, with maximum material usage, for ease of handling. We need 9 -4 1/2" pieces from each 48" board plus the left over for a shallow drawer at the top. I figured I could rip each sheet at 19", then rip again at 19", set them in a pile and put the drop in another. ( reasoning--4 1/2" + 4 1/2" = 9"... 9" doubled = 18", plus the saw kerf for each cut and 19" increments are fast to figure and allow the factory edge to be cut off at the end. /reasoning)cutting drawer sides1.jpg
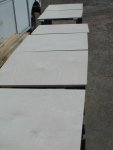
This is a pile of the 4 1/2" pieces cut next to a stack of 1/2" baltic birch cut for the bottoms which have been ripped to 23 13/16" x 60".sides cut bottoms not1.jpg
We will know what the other dimension is when we nail our sides together.
 
Last edited:
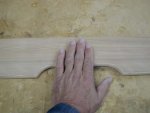
It would be time to nail through the sides into the front and back pieces if it weren't for the fact that we need to cut in a space for finger entry to easily open the drawers. I use my hand for determining sizes for the cut outs.
pattern drawer front.jpg
We will spend time making sure that the drawer edges are smooth, especially the opening. Rounding over and sanding are in order.
pattern drawer front (1).jpg
Shaz
 
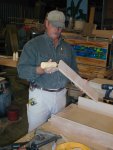
Moving on, we finished the fronts, routed and sanded
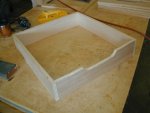
Drawer front routed and sanded.jpg and moved on to glue, nail and screw it.drawer end glue up.jpgDrawer assembly.jpg
As can be seen we are moving on down the road toward the "Emerald City".
 

Attachments

  • Drawers for family W 033.jpg
    Drawers for family W 033.jpg
    44.7 KB · Views: 15
Looking Good!

Production line is rolling right along. What are you doing to do for the finish? Will you finish before you put the hardware on?

Jay
 
shaz, you`re not blowin` in the wind! you`re doing a great job of documenting your progress and techniques..thanks! tod
 
Looking Good!

Production line is rolling right along. What are you doing to do for the finish? Will you finish before you put the hardware on?

Jay
Hi Jay,
As you can see,the grooved hand pull cutout was routed prior to the nailing as it is easier to do that when in single pieces, but not routed all the way to the end of the board and only on the top, inside and out. We used a 1/4" round over.
Copy of Drawers for family W 035.jpg
Then we sanded the hand pull with 100 grit, nailed the four pieces per drawer together, set aside, repeat, and again.
Drawer 4 sides.jpg
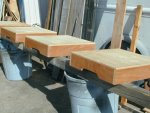
We then routed the tops of the drawers ( I am getting to your question:D ),and proceeded to sand all the top edges of the C-3 birch plywood sides. With no bottoms we took them outside and set them on their sides, turned up, on edge and shot them with hard sanding sealer, a lacquer, all around the inside making sure to coat the top edge of the drawer with one good coat.
More later,
Shaz
 
We then, having the width and the exact depth determined by the drawer size nailed together,we can cut our bottoms to a size,just a hair larger than the drawers, 1/16" in width and 1/16" in depth, it is nice to have a little over.
cutting bottoms.jpg
after cutting them out,rout them with a 1/4" roundover bit all around, on the down side(bad side). Rout the end grain of the top veneer first and then continue all the way around. Flip it over and sand the 1/2" bottom on that side.
sanding bottoms.jpg
It will be the useable side of the drawer bottom, Then we shoot that plywood on that side with lacquer.
spraying bottoms.jpg
 
We sand the 1/2" ply with 220 real quick and shoot it again with the sanding sealer. Then we proceed to nail these floors to the sides with a 1 1/4" pin nailer spaced accordingly to allow for 1 1/4" screws to be added as marked after the floor is nailed in place. Since the floor is a wee bit larger, get one corner perfectly flush,( floor covering the front and one side perfectly) then add nails. flush up one side perfectly during this nailing starting from the secured corner and work away from it. Then go back to the secured corner and work down the other unnailed leg of the 90 degree corner making sure it is perfectly flush as you go away from the nailed corner. This should make the drawer square. Nail down the rest of the floor add screws. sand the excess floor hanging over the edgedrawers december (2).jpg.
Take the drawer out and spray while upside down, all that needs sprayed.
drawers december.jpg
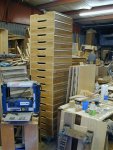
When dry, add the runner to all drawers. Since we are working from a story pole, we know exactly where to mount our metal runners, and since we figured it all out earlier, the runner on 36 drawers are all centered on a line drawn with the combination square using the same setting for each. Here is a stack of 18 drawers.
drawers december (4).jpg
 

Attachments

  • drawer dec2006 (1).jpg
    drawer dec2006 (1).jpg
    58.4 KB · Views: 17
Last edited:
You can see the box is pretty well nailed and screwed together. The top, bottom and the horizontal spacer located between drawer 6 and 7 along with a top cleat and bottom cleat are all Exactly the same width. they are deternined by measuring the width of the drawer then adding 1" to 1 1/16" in width to the drawer measurement to take into account for the drawer slides. After box assembly we add a 1/4" back, just stapled on to help our piece remain square and add drawers.
 
Rocking and Rolling!

Shaz,

You missed a big opportunity to check every other dentist in town and get lots of other orders at the same time., you could have had a big production line set up, rolling those babies off the end at three a day!

Thanks for the great post, it is interesting to see how someone who does this for a living actually does it

Happy New Year

Jay
 
Thank you Jay, even though some of us do this for a living it is nice to be thanked, praised or offered criticism. Each of the these will constitute involvement in our life, and take a certain amount of effort. Thanks.
This photo shows a stack of drawers with the runner on the sidesdrawer dec2006.jpg
Here is a photo of the drawers being inserted.
drawer dec2006 (3).jpg
And as can be seen this is a photo of two of the drawer banks on dollies.
drawer dec2006 (5).jpg
Shaz
 
shaz, what do those stacks weigh empty? i`m bettin` 150-200#, lookin` good! tod
Hi Tod,
Thanks.
I think you are close to right, at your 200# guess. 1 full sheet 3/4" for the box, 1-3/4" sheet for the drawer sides, 2 1/2 sheets of 5'x5'x1/2" baltic birch for the floors, 1/2 sheet of 5'x5'x1/4" for the back, plus a quart of lacquer, give or take a drop, and several spills,:rolleyes: plus 9 pairs of K V 8505x 24", you know they weigh so much they only put 5 in the bulk pack instead of ten, and one pair of the 20" FE 100# drawer slides. I bet with that info either Art, or Frank or Greg can be real close to the exact weight that trapped my foot under the dolly when unloading it in the tight quarters of the Dentist's office.:eek:
I figured...lets load and deliver with drawers installed. Okay, dolly rolls to truck bed, tilt and if back is over wheels, cabinet supported, wheels roll, box lays on tail gate, we lift bottom and slide in. No problem. Same coming out of the truck. Okay, we are there and how do we get it off the dolly?
My thoughts, we have about 54" front to back, cabinet 24" deep, we leave the front of the box overhang the dolly enough to catch the other dolly, then when there, we slip second dolly under front of box lean forward, take out dolly number one, lower box that is teeter tottering on dolly number two til it contacts floor, tilt box back further, extract dolly number two lower box to floor,slide on linoleum and go away. All is fine till teeter totter and lean back stage when while on dolly leaning back, box hits wall, dolly can roll no more forward and box hasn't touched the ground yet, dolly has not started to raise up on the other end yet so I decided to help it, and "drop the box". Well I stuck my foot into the space in the middle of the dolly, to push on the cabinet so we could get the dolly out but the dolly rolled up the cabinet dropped and caught my foot under the dolly frame with the box still on an angle weighting down the dolly, just bearly on the floor in the back. I said " the box is on my foot , the box is on my foot." My buddy was helping think and looking somewhere else at the box, so he didn't hear me. You know the dentist's office is like a library, so you can't hollar.:doh: "I EITHER GET MY FOOT OUT MYSELF OR I WILL STAY STUCK AND DIE HERE":eek: I said to myself quietly.:( TO BE CONTINUED I got ta go to work..
 
We can laugh now but I thought I would probably to be left there to rot and be eaten by the buzzards.:( All this passed rapidly before my eyes :eek: and my unwillingness to donate my teeth to dental science or my body to the buzzards somehow allowed me to push/lift box, rearrange dolly a smiggen while extracting the foot I have grown fond of. The dolly flared up, my foot pulled out and the box dropped. All is well that ends well. Another thing to be thankful for!!!!:D drawer dec2006 (6).jpg
Shaz
 
Top