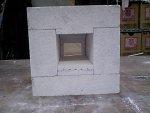
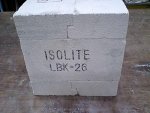
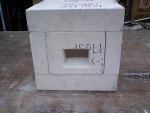
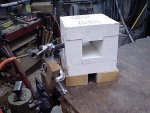
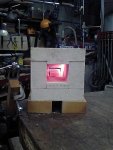
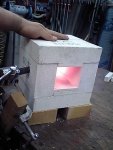
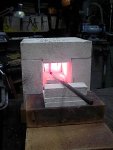
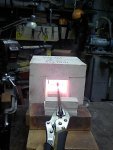
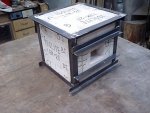
Square Body Propane Gas Forge

I used 7 bricks.

He used 8, because he sat one on top to cover the gap in the roof bricks, but I've been noodling this and I've come up with an idea :eek:

Right now the floor bricks that the roof bricks (for a lack of better terms) have a joint that goes from the heart of the forge to the outside of the forge. I don't really think it would be a major problem, but....:dunno:

I plan on building my forge into some sort of a frame, so it can be portable, I'll want to take it to our turners club meetings if we do some more tool making, and the forge, when not in use, will sit somewhere out of the way. I was thinking of the joint in the floor bricks and how I can combat that by leaving an airspace under the forge by mounting it of 4 legs the would stand the forge up off the workbench. The joint in the roof bricks would just be inefficient, but I think I have an idea around this problem.

Now the joint in the floor and the roof bricks is just a straight joint, but with just a little carving, I could make a staggered joint, would only have to be 1/4" or so.........
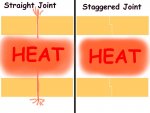
joints.jpg

It would also make things hang together better too.

What do you think?

Cheers!
 
Stu,

When you say with some carving you could create a staggar'd joint, do you mean in the same sense of how the back brick is carved to create a mortise, so there is not an opening/seam between the bricks as you mention for the top/bottom?

I think that would work fine, and depending on how you will have the forge setup when you're using it, there might not be a problem with the seam there.

I have a metal type welding table that my forge is on, so there's really not much that can be done, aside from melting the table, and I don't think that will happen, even if I had a brick forge as yours.

There's a lot that can be done with a forge, but it takes a while to learn how to do things. You're lucky in the sense that you already weld, and that's a big help for a lot of metal work.
 
Well, I had "Come on baby light my fire" in my head today, as I was thinking about the forge, so once I'd finished up at the L shop, I went down into the Dungeon to do some work.

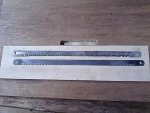
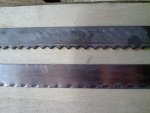
blades1.jpg blades2.jpg
I wore out two hacksaw blades, and did not want make it three, so I took one of the blades and ground some teeth into it. You can see in the pic to the right, how the hacksaw blade's teeth were ground smooth from use. The new blade worked really well! :thumb:

staggered_joint1.jpg staggered_joint2.jpg
This is the staggered joint I was talking about, in the roof and the floor bricks, again, worked good!

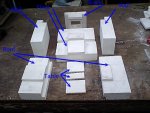
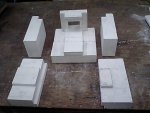
forge_parts.jpg
This is a break down of the parts of my forge, or is it a puzzle :rolleyes:
It should all hang together well.

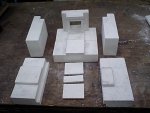
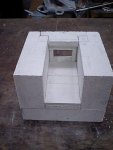
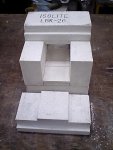
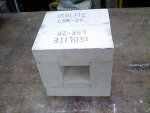
putting_together1.jpg putting_together2.jpg putting_together3.jpg putting_together4.jpg putting_together5.jpg
A series of shots showing how it all fits together.

On to the next post, more pics :eek: :D
 
Like I said, more pics :wave:

front_to_back_view.jpg
Here is a view looking in the front out the back

side_view.jpg back_view.jpg
a side view, and a back view.


ready_to_light.jpg
OK ready to light, I put a hole through the side, and pointed it towards the back............

lit_too_much_back.jpg lit_too_much_back2.jpg
........ but I found out I pointed it too much towards the back :doh:

cool_running.jpg
But is did run fairly cool........ on the outside:rolleyes:

OK, I let the forge cool off, and adjusted the angle of the hole a bit, for a much straighter shot..........

straighter_shot_start.jpg
At start up, this looks way better........

1st_iron.jpg 1st_iron_1_minute.jpg
1st iron in the forge.............then after one minute.....
 
Yep, lots of pics :rolleyes:

light_saber.jpg
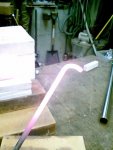
Here is the first iron out of the forge, maybe 5 minutes after I lit it......... HOT STUFF! :eek:

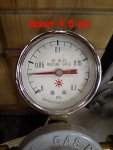
cranked_up_running_pressure.jpg
This is the pressure I was running at the CRANKED up mode, I did not run it like that for long, kind of scary, makes a really neat noise :rolleyes:
Works out to about 4.5 PSI, I think :huh: The gage is in MPa "Megapascal" and one MPa is 145.0377 Psi, so that, times 0.03 is 4.35 Psi.:dunno:
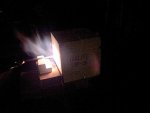
draons_breath.jpg
Got to respect that dragon's breath, hard to see with the lights on, but boy do you feel it.

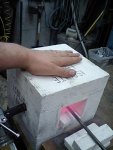
cool_running2.jpg
Just after I shut it down, the brick was certainly warm, but not HOT, as I could hold my hand on it.

This is looking really good, now I need to make some kind of a steel frame for it, and then get all the right fittings etc, so I can put a proper shut off valve etc inline.

Hope you are enjoying the show! :wave:
 
View attachment 10500
Here is the first iron out of the forge, maybe 5 minutes after I lit it......... HOT STUFF! :eek:
That's all you need. That will weld. I was doing some forge welding today, as I cracked a tong jaw I was forging. I fixed most of it, but noticed a thin spot where there's a sliver I can see, I hope to fix that with some borax, carefully, the bricks and ceramic shelving/tile doesn't like flux. The ITC-100 helps to protect said products from the flux. I've seen floors that were really messy because of the flux, but I have a piece of ceramic tile I can use.
 
Great video Stu...eigo jozu, desu yo? :rofl:

I don't know about M2, but with 5160 and other tool steel I use I will light it on fire in the forge after, and then let it cool slowly. The gas forge is better for cooling slowly as mine stays warm for several hours, mostly retaining the heat in the ceramic floor. I typically will do that in a coal forge, and not sure if it's ok to burn the oil in a propane forge...I'll have to ask Scott.

Your forge looks nice!
 
Alan, what do you mean by "Light it on fire" :huh:

After quenching it, light the oil on fire?

Cheers!
Yes, light the oil on fire and let it burn, and then let it cool slowly, like on the side of the forge with a fire going.

This allows it to cool slowly.

As for tempering, you want it to cool slowly after you quench it. I'm not exactly sure what lighting it on fire does, but that's the way I've been taught.
 
Stu - just so that I can confirm you really are a man with nerves of steel (or a limited imagination - take your pick) - are you running this fascinating and scary as heck thing in your hole in the ground??
 
Alan, no doubt you have seen this page before, but I'll include the link for any who are just reading along :wave:

[FONT=Arial,Helvetica,Geneva,Swiss,SunSans-Regular]Heat Treatment of Tool Steels[/FONT]

As I'm struggling with terminology here in two languages, I'm going to try to use the right ones from now on..... :eek:

The tool steel comes "Annealed" usually at about 20 HRC (HRC is the Rockwell Hardness Test for Steels)

To Quote.....

[FONT=Arial,Helvetica,Geneva,Swiss,SunSans-Regular]Austenitizing
[/FONT][FONT=Arial,Helvetica,Geneva,Swiss,SunSans-Regular]
[/FONT][FONT=Arial,Helvetica,Geneva,Swiss,SunSans-Regular]The useful alloy content of most tool steels exists as carbide particles within the annealed steel. This alloy content is at least partially diffused into the matrix at the hardening or austenitizing temperature. The actual temperature used depends mostly on the chemical composition of the steel. The temperature may be varied somewhat to tailor the resulting properties to specific applications. High temperatures allow more alloy to diffuse, permitting slightly higher hardness or compressive strength. At lower temperatures, less alloy diffuses into the matrix, and the matrix is therefore tougher, or less brittle, although it may consequently not develop as high a hardness. The hold times used depend on the temperatures. Diffusion of alloy occurs faster at higher temperatures, and soak times are decreased accordingly.
[/FONT][FONT=Arial,Helvetica,Geneva,Swiss,SunSans-Regular]
[/FONT][FONT=Arial,Helvetica,Geneva,Swiss,SunSans-Regular]For the best combination of properties, we generally recommend using the lowest hardening temperature which will produce adequate hardness for your application.
[/FONT][FONT=Arial,Helvetica,Geneva,Swiss,SunSans-Regular]
[/FONT][FONT=Arial,Helvetica,Geneva,Swiss,SunSans-Regular]The times shown in the table are typical for relatively small sections (under 2") and represent total soak time after material has reached the aim temperature. Larger sections need to be held longer to allow the center to reach temperature. The extended soak times depend on furnace equipment, load size and heat treat experience.[/FONT]

OK, so what I did in the video above is to "Austenitize" the steel, making it hard but brittle, right?

Now we come to the part that "Concerns" me a bit......Tempering......

[FONT=Arial,Helvetica,Geneva,Swiss,SunSans-Regular]Tempering
[/FONT][FONT=Arial,Helvetica,Geneva,Swiss,SunSans-Regular]
[/FONT][FONT=Arial,Helvetica,Geneva,Swiss,SunSans-Regular]Tempering is performed to stress-relieve the brittle martensite which was formed during the quench. Most steels have a fairly wide range of acceptable tempering temperatures. In general, use the highest tempering temperature which will provide the necessary hardness for the tool. The rate of heating to, and cooling from the tempering temperature is not critical. Sudden drastic temperature swings should be avoided. The material should be allowed to cool completely to room temperature (50/75°F) or below between and after tempers. Most steels must be held at temperature for a minimum of two to four hours for each temper. A rule of thumb is to allow one hour per inch of thickest section for tempering, but in no case less than two hours regardless of size.[/FONT]

Yikes, I have to find some way to hold this steel at a temp of 540-570C for two hours! :eek:

YIKES that is a long time to hold something at a temp like that, our oven in our house only goes to 300C so it is of no use.....:huh:

BTW, the info comes from here........

Daido Steel Info <- Link

...the maker of the steel I got.

Now what........? :dunno:
 
Stu - just so that I can confirm you really are a man with nerves of steel (or a limited imagination - take your pick) - are you running this fascinating and scary as heck thing in your hole in the ground??

I take as many safety precautions as I can, I have good welding gloves on, I have safety glasses, I have a full face shield, I have the hatch on the Dungeon wide open (you know hot air rises) and the mondo big air mover exhaust fan going full chat.

It is just a little forge, not some HUGE fire breathing dragon or something :D

Even when running the outside of the forge only gets hot, really only VERY warm, especially compared to the inside of the forge :rolleyes:

You may still think I'm nuts, if you like, you won't be the first nor the last :D :wave:
 
Hey Alan, or anyone else, do you know where I can get a high range, like up to 2000 C thermometer, that does NOT cost $800 :dunno:

Been looking here, but all I can find are REALLY expensive digital units, there must be something cheaper out there?

Cheers!
 
Hey Alan, or anyone else, do you know where I can get a high range, like up to 2000 C thermometer, that does NOT cost $800 :dunno:

Been looking here, but all I can find are REALLY expensive digital units, there must be something cheaper out there?

Cheers!
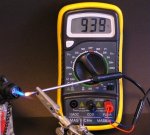
Yeah, actually if you look on my forge page, you'll see a picture of one of my friends, towards the bottom. We're using a regular voltmeter and are measuring the milliamps across the positive/negative using a homemade ceramic probe. You can get these probes for about $15-$20 at most clay supply shops as they use them in kilns all the time.

Remember, you can only go up to about 2500 degrees when steel starts to melt, so you will not be able to measure past that point as your probe will melt inside where the wires are. There's conversion tables on the web, you'll have to search as I don't have one handy, but there's a table you can look up to convert the milliamps to temps. You should be ok at 2000 degrees. 2500 is melting and what you need to get to for welding.

Stu, I haven't seen that specific, but just go by the seat of the pants type tempering...heat it up til it's lightly glowing orange, quench, light on fire, cool slowly. The test is to take a file and try to file the steel, if you can do that easily it won't hold an edge. Some steels like S7 are air hardened, that means you can harden it by just swinging it in the air.
 
Last edited:
...Some steels like S7 are air hardened, that means you can harden it by just swinging it in the air.

Oh Great - Now I have a mental picture of Stu in his jole in the ground swinging a piece of red hot metal round his head at full arms stretch - somebody please take this image out of my head:eek::D
 
I recomend

Heat Treating of Metals by the AGA(American Gunsmithing Assoc).

Can be rented...

You can tell the temperature of steel or anything else very closely by the color..

There were plans for an optical pyrometer on the web a fer years back...

I look around again.

Garry

I found the link. Building is simple calibration at little tougher...

http://www.metalwebnews.com/howto/optpyro.html

Garry again
 
Last edited:
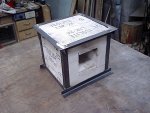
Well, I finally got around to making a frame for the forge, I'd been thinking about how I would do this from some time and using the forge a few times just convinced me that I had to frame it.

I want a frame that is not heavy, as I need the forge to be somewhat portable, from the bench top to where ever I find a spot to part it between uses and to take it somewhere like one of the turning meetings.

I figured that some smaller scale angle iron MIG welded up would be good, this is what I've come up with so far (not done yet!)

framed_front.jpg framed_back.jpg

Front view..........Back view

I made it in such a way that all the bricks can be removed in need be. I'll be putting some more angle across the top, which will bolt on, not be welded and some handles to make it easier to move around.

On the side with the burner hole, I'll be making up a holder for the burner as well as some other supports to hold the plumbing I'm going to make, similar to what Alan has done on his forge........

alans_forge_plumbing.jpg
..nicely done too!:thumb:

If you look at the back, I put those two angles to help hold the back brick in place, this brick is the Achilles heel of my design, it is rather carved up, and has already cracked, but is still holding together (fingers crossed!) so making sure it stays put is high on my list. I'll be making a door for the back, with a lump of the Isolite firebrick that will be carved to slide into the door, to hold it in place and then the door will be able to swing open, or swing so the the lump of firebrick effectively plugs the back door, or at least that is the plan! :rolleyes: :)

I'll also be putting some adjustable feet on the forge, this way it will be held up off the worksurface, and I'll be able to level it, which would be important if I were to ever try to cast some small parts.

I'll be putting a shelf or a hearth on the front too, a fair bit lower than the front opening, and I'll put some of the firebrick cut offs on it to keep the metal from heating up too much.

A bit more work to do yet, but when done, I hope to be able to have the forge sitting on the shelf ready to go at a moments notice, just get the propane gas cylinder and hook it up and go.

Comments and feedback,what am I missing?

Cheers!
 
Gary, I just read through the article you linked to, VERY cool, but I think an optical pyrometer would not be as good for reading the temp inside the forge, as they say you have to point it at something that has a dark surface, where the inside of my forge is all white?

I guess I could point it at the metal being heated, but that would require the metal to be removed each time, as he says in the article ....

Point the pyrometer to the object to be measured, preferably a nonlustrous object (blank metal surface) and not at flames, because the latter are gases or scattered soot particles.
.......or am I misunderstanding it?

All the same, great read, and very ingenious, surely of interest to many, I did not even know you could make such a thing, That one is bookmarked and printed out! :thumb:

Ian, not much I can do to rid you of the images you have in your brain, so here is one that might help..........

PIC_0047.JPG
My two daughters and I on my youngest's 11th birthday (I'll let you figure out which one is me!)

Cheers!
 
Well we found a pyrometer on auction here, about $30 with shipping to me, not bad.........

pyrometer.jpg

...... it's good for -200C to +1250C which will do the job I need I guess, and it is also a multimeter.

On to the tempering phase I guess :D

Cheers!
 
Top