Birdseye Maple bookcase

That will be a stunning item when finished. You should get the patience award for working with that birds eye maple.


Thanks Frank, I'll just be thrilled when my client (friend) see's it in person. I've emailed pictures to them as work progresses and so far she is just thrilled and can hardly wait for it to be finished and installed in her home.
 
Last edited:
Steve

Great looking job, thanks for the post. I'm envious of the wood, wish I had some logger friends to dump great materials in my lap.

Jay
 
Steve, I cant help but admire your work. I am planning a shelving unit similar to that and I wish I could get my hands on some B/E as pretty as that.

I have a question just out of curiosity.

I noticed on the close up of the face frame, the upper section that has the curved piece, the grain on the verticle has the B/E burl but the horizonta curved piece is a different cut. Any specific reason why you didnt use a burled piece for the horizontal?

I cant waite to see it completed. Have you already decided on the finish (perhaps you already mentioned and I missed it)

Julio the piece you are asking about is all that I had from the material given to me by the customer that was wide enough and of enough B/E that I could make the piece out of. This part will have Crown molding and possibly some dentil molding on it which should make it not quite as noticeable as it is now.

I am leaning towards a pre-catalyzed laquer finish, FW member and neighbor
Keith July did some work with that finish and it is gorgeous, so I've been getting some good info from him on what to do.

I haven't posted pics yet, but I have all the rails and stiles cut and am doing cherry glue ups for the raised panel part of the bottom doors. This Project took a back seat to my other job, but I am back on it again so pic updates should be coming soon.
 
Ed, here is the info pertaining to the pre-catalyzed laquer:

RESISTHANE PLUS®
PRE-CATALYZED CLEAR WOOD LACQUER
This product is unlike any other environmentally friendly spray on type wood lacquer on the market. Its tough and durable, self-sealing and easy to use and apply. Offers clarity, depth, beauty and toughness without any of the hazardous features. It's clarity is second to none in a water-based finish. Makes wood finishing safe and easy. No window of recoatability thus, recoat anytime with as many coats as desired. An excellent all around product for most interior woodwork. Its VOC is less than 0.5 lbs/gal or 60 g/L.

Best application results are achieved through spraying; through most conventional, airless and HVLP spray systems. Suitable for brushing on small areas only. Not recommended for bar tops, restaurant tables, or flooring.
 
Last edited:
Thanks for the info. This stuff sounds great! I have the cheapo HVLP sprayer that I have had some success with paint. I'll have to try it with some of this sometime.
 
Thanks Steve. I'll be looking in often as I am going to start on one similar.

Again, beautiful work.

Now for the important question; where are you going to put some ash in this project?
 
Now for the important question; where are you going to put some ash in this project?

Good question since I always include a piece of Ash somewhere in all the projects I do. I've been trying to decide what to do this time myself Julio, maybe something on the inside of one of the raised panel doors? Stay tuned.....
 
Thanks for the info. This stuff sounds great! I have the cheapo HVLP sprayer that I have had some success with paint. I'll have to try it with some of this sometime.

Keith July, a member here at FW has an inexpensive spray gun that he uses and his work is beautiful. Maybe PM him and ask him if yours will work of maybe he'll chime in here.

I have two guns that I used when we were restoring these old cars we have. One is a $350.00 DeVilBiss and the other is a $150.00 Matco. What spraying I have done so far, and using the same size tips, the Matco gun has done a better job of spraying. Keith said he paid 20 something bucks for his and it works great....maybe the cheaper the gun, the better it shoots?:huh:
 
Hi Steve,
It sounds like with that lacquer you will be shooting you can do it over til perfect, so that is taking some pressure off. It's turning out really nice! Good job and Hi to the your Mom and Dad. :)
Shaz
 
"bump"

Steve, dont forget to update this, I am very interested in this project.

Julio, I wont forget to update...I love taking and sharing pictures. Problem is I don't really have any pictures worthy of showing right now, but will soon.

Yesterday and the day before I got the 5 Birdseye Maple and Cherry raised panel doors all milled, glued and in the clamps. Today I will be taking them out of the clamps and final sanding these doors then hopefully putting the face frames on the cabinets.

I need to get the pre-catalyzed laquer ordered up too.

Pictures coming Julio...I promise.
 
Update

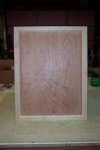
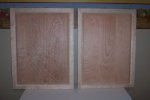
I have two of the five raised panel Birdseye Maple and Cherry doors sanded this morning.

I started out with 80 grit and then proceeded with 120, 150, and finished up with 220 grit.

As I finish sanding these I bring them from the shop to my office to keep them safe and to avoid any damage that can happen in the shop.

I am finding I need to spend a bit more time sanding than I thought I would need to. I put all my stock through the drum sander and thought it looked pretty good, but as I get right down and look at it I can see a little bit of tearout, not a lot but enough to give me concern to take more time sanding it out.

I have 3 more to go and then on to face frames.

I'm getting excited to see the grain "pop" when the finish gets sprayed on.
 

Attachments

  • 100_2946.jpg
    100_2946.jpg
    52.2 KB · Views: 24
  • 100_2949.jpg
    100_2949.jpg
    49.7 KB · Views: 20
Raised panel doors done

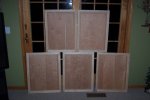
Finshed sanding the 5 raised panel doors yesterday late afternoon, they took a bit longer than I anticipated so I didn't get to the face frames.....maybe today.
 

Attachments

  • 100_2957.jpg
    100_2957.jpg
    75.7 KB · Views: 19
Top