Denise's lathe is paid for now...

Marty Walsh

Member
Messages
1,396
Location
Southern Georgia
I haven't posted in a while...but that's mostly because I've been ridiculously busy trying to get my 'secret project' completed and delivered. I'm getting closer by the day...have about 7 gallons of lacquer sprayed so far...but not done yet.

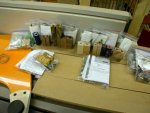
A little less than a week ago, I got the finalized orders from two clients for the pens that prompted the purchase of Denise's lathe. So, with LOADS of help from Denise, we got into "production mode" and banged out 'a couple of pens':
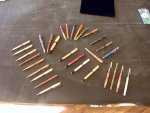
DSCN7900.jpg

That's 'most of them...and not a very good picture. I'll post a few close-ups of some of my favorites later in this thread.

All this was going on while I was working on spraying and sanding my 'project' during the week. Then when the weekend hit, and I had Denise's help fulltime, I went into pen turning mode 100% of the time. A few 16-18 hour days in the shop, and we were done!

Here's the setup I came up with to let us get through that many pens in as little time as possible, while maintaining what little sanity we have left:

DSCN7864.jpg

That's Denise sitting at a folding table that served as our assembly/prep/tool table. She'd donned her oh-so-attractive safety glasses, as she sands some tubes in preparation for gluing into drilled blanks.

Behind her is 'her' lathe that's now mounted on a quick-n-dirty, but oh-so-stable stand I threw together. To her left is the Tormek on it's reclaimed stand.

Behind that is the old trusty ShopSmith with my home-made Beall-like buffing system:
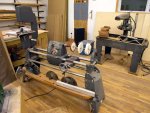
DSCN7865.jpg

....three Harbor Freight buffing wheels on a piece of 3/8" all-thread, a few nuts and washers, and presto. A Beall-like system for under $10. Well, under $10 if you forget the $2,000 I spent years ago on the ShopSmith! :rofl:

And here's a few shots of the 'assembly line' we worked from:

DSCN7833.jpg.....DSCN7835.jpg......DSCN7836.jpg......DSCN7866.jpg


Denise selected blanks and kits, based on the client lists. I'd cut the blanks to the lengths she marked on the rough stock. She'd then drill them using the appropriate sized bit (six different kits, several used two different bits each!). She'd then glue in the tubes and assemble the kits with the blanks. Working with two mandrels, I'd setup a pen to turn, then turn and sand it, rub on finish, then change mandrels and get started on another pen. When I had the next pen turned, sanded and finished, I'd remount the first pen and apply the next coat of finish. I'd then put the second pen back on the lathe to work on its finish. Once the first pen's finish was dry, I'd take it to the ShopSmith to buff it out and wax it...putting the finished pen back in the ziploc bag with Denise's notes in it. With a pen done, I had freed up a mandrel and started all over on another pen....etc., etc..

Oh yeah, I almost forgot, I also turned a few bottle stoppers with Arizona Silouhette's Stabilized blanks:

DSCN7873.jpg

...and tried my hand at the Poly-resin stoppers:
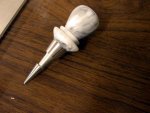
DSCN7797.jpg

I don't like that stuff AT ALL! Not only is it a pain to turn, it makes a MESS:
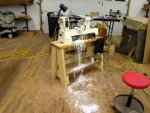
DSCN7796.jpg

Ok, I'm off to make another post with some better shots of some of the nicer pens...

Back in a bit...
- Marty (I've had my fill of pen turning) -
 
Some of our mass-production pens...

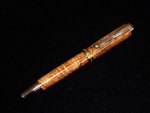
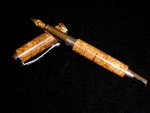
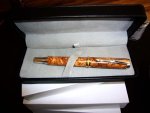
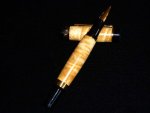
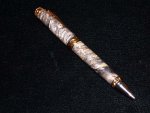
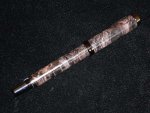
Here are some of what I consider to be the 'nicer' pens from the lot...although they all came out pretty darn nice...if I do say so myself...:rolleyes:

Berea Kits from AZS...

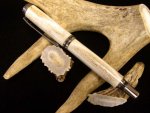
First is a Deer Antler with a Black Titanium 'Baron' Rollerball:

DSCN7886.jpg

A Box Elder Stabalized Burl on a 'Series 2000 Flat Top' Rollerball:

P1010016.jpg

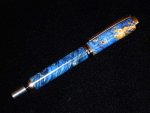
A Blue Box Elder Stabalized Burl on a Platinum 'Baron' Rollerball:

P1010030.jpg

From Craft Supplies USA...

A Black Ash Stabalized Burl on a Jr. Statesman Rhodium/22K Fountain Pen:

P1010033.jpg.....P1010036.jpg.....P1010038.jpg

Again from AZS...

A Box Elder Stabalized Burl on an 'El Grande Elite' Rollerball:

P1000984.jpg

A Black Box Elder Stabalized Burl on an 'Ultra Cigar':

P1000988.jpg

A Black Box Elder Stabalized Burl on a Black Titanium 'Baron' Rollerball:

P1010026.jpg


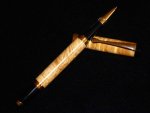
Oh yeah, how can I forget? I also had to turn four roach-clips on a stick...I mean bracelet helpers:

P1010040.jpg

Those are, from the top, Paduak, Curly Maple, Paduak, and Mexican Bocote.

I'll be getting pictures of ALL the pens, stoppers and bracelet helpers up onto my web site...some time soon. Hopefully these give you an idea of what we got accomplished.

Thanks for looking...
- Marty (useless without Denise's help!) -
 
Now that's the way to do it alright, get set up in production mode and crank them all out :clap:

Fantastic job that you guys did, the pens are real beauts! :thumb:
 
Seven gallons of Lacquer? SEVEN? I did 2000 sq ft of floor in this house, with three coats, and didn't even use seven gallons of poly! What the hack are you building, Marty? ;)

Thanks,

Bill
 
Nice turnings Marty! Are you having a party?...............Seven roach...er bracelet helpers......A bracelet party....hmmmmmm.......:D
 
NOW, it's lookin' like a Productive Shop (with some material stacked around AND some sawdust on the floor).:D Good looking Pens too.:thumb:

I was kinda over your way most of last week delivering a couple of vehicles and making the BHM auto auction and then bringing a different one back home. I was in Cullman and Birmingham, and will fly back into Birmingham and get a ride to Cullman again tomor......er....(saw the time), so I guess it will be later this evening, to pick up a motor home and drive it to Odessa. I just can't seem to get a trip on over to the Atlanta area so I could sneak off and give you a short visit.:( Maybe one of these days. These trips are sure harder on the ole "Bod" than they used to be, but got to try to get some Medical bills paid so I can try to make a little progress on the shop.
 
Nice work, Marty (and Denise). Doesn't take a lot of pens before a little lathe pays for itself, huh?

Gord, a bracelet helper allows a person to hold one end of the bracelet with one hand while fastening the clasp with the other. If you're putting the bracelet on your left arm, you'd hold the bracelet helper in your left hand with the clip attached to one end of the bracelet. The right hand can then work the clasp. I believe the idea was conceived by arthritic flower children. :rolleyes:

So Vaughn, does that mean the bracelet helper is the alternate use?;)
 
First impression: Great how you two work together. Super.:)
Second impression: Envy is wrong, but I look at all that space in yer shop and....well,,,,,admire. ;)
Third impression: Something just odd about all them tiny pen kits sitting on top of a super-sized jointer like that.
Fourth impression: Actually, a puzzlement. What is your sanding and finishing technique. I would have difficulty doing any kind of production with mine. Sanding takes as much time as turning and I wait and wait and wait between coats of laquer finish. (no, I'm not a CA fan)
Fifth impression: The pens look real fine. You don't let production get in way of quality work. :thumb:
 
Seven gallons of Lacquer? SEVEN? I did 2000 sq ft of floor in this house, with three coats, and didn't even use seven gallons of poly! What the hack are you building, Marty? ;)

Thanks,

Bill

Well Bill, Poly and lacquer are two very different products. And so is finishing a floor versus filling grain and finishing furniture...:rolleyes:

As to what 'it' is, I hope to have 'it' finished in the next week or so...assuming I don't get any more last minute pen requests. I'll be posting pics then...:dunno:


Nice turnings Marty! Are you having a party?...............Seven roach...er bracelet helpers......A bracelet party....hmmmmmm.......:D

Ok Ken, 'seven' roach clips? I only see four in that picture. I wonder why you see seven...never mind...:laugh2:

First impression: Great how you two work together. Super.:)
Second impression: Envy is wrong, but I look at all that space in yer shop and....well,,,,,admire. ;)
Third impression: Something just odd about all them tiny pen kits sitting on top of a super-sized jointer like that.
Fourth impression: Actually, a puzzlement. What is your sanding and finishing technique. I would have difficulty doing any kind of production with mine. Sanding takes as much time as turning and I wait and wait and wait between coats of laquer finish. (no, I'm not a CA fan)
Fifth impression: The pens look real fine. You don't let production get in way of quality work. :thumb:

Frank,

Regarding your fourth impression...

I turn a pen to within 1/64th (or so) of the bushings. I then sand down to within 1/128th (or so) with 150. I then very quickly progress through 240, then 320, then finally 400 grit. By that point, I'm at the bushing (or maybe 1/128th or so below).

Sanding takes MAYBE 15-20 seconds using this method. :huh:

One thing that would make sanding more complicated is if I were to add any design embelishments to the pens...coves, beads, etc. But, as you can see from the pictures I've posted, I prefer to let the wood and kit quality speak for themselves...:dunno:

I then smear on plain ole lacquer (from a glass jar that I poured into from one of the five gallon cans I have in the finishing room), using a bristle brush...with the lathe off. I then turn on the lathe (slowish speed), and run my fingers back and forth over the lacquer/pen to heat up the lacquer and work it into the wood. When my fingers get WAY hot and start sticking to the lacquer, it's time to let go and let that coat set up.

5-10 minutes later, I then buff that coat with either gray or white Scotchbrite (depending on how bad the ridges are from me working the lacquer in). I then apply and work in a second coat following the procedure above. Some pens wanted (and recieved) a third...and even a fourth coat. It all depended on the grain, how open the pin knots were on some of the burls, etc.

I never bothered to clock one, but if I had to guess, start to finish, turning, sanding, and finishing...including final tripoli/white diamond/renessaince wax buffing...each pen took less than 30 minutes.

But then you have to add in the blank prep time, drilling the blanks, gluing in the tubes, etc.


Regarding your fifth impression...

Thanks for the kind words. Denise is 'up north' delivering the pens, so I'll find out soon what the clients thought of the quality. I hope they'll be pleased...:rolleyes:


I'm off to spray some lacquer...
- Marty -
 
NOW, it's lookin' like a Productive Shop (with some material stacked around AND some sawdust on the floor).:D Good looking Pens too.:thumb:

I was kinda over your way most of last week delivering a couple of vehicles and making the BHM auto auction and then bringing a different one back home. I was in Cullman and Birmingham, and will fly back into Birmingham and get a ride to Cullman again tomor......er....(saw the time), so I guess it will be later this evening, to pick up a motor home and drive it to Odessa. I just can't seem to get a trip on over to the Atlanta area so I could sneak off and give you a short visit.:( Maybe one of these days. These trips are sure harder on the ole "Bod" than they used to be, but got to try to get some Medical bills paid so I can try to make a little progress on the shop.

Thanks Norman,

The shop WAS messy. As I was applying finish to the last pen, Denise was busy with the shop vac making the 'studio' presentable again! :rofl:

You need to try to work in a trip to Savannah. That's less than an hour away...whereas Atlanta is about three hours north of here. Birmingham isn't close at all!

- Marty -
 
Top