Island * Yet another update!

Jeff Horton

Member
Messages
4,272
Location
The Heart of Dixie
Well, I am starting to see a pattern. I am planning my next project and suddenly out of blue I start another one on the spur of the moment. I think this is the third time I have done this. I was about to start the Cherry TV stand but I really need my mortiser and I don't have a set of bits yet. Next thing I know the Island that we scheduled for down the road suddenly is being built.

island3.jpg

It will be popular and painted. Storage behind the door and an some open shelves on the right hand side. Exact size to be determined. She wants to put baskets in there. So I have to get her to find some and then size that to them. The top will be a maple(?) bench top I found at the local surplus store for $35! That was one of those grab it quick type deals. Top is a mess but nothing some quality time with a #7 plane won't fix.

I sat down while I ate lunch and pulled up the Sketch Up file and started making a couple of tweaks and added a few dimensions. Then headed to shop and pulled the poplar out of the rack and started to work.

First thing was rough out blanks. Joint, edge, rip, plan etc. I started with the legs. Had to glue them up since I didn't have any thick poplar.

101_1248.JPG

Then I spent a couple hours(?) milling the rough blanks for the all the Rails and Stiles. They are all square and milled to thickness when I quit. Ready to rip to width and start milling the joinery on them.

101_1249.JPG

Spent quite a bit of quality time with the Great Pumpkin' too. The more I use this thing the more I like it. Also learned a trick but I don't think many jointer's can do this. Somehow I nicked the blades. (When I resharpen them I am going to try a shallower angle, that will hopefully strengthen the edges some.) Anyway, I can angle my fence to the blades to make shear cuts. I was adjusting the fence to get past the nicks when I had a thought. I set the fence at an angle. Ran a board across... no more ridges! Sliding the board on a sheer cut mills off the ridges. Now I can put of sharpening now till the blades get dull. Or I need to straighten it up and run a long board across there.

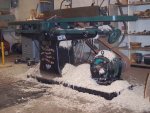
Just to prove that I do use this machine. It was clean from where I moved it last week. But that didn't last!

101_1253.JPG

Overall, I think it was pretty productive afternoon. Tomorrow I am going to work on a sled for the jointer. I have a lot of cuts of make on the ends of the rails and it's very hard to hold those pieces square against a miter gage. I think it's time for a sled.
 
Last edited:
Hey Jeff, I think there's a leak in the DC on the Great Pumpkin. Looks like some chips were not making it into the duct. :p

Looks like this will be a fun build to watch. :lurk:
 
Hey, I remember that machine from a pictorial you did of the restoration on another forum. Surely there can't be two of them with that gold lettering. I enjoyed watching the restoration process. Good to see it making sawdust.
A sled for a jointer? I've never seen one. Please post some pics when you do it.
 
Hey Jeff, I think there's a leak in the DC on the Great Pumpkin. Looks like some chips were not making it into the duct. :p

BIG LEAK! I tried tracing it down but I couldn't find the sucker! ;) DC is so big on my list. Just at $1,500 plus, it's not in the budget yet since I don't do Credit Cards. On the plus side now that I have my shop equipped I can start putting back some cash toward a cyclone.

Glad to see you're finally getting to Break in that "New" Machine. Lookin' Good.:thumb:

Breaking in?? :huh: Where you been? :D

Really, I have run many bd. ft. of lumber across there. I probably haven't posted anything with it after I got it restored and operational. But I use it all the time! It was well worth the 80+ hours of labor!

Hey, I remember that machine from a pictorial you did of the restoration on another forum. Surely there can't be two of them with that gold lettering......

A sled for a jointer? I've never seen one. Please post some pics when you do it.

Larry, I posted on Woodnet and OWWM as I was restoring it. Your probably saw it on one of those. I don't know of another one like it (yet). But there is another one being restored over in the Atlanta area. I had a virtual twin to this jointer in my shop for a while. It was went to a young man who is in the process of restoring it now. I think he is going to use the same color scheme but I don't think he has posted anything on it except a couple of photos at OWWM.

I have a 30" bandsaw that I am almost done with and I liked the colors so much I used the same on it.

Jointer sled idea was posted in jigs and fixtures. I am going to try to build it today.
 
Is your house dusty? I had an open space next to a drawer stack in our old island, and probably every day for 9 years I heard what a mistake that was. Plenty of hardware out there for pull out shelves, backets, etc... that can be hidden behind a(nother) door.

KC
 
From the title of this thread [KJB: it was originally "Island started"] I thought maybe somebody had bought some property in Dubai, and it was finally coming into existence out in the Persian Gulf.... :rolleyes:

 
Last edited:
Day two

Don't feel like I got as much done as I should have. But thats almost always the case.

Started by building the sled for the Shaper. Took some effort to get the dado for the fence square with the dado for the runner. I had to recut it a bit wider because the first one wasn't square. Not sure why either.

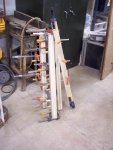
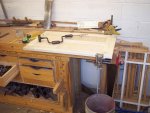
I was looking around the Lab and I found these bar clamps that I bought. These were part of a box of clamps I bought and I didn't intend to use them. So I picked up some flanges and mounted them. The only down side is that they want to slide down when released. I will probably replace these or put a spacer under them.

Sorry, batteries went dead before I could get a better photo. If someone needs or wants I will take better ones. But it's pretty simple.

101_1257.JPG

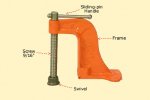
I think these would be a much better choice if you were to build one of these. But I just used what I had and it works.

1600-img.jpg

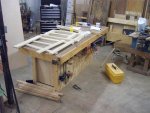
After that I to machining the tongue all the pieces I roughed out yesterday. When I quit I had all the panels cut, everything dry fitted and clamped together. Ready to glue them up in the morning.

101_1256.JPG
 
Day three

Work got in the way. Had to make money rather than do what I really want to do. Don't get me wrong. Last month was so slow I am glad for all the work this week!

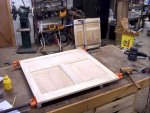
I glued this panels up this morning. We did some shopping :( while they dried. I need her to pick out the baskets she wanted so I could size the openings for them.

When we got back I figured they are dry enough to drill some holes for the dowels. I grabbed my good old Stanley drill guide and my brace, and yes I really use them. I find it only seconds faster to use the cordless drill and the augers give me better holes.

101_1391.JPG

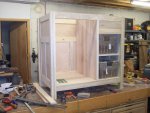
Cut a few dowel pins. Matched all my parts up and here is a dry fit. I don't have anything cut for the front rails yet. Wanted to get this together and look at a couple of things. Like exactly how I want to put in the floor. It's supper time and this is where I stand. Will probably work some more after supper.

101_1392.JPG 101_1393.JPG
 
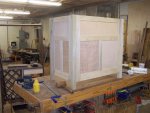
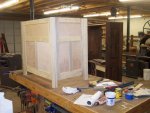
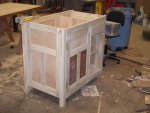
Been busy this week. Just about have this one ready for finish. Only thing left is a set of shelves for the left side and the to recondition to the butcher block top I bought for it.

Door and drawer are made. Finished them up yesterday.

101_1401.JPG101_1404.JPG
 
A little embarrassed at how long these have taken. I just haven't found the shop time I normally have. Being known as the guy that gets so much done in short periods of time, these seem to have taken forever!

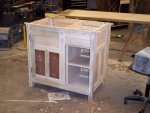
Doing the touch up, fillings some knot holes and sanding and all that final stuff before paint. I think it is ready for paint now. I have two spots that need a little more sanding but I am hoping... but not expecting to get a primer coat on it tommorow after Church. But I know how that goes too. :rolleyes:

assembled1.jpg assembled2.jpg

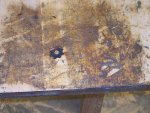
Now for the fun part. I had purchased a maple bench top at the local salvage place. They bought an old factory for their store and I assume this was left behind when they bought it. They had it marked $40 and I jumped on it. I couldn't buy the maple around here for that. And besides we can't get hard maple anyway! But it was rather rough.

top1.jpg

This photo is actually have I had tried a couple of things to see if I could clean it up. So it actually looks a lot better here. Nothing I tired really worked well. Hand plane did but I could see this taking forever. ROS was slow even with a 50 grit on it.

Then I remember I had bought a used belt sander to replace mine that died. It is one of those last resort tools for me. I don't like them but they are THE tool sometimes. This turned out to be the case here. I picked up a couple of 50 girt and 80 grit belts today. Came back and after about 30 minutes I was ankle deep in lint, well sawdust but it looked more like lint. But I was seeing wood again.

So i grabbed my saw and cut it down to length. I then switched to the 80 grit and went to town on it. To my surprise I didn't really mess up the top. It was fairly level to the touch.

Spent an hour or so sanding and planning it with my #7 to knock down any high spots. When I finished I decided since it was so dry to give it a good thick coat of BLO. And this is what I ended up with.

top2.jpg

Got to say I am pleasantly surprised. I never expected it to look this good. We wanted it to look like it was original to house.... well everyone thinks the house is old, even though it is new. So we wanted this to add to the illusion that our house is an original old cottage. I think it still will because there are some marks that I would never get out. But it looks a lot better that I ever expected. Maybe I should have stopped sanding earlier? :D

I will give it a few days to dry and when I spray the Walnut Cabinet I working on I will spray a finish on this one too.
 
Top