SU Adirondack Chair

Irv Graham

Member
Messages
64
Location
Golden BC Canada
Hi
Please find attached my zip file showing a sketchup style chair which I will be building. I have built three milled from western red cedar from our woodlot, but didn't like the style and are not good enough to show. Learning to design, and build with sketchup is also a quest. Your comments are welcome.
Cheers from the Canadian Rockies.
 

Attachments

  • achair build.zip
    73.1 KB · Views: 67
SU Chair

Dave I was looking for comments both on improving the design of the chair and also suggestions to make the sketchup modelling process more effective and efficient.
Irv
 
Well, I like the design of the chair. It looks like it would be comfortable and a fairly easy build.

The model has some issues, however. I suspect a number of them are due to the low precision setting and the fact that Length Snapping was enabled. Also, Profile edges shouldn't be turned on while you're drawing. Those thick lines along with the Units settings make it tough to draw accurately.

Going by scene, here are a few other things I've noticed.

Start Cutting With precision set higher (1/64"), the arm rest length is shown as 27 37/64". This dimension is actually not measuring the overall length of the arm rest. It dimensions out to 27 39/64". Seems like nit picking but I doubt you'd really cut the arm rest to that length on purpose. It might not matter in this model but sometimes being off just alittle on one component can throw off the rest of the model developing cumulative errors.

Also, the curve on the inside of the arm rests shows facets indicating the line segments dividing those faces have been hidden instead of softened. Although the curve will still be made of faces, softening will make that less apparent. If you drew the shape of the arm rest and then used Push/Pull, those edges would have been softened. I'm guessing something was done differently.

The two outer slats for the back rest have some reversed faces and in the same area, an additional curve line that is out of place. I'm curious about how you drew these parts.

Look closely at the ends of the angle legs. There are some unneeded faces at the back end. Again, I'm curious about how you drew these components.

Also, for some reason, these legs are not related components. They are, instead, groups. This means that to fix them, you'll either have to fix each one individually or fix one and then replace the others.

The piece that supports the backrest at arm rest level is missing a couple of faces.

Building Since the components are just copied over, the same problems are present.

Relax The texture you've applied is applied to the outside of the components and not to the faces themselves. This makes it impossible to correct alignment of the grain. If you edit that material and change it so the dimensions are 4" x 4", you'll see that most of the elements in the chair have the grain running the wrong way.

To fix the problem, you should delete the texture from the In model section so that everything is set back to default colors. Then start again with applying textures. Open each component for editing and then apply the texture. If the grain alihgnment is incorrect, select a single face, right click, choose Texture, Position. Rotate on the expanded view of the texture and choose Rotate, 90°.

All of this was meant as constructive. I hope you don't think otherwise. If you want more specific information about any of this, feel free to ask. Also take a little time to peruse the Design forum. I think you'll find some things that might help. Also check out Design. Click. Build. on the Fine Woodworking site. I've done a number of posts there most of which have demo videos linked to them.

Keep plugging away. You're getting the hang of it. :thumb:
 
SU Chair mgmt

Thanks Dave for your comments. You have pointed out problems that will take awhile to work through on SU. I believe my main problem was not creating proper components(I created groups) from the beginning. Other problems showed up when I had a sandbox layer of 1 inch by 1 inch squares on the start up scene to help layout curves on individual pieces. Dimensioning with these numerous inference elements caused errors which I didn't fully fix. I removed the sandbox layer later to simplify the model.

One lesson learned is to build the model creating components(not groups) as I go and let them carry through the different scenes.(easier to modify or correct). I will work on the other lessons.
Thanks
Irv
 
Irv, I don't think the sandbox tools are at all appropriate for use in laying out curves. They weren't intended for that application. If you need some guidance in laying out your curves, drag out some guidelines with the Tape Measure tool. Also it may sometimes be easier to draw a larger surface to work on and then cut away the waste.
 
The reason I was trying the sandbox tool, was as a concept to allow printing out individual pieces with a proper sized grid as a full size printed template, hence marking and cutout of pieces, could be easier. I agree now the sandbox wasn't the right tool.
Irv
 
A grid behind the parts would be a handy thing in some cases. If you want to do that, I think the best thing would be to make a couple of crossing linear arrays of lines. Make a component of them and put them on their own layer. AS you found out, lines in the background can be annoying if SU's inferencing engine is trying to inference to intersections on them. I wouldn't even draw the grid until after completing the parts arrangement.
 
Updated Plan for Adirondack Chair

Thanks Dave for your sketchup advice, attached please find the SU zip file that improves the following:
1. Has a 1"x1" grid layer with dimensioning on separate layer on startup scene.
2. Fixes component items that had reversed faces etc.
3. Simplifies the Relax scene as a material solid color on all components. Please note that wood grain has been sacrificed, as it was time consuming to reorientate all faces of each component according to grain direction.
If it can be build better or designed in SU better, your comments are always welcome.
Cheers
Irv:thumb:
 

Attachments

  • achair build2.zip
    86.8 KB · Views: 18
Adirondack chair image

Here is an image of my relax scene, the other scenes show the start cutting inventory, next two scenes the building sequence and the finished product. I put the file in zip format, as it was too big for this forum.
If the file is unzipped, it then can be loaded into sketchup.
Hope this helps
Irv
 

Attachments

  • achair build2.jpg
    achair build2.jpg
    68.6 KB · Views: 12
Irv,

I made some comments directly in you model.

In addition, I think you should improve the precision settings and get rid of Length Snapping. Se my first post to you on this. I think Length snapping is causing you trouble with accurately placing the parts in the assembly.

As far as using wood grain textures go, they really aren't that difficult to apply if you open the components for editing before applying them. Read the help files about materials and adjust orientation of them.

Keep working at it. You're getting it. :thumb:

Dave
 

Attachments

  • achair build2.zip
    95.2 KB · Views: 8
Adirondack Chair Design Update

Hi Dave
Attached is the updated SU file which should have most elements you have identified, including following tricks::
1. Finally turned off hidden guides
2. Changed dimensioning method to remove snapping
3. Removed excess lines, surfaces, from components
4. Removed excess in model materials and applied texture color to surface of each component
5. Adjusted position of components in building the chair(was going to reshape components but that is in another model file)
6. After this exercise I am going to the shop to create sawdust.
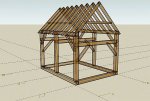
(Working on a new model for timberframe shed, see jpeg, work in progress not ready for analysis)
Thanks for all your kind assistance.
Irv
 

Attachments

  • achair build2.zip
    70.6 KB · Views: 7
  • TFSHED3.jpg
    TFSHED3.jpg
    51.1 KB · Views: 10
I really like that chair. Too many Adirondacks have straight backs and are not quite as comfortable as one with some curve in it. A little extra work for that makes all the difference in the world.

Jerry
 
Thanks Jerry for the comments. I'm sure there are hundreds of different designs out there, but I like sitting in the chair with the view to contemplate and rest comfortably. The only difficulty is having the burst of energy to raise yourself out of the A chair.
The design was from one of Norm Abrams older books, and modified for the shape and appearance.
Have a Great Day
Irv
 
Top