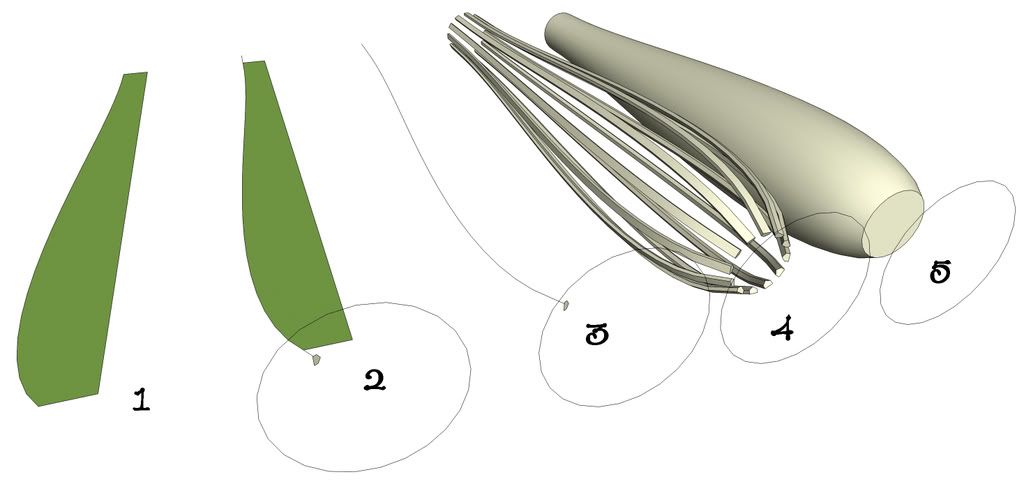
Jerry, if I followed your description your method does sound like some extra work. Take a look at the following image and description. I ommitted the rest of the spindle for this.
#1 Is the profile from this section of the spindle. The profile was traced from an imported image copied from a PDF file. The original profile was at the location of #5, the turned spindle. I copied the profile over to position #1. Had I been doing this for a model and not for a tutorial, I'd have only made the one copy.
#2 Both ends of the outer edge of the profile were extended a bit. The length of the extension is not critical but you need to make it long enough that the reeding profile will extend fully beyond the ends of the turning. The profile will become the Follow Me path. I drew the reeding profile at one end. It is important to draw the profile so that it is perpendicular to the first segment of the path. I also added a circle perpendicular to the centerline of the profile. The circle's center will be used for the center of rotation later. It is easier to draw that while the centerline exists. I could have used guidelines to identify the center as well. I just happened to have the Circle tool active because I was using it to create the path for the turning.
#3 I've deleted the unneeded stuff from the profile.
#4. After running Follow Me on the profile of the reeding, I selected the entire extrusion and made a radial array with the Rotate tool.
I didn't show the last few steps but they are easy enough to follow. The extrusions were moved over so they are centered on the turning. Then everything is selected and Intersect with model is run. Finally, the waste is deleted and face orientation is corrected as needed.
When starting this, it is a good idea to move the copy of the profile a known distance. This will make it easier to move the reeding extrusions back so they are properly centered.


") See Tim's comment. He's right on.
See Tim's comment. He's right on.