Ok, after a bit of a hiatus (mostly due to an ongoing laminate floor install for my folks - they're getting off cheap with the new laptop I'm using to write this - very, very cheap, for 'Tis nary a straight wall nor square corner in their house to be seen) I've made some progress.
I've also been buying clamps. A couple at Woodcraft on the way home from 5 barns, a couple at a trip to my local Lowes and a couple while at the Home Depot near my folks while doing that laminate floor install. Just barely enough for this project now!
First, I learned some basic arithmetic. Namely that 8" - 2" != 7". ('!=' is the "not equal to" operator in the C programming language among others.) Spacing my #1 square drive trim head screws down the height of the carcass worked out just about perfectly with 2" on top and bottom. I remembered I used 7" before ... and then promptly marked and drilled and screwed using 2" to 8" markings on the large speed square without figuring out why the marks didn't match at the bottom.

Oh well, it is done now. Good thing this is for the basement. If it ever gets put into living space I'll just make sure to put it in a corner.
Also, Ned was helpful and figured out that I cut my top and bottom pieces exactly the correct width of the shelf unit ... but not including extra width to fit into the dadoes.

We came up with a plan - I went to Lowes and got a 2 by 10 stud. A couple crosscuts on the RAS, some ROS work and learning that my 18V ONE+ Ryobi planer is just about perfect for edge jointing 2 by dimensional lumber, and I had some pieces to fit into the dadoes. I'm going to lower my casters 3/4" and hopefully the bottom platform will slide under the 2 by 10 pieces and still clear the door to the garage from the basement.
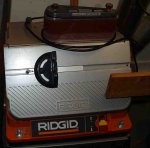
Oh, putting these 2 by 10s in led to my very first all-on-my-own successful use of a tap! The 2 by 10s were just a hair thick for the dado, so I figured that the Ridgid oscillating spindle / belt sander (in belt mode) was just the thing to use. A 2 by 10 is about the capacity of the belt (ok, it is really closer to 9" capacity, a little touch up at the very end was needed) but the built-in stop thingee subtracted ~1.5" usable belt length. What I did was to tap 1/4"-20 into the bottom of the miter slot, and screwed in a long bolt with one of those really long nuts attached (I think they have a real name - for 1/4"-20, the total length of the nut is ~2"). Then the little baby miter guage that came with my HF bandsaw slid up to use that nut as a stop and I could use all of the belt for sanding!
I decided to use some free pine plywood for the top. The inside (which won't generally be visible) has seen better days. I probably should have went and bought another 3/4" birch panel. Oh well, it is done now.
Ok, I need to add some pics at some point. Need to install the GIMP on to this new puter first though.
I'll try to add pics soon!


 Alternatively, my wife is taking this Thursday and Friday off, so I can take the econobox car - maybe I'll swing out the the not-so-local HF on the way home Friday.
