4' x 7' Pantry Project

Bryan Cowing

Member
Messages
728
Location
Ridgetown, Ontario, Canada
A co worker talked me into building him a large pantry this winter during layoff. He wants it built in 2 pieces to make it easier to get into the double wide home. I found a pic of the general style, 4 doors and 2 drawers, he wants it all raised panel, soft close hardware. So far I made up a rough sketch, used a cabinet door calculator and ran the rail and stile parts through the shaper. I now have the panels glued up and ready for raising on the shaper with the new Grizzly 5 wing cove panel raiser that arrived yesterday.

Black-Kitchen-Pantry-Cabinets-Ideas.jpgcabinet will look like this but wider and taller, in red oak .
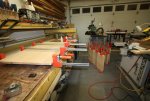
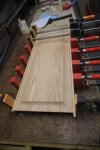
IMG_7071.jpg4 doors and 4 side panels to raise

IMG_7065.jpgmy new griz cove panel raiser, :thumb:
 
Wow some cutter. I am looking forward to watching this event play out thanks Bryan for sharing it with us. Those look like pretty large panels for doors. So all solid wood no ply eh.
 
Wow some cutter. I am looking forward to watching this event play out thanks Bryan for sharing it with us. Those look like pretty large panels for doors. So all solid wood no ply eh.
sides and doors all "Red Oak" raised panels. I made the stiles on the side panels wider so I can drill for shelf holes, cut dado for the back panel, etc..
 
well i guess my lookers fooled me this time.. the pics looked like ash bryan but i see its red oak.. did you notice any differnce in a 3 wing cutter over the 5 wing? should be smoother in the 5 wing
 
cut too much off!!

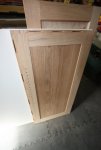
Mistake #1, cut 3/16" too much off the panel size :huh:, so I have to add a wee bit too each side on 3 panels. During assembly, one panel was showing a slight gap. One of the problems that crop up because I'm using space balls. With less wood in the groove, an undersize panel or blow outs are easily seen. :doh:

IMG_7091.JPG
 
Oh my bad. So these things happen to pros too. Did not even think one could fix it so glad you showed how.

sent from s4[/QUOTE
I have had big blow outs, 1/2" or so deep, so saw it back an inch, glue on a strip, resize and re run on the shaper. Oak seems to be the worse for splintering off. I spend a lot of time trying to get the grain patterns of the several boards that make up the panel looking nice. Best in the centre with the flame of the grain running the same way in the boards. Then add strips to the sides to bring to final width.
 
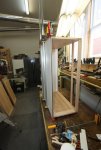
Working on the base cabinet, it's upside down and I'm doing the glue up of the drawer face frame. Temporarily using the base cabinet as a jig to position the face frame parts. Floor, back wall of the base is 5/8 melamine. Once the face frame for the drawers has all it's part made, then I can glue up the base.

IMG_7094.JPG
 
Bryan i am curious as to how u going to secure the side panels to that melamine back? Biscuits? Scratching my head. Thats chipboard right? You got me stumped. I did not realise you were using raised panels for the sides. Alan B did this in his kitchen and i think its a cool looking design for an exposed side. Beats plain ply.

sent from s4
Dado + biscuits. I wish my Lamello had a mechanical adjustable fence! panel is upside down!

IMG_7096.JPG
 
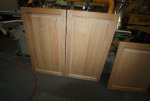
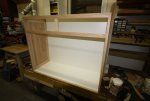
One done except for adding the oak base. Working space is tight, :rolleyes:only a small area left in the shop for storage of project pieces. A second TS is handy at times to have set up with a dado or other blade. I think I have 2 too many toys in the shop :bonkers:


IMG_7099.JPG

IMG_7098.JPG
 
Top