A Little Upgrade..

Won't be long and we be doing a few drawers...
Then I will need Glenn to hop on a plane to give me a hand. :D

Hope everyone is getting a little shop time.

Sooo tempting :). I really like the door design versus the scale of the carcass. Take it slow and steady. Its hard to "rest up" but, in the long run you'll be glad you did.
 
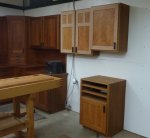
A Few On The Wall

We finally get to put a few on the wall...
And I'm starting to get a bit of my floor space back.
With this knee shop time is still pretty limited.

3 uppers1.jpg 3 uppers 2.jpg

Now these three doors will get the final BLO bath.
With any panel door I pre-oil the panel so no raw wood is exposed during seasonal changes.


I hope everyone has a safe and Happy Holiday Season!


.
 
Just catching up on your thread Gary. Been a while since i managed to follow but its sure looking good. You should know you have the wheels turning in my head with all this inspiration to sort out the shop space and storage. Those cabs look real good. All the best to you and your family over the holidays. Hope the knee co operates and heals well.
 
Xmas Edition

I hope Santa was good to everyone yesterday...

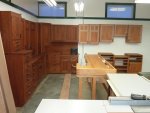
The last of this first phase are on the wall now.
Lowers are ready to have a little electrical run through them get get power to my mortiser.
She is starting to come together!

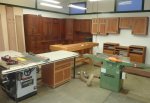
I have moved my general dust collector for these pics so one can get a little tour of this corner of my shop.
As my lumber rack is now off the wall I have a couple of bigger pieces of wood on the floor.
In my Neander Haven there is a chunk of 12/4 cherry and in front of the new cabinets I have a nice piece of figured Bubinga 8/4 about 24"X 13'.

1.jpg

3.jpg

My stationary tools include a uni saw and a general canada 8" jointer with a byrd head.
From the jointer to the bench is around 65" and if I ever need more outfeed I would just move the bench 8" back.
This has only been done a couple of times.
The bench was built to my specs by LN a couple of years ago.
The mortiser will live on the middle cabinet with the other two being outfeed tables.

2.jpg

Now to make a few tops. And when Glenn gets here a few drawers....:D
These next tops will be out of maple ply with cherry trim. The cherry ones I have at my Neander haven look great but dust shows badly...

Hope everyone is getting a little shop time over the holiday season!

.
 
Last edited:
Ah, its coming along nicely. There's nothing like a few days off to get caught up on things that have been patiently waiting for us.
 
Thanks Glenn.
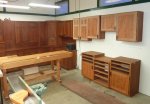
Even got the doors all oiled and back on now.
Now we can start to move some of the tools into these uppers.. :)

4.jpg 3.jpg

You got to love it when a plan starts coming together...


.
 
I've been following your work Gary , you have some great work and some ideas that have got my wheels turning also .............MB
 
Gary you sure inspired me to sort out my shop.

Question though is that blo mix you put on the last batch going to darken to the same tone as the others or is this wood variation we are seeing. The latest look lighter even with the latest coat?

I like what you have as a layout but its a long way around to the table saw front for a quick cut. Ofcourse assuming you on the cupboard side of the bench. :)
 
Thanks Rob,
The cherry will darken naturally as time goes by, something to do with the uv rays I believe. The dark cabinets looked like the new ones a couple years ago..
Blo just makes the cherry colour more vibrant.
My shop is divided into work sections. The bench is just for hand tool work. My pieces when they get there have already been machined to size.
The main work area is around the tablesaw. My jointer is to the right and planer to the left of it.
My assembly table is in this area too, which makes a square. Great workflow for a one man weekend woodworking warrior.....
 
Drawer Time

So with the knee being screwed up still I don't want to be hauling 4X8 sheets of ply around to make some tops...
Plan B will to be to get a few of the drawers out of the way.
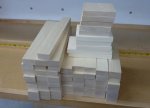
First 6 rough machined.

drawers 1.jpg

Spent the last of the night running these again through the jointer and planer.
We are a thick 1/8" from final thickness.
Final dimensioning will be done in a couple of days just in case these move a bit. And a few will...

Glenn have you got that plane ticket??:D
We got a few drawers to do in a couple of days...


.
 
Drawer Time....

Happy New Year to everyone!
With my knee still screwed up I thought it was not a good thing to be hauling 4x8 sheets of plywood around my shop to do a few tops.
So instead we will do a few drawers.

These drawers will have through dovetails, with the boxes made of aspen.
All the parts machined and cut to size for the first six.
I have spent the time to mark and set them in order so no grain will be running the wrong way.
This aspen really isn't going to be an issue, but I have got into the habit which really helps with other woods.

drawers 2.jpg

I love to build little toys for the grandkids.
But it seems the cut offs from my projects are a bigger hit with them than the toys....
We will be a hit when we go over to the kids house next time.

drawers 3.jpg

The backs of the drawers will have a sliding dovetail joint.
Sides go to the back of the cabinet but the drawers will only be 14" deep.
The extra length will help the drawer not to tip a bit when being open and will let me know how far only to open it.

drawers 4.jpg

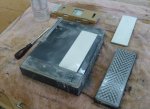
With the drawer parts done we have to sharpen a few tools.
I use shapton glass stones. 1000 and 16,000 will be needed to put a new edge on the chisels and plane irons.

drawers 5.jpg

And a quick shot of the hand tools I use for dovetailing....

drawers 6.jpg

I haven't done a dovetail in probably a year so I want do a few practice ones.

drawers7.jpg

Keen eyes will see a few things went wrong with this first one..:(
Should of taken a couple more swipes with my 4 1/2 to remove the pen and scribe lines and when I was doing the left shoulder I screwed it up...
And the shoulders are a bit heavy for the pin size. But all in all not bad for the first one in a year....
Working with this aspen for the pin boards is not my favorite thing. It's pretty soft.
To help with this I have a set of chisels that are ground to 17 degrees.

A couple more practice ones and will will see how we can butcher a real one...


.
 
Last edited:
It's cheap so thats why I use it Bill... And you are right how soft it is.
Downside of using it is your tools have to be real sharp as it will tear rather then slice with a not so sharp chisel..
It's really a test of ones patience when using it for drawers.
That why the 17 degree angles on a chisel. These angles can't be used on a wood thats hard and for sure can't be used to take off big chunks, the tip will just fold over.
Using it for tail boards I really like as the end grain the chisels see is very minimal. Especially if one like real small pins as I do.
 
Last edited:
Tails...

So the next little while will be quiet in my shop. No tailed tools...
Tonight we started on the tail boards for these six drawers.
Lots of different ways to do a dovetail. This way I am comfortable with and most times real happy with the result.
Tails first for me.
Good lighting is a must... I have a bench light to give these old eyes some extra help.

With all my stock cut to size I first clean the edges up at my shooting board.
This makes the scribed lines more visible.
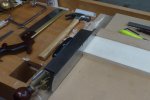
dovetail 1.jpg

Next we adjust the depth on my tite mark gauge and scribe some line around the tail and pin boards.
These will be my reference lines when sawing and using the chisels.
The chisels will sit in the scribe line to give one a nice straight baseline.
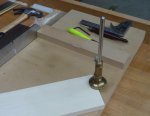
dovetail 2.jpg

I put a little ledge on the backside of the tail boards. This will help line the tail board up with the pin board.
Makes scribing the pins a snap. For this I use a LN 140.
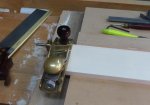
dovetail 3.jpg

To mark out the layout of the pins and shoulders I use two dividers.
One set for the shoulders and one set for the pins. If I use two the they will be set for all the layout of these drawers.
No going back to rest anything.
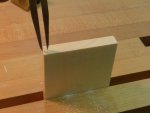
dovetail 4.jpg

After the shoulder points are marked we step off the two pins (starting from the shoulder hole. And then step them off from the other side, once again starting from the shoulder mark.
This gives me the width of the pin. Wider pins we open the dividers up tiny ones we close them a bit.
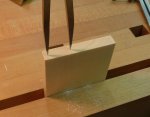
dovetail 5.jpg


To give me my layout lines I just put a pen in the tiny divider hole and use a dovetail marker.
For soft woods I use the 6:1 side.

dovetail 6.jpg

Before I do any sawing I make sure the board is level. Level, not square to my bench. It's not level....
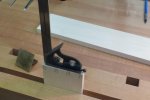
dovetail 7.jpg

When I saw I do one angle first and then go back and do the other one. I find I am more consistent doing this.
After the sawing most of the waste is removed with a fret saw. The closer one gets to the line, without going by the baseline, the quicker the chiseling is...
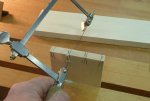
dovetail 8.jpg

Next we lay the tail board level on its side and chop off the shoulder.
Once again the closer we are to the line the quicker the cleanup...
A sharp chisel is used to clean up the shoulder.

dovetail 9.jpg

And with a bit of cleanup with a 17 degree chisel we have one tail board..
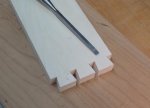
dovetail 11.jpg


Can't beat a night in the shop and all you hear is the radio.:D
The next few nights we will do the other 11 tails boards and then go on to the pin boards.

.
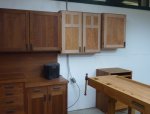
 
Gary you make it seem effortless. ;) thanks for showing us how you do it. Following along :)

Me thinks between you and Allen you two have inspired a bunch of shop reno work.;)

Sent from my MB860 using Tapatalk
 
Id not insult gary like that.
garys shop is a display of what fine woodworking and excellent craftsmanship can produce.
my shop is arranged for production work(on my level of craftsmanship,again, not comparing it to the garys of the world) and mostly for my handicap of being neurologically impaired.
I do believe we have one thing in common.
I agree turning on a radio in the shop and enjoying music while you work is tops.
 
Top