Over Bench Storage

Rennie Heuer

Moderator
Staff member
Messages
11,961
Location
Constantine, MI
Most of you who have either visited my shop or seen pictures know that it is not really large and I like to keep it neat and somewhat organized. Well, one of those things has not changed, but the other two have taken a turn for the worse. As I put more and more projects behind me I am accumulating more and more lumber, jigs, templates and tools. What I am not getting is more space to keep them in.

So, I am undertaking a few projects to, at least, partially remedy the problem. The first thing to tackle is to find more places to put things. I have always been aware that I have a lot of under utilized spaces under tools and over the work bench. The most obvious seemed to be under the drill press and under the drum sander. There's loads of available drawer and cubby space to be had there for little investment. Also, there are lots of ideas on the net for making good use of that space. So, those two are definitely on the schedule. There are also similar opportunities beneath the planer and under the TS extension table. The planer (DW735) has a remote chance of being upgraded someday so I think I'll hold on that. The TS extension has oodles of space but I have a right tilt saw (so the base access is on the right side and opens under the extension) and I also have the TS on a roller base with a member that cuts through that space. Any storage solution for that space will have to take those things into consideration.

Needing to be encouraged with a quick win I decided to go with the over bench storage first. Mostly because I already have the casters, a sheet of 3/4 birch, and enough red oak for the doors and face frame in the shop. So, $35 worth of 2x4 is all I needed to buy. The bench sits in front of the overhead door so everything must be free standing.

Solution #1 - Over the bench storage
Having something hanging over the bench is not optimal. It can get in the way or make you feel claustrophobic. My bench, unlike the one pictured here, has a tool trough that runs the entire width of the bench so the actual work surface is only at the front of the bench. I also decided to use a cantilever design with casters. Now, if there is an "airspace" conflict it can be easily and temporarily solved. The last consideration was that it could not be taller than the bottom of the windows in the door. They provide the only natural light that gets into the shop.

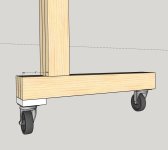
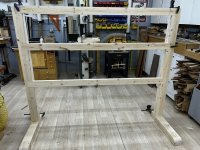
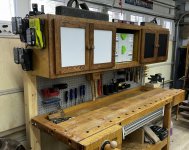
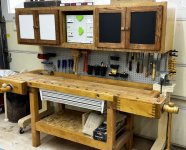
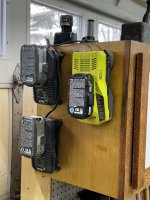
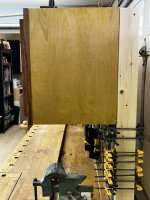
Here's what I came up with. For the moment it provides storage for the Domino, hanging space for small oft-used tools, and some cabinet space. I'm thinking of maybe adding a plane till. As always, comments are welcome.
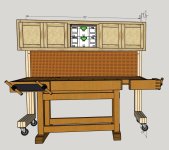
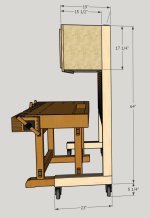
Over Bench Cabinet front.jpgOver Bench Cabinet Side.jpg
 
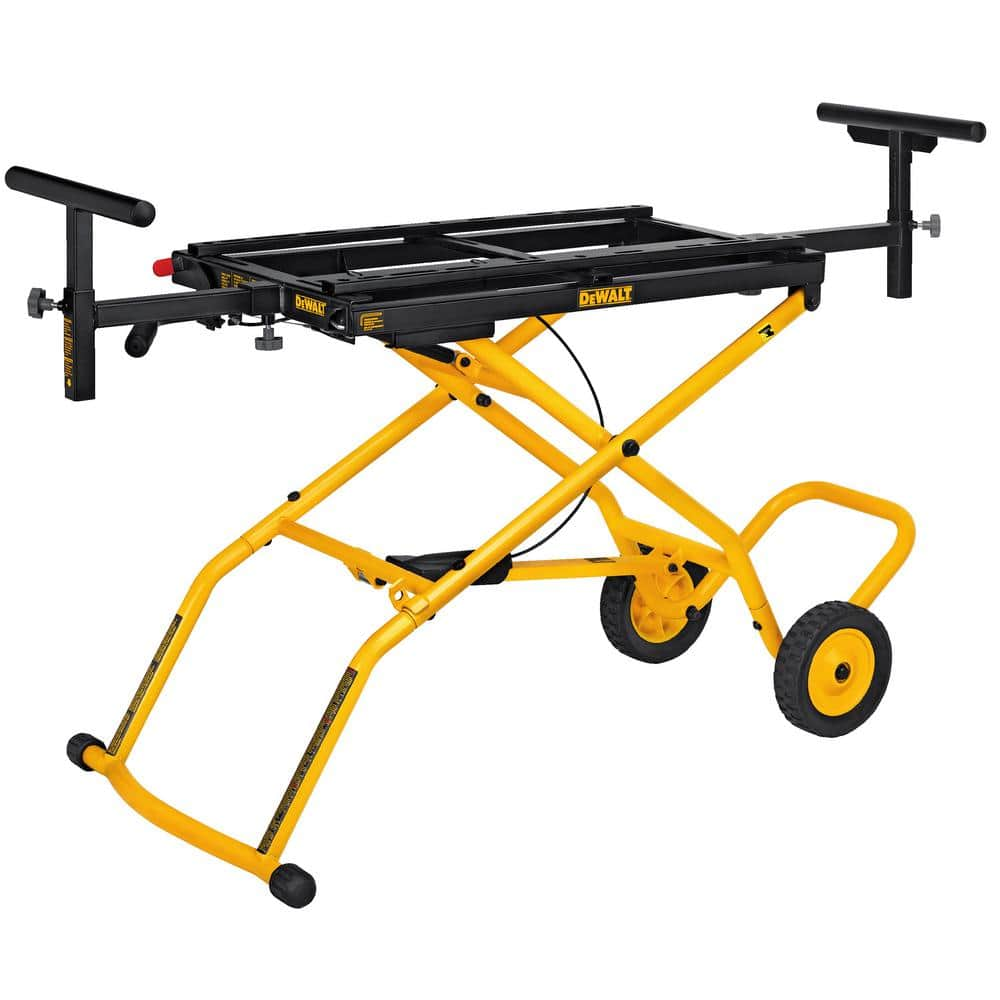
I put my DeWalt 735 planer on a Delta Miter Saw/Planer stand, but the new DeWalt version of the same stand is actually better than the Delta that I have.


You will need to mount the planer on a piece of plywood, then the plywood to the stand, but this is relatively easy. The rail spacing on the stand just doesn't match the hole spacing front to back of the planer mounting holes.

Putting the planer on one of these stands lets you fold and then stand it up on end in the corner (needs less than 2 sq ft of floor space) when not in use, and it rolls around easily like a hand truck making it easy to move to the work and set up or fold and store. I do my planning outside my shop in the driveway, so this makes that 95 lb planer easy to roll out and back, and gas springs in the stand help you lift it into working position and fold it back up when you work is done. The stand includes extendable rollers for supporting the long work, although I have the in and out feed tables, so I use them both when planning the long stock.

I have and use the chip collecting hose and barrel cover that was once an option, and I keep an open end plastic 55 gallon barrel behind my shop that I use for collecting the chips. Although DeWalt seems to have discontinued this option, they do sell a Black & Decker leaf collector hose and barrel cover for one of their leaf vacuums that seems to be identical to the DeWalt version once available for the 735. The hose and barrel cover that I have has worked great for me, except for when the string wasn't tight enough and I got chips in my neighbor's pool, (but I cleaned them out quickly).

Charley
 
Overall that looks like a fabulous idea. I'm no engineer but have a bit of a pucker-factor over the tipping backwards potential if the cabinets to not contain a static load. I tend to be over-cautious. Probably due to growing up where the earth moves without warning. :D
 
Overall that looks like a fabulous idea. I'm no engineer but have a bit of a pucker-factor over the tipping backwards potential if the cabinets to not contain a static load

It does potentially look a touch tippy towards the back side depending on the loading.. Although the cabinets might add enough forward weight to make it ok.

I'd also consider some diagonal supports between the uprights and the bottom legs...
 
Overall that looks like a fabulous idea. I'm no engineer but have a bit of a pucker-factor over the tipping backwards potential if the cabinets to not contain a static load. I tend to be over-cautious. Probably due to growing up where the earth moves without warning. :D
It does potentially look a touch tippy towards the back side depending on the loading.. Although the cabinets might add enough forward weight to make it ok.

I'd also consider some diagonal supports between the uprights and the bottom legs...
I thought about the tipping possibility, but I'm thinking that the weight of the cabinet, especially when loaded, should keep it stable. However, I do have an alternate design that addresses this.

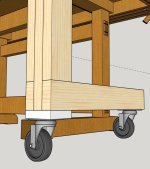
The joint between the two will be very strong so I'm thinking a diagonal brace might not be needed, but can easily be added. That little white block is there to raise the back of the leg to maintain level - since this is going in front of the garage door I have a slope to contend with.

Over Bench Cabinet Alt leg.jpgOver Bench Cabinet Leg joint.jpg
 
That lap-style joint will be hella-strong. The cabinet looks to be made of 3/4" stock or thereabouts so it is easy enough to guesstimate the weight. I like the 4" move of the vertical but again, I am no engineer. I just know catching a near-200 pound tipping drill press head when the mobile base hits a piece of spoil on the shop floor is no joke. Good thing I had some spare shop pants handy :poop:.
 
Last edited:
Ditto on that 4", Really nice job on the drawings. I never had considered that type of lap joint but am going to file that away for future use.
 
Made some headway on this today.

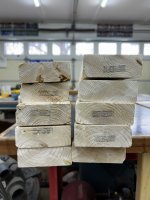
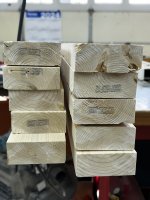
First order of business is to plane the two faces of each board. No jointer as I am not concerned with them being flat, just parallel.
IMG_3222.JPEG

Then a trip to the jointer to make one edge flat and 90 degrees to the two faces. Then ripped to final width at the TS. It should be said that the dimensions are irrelevant. I just need consistency.
IMG_3223.JPEG

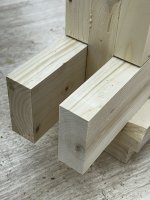
The leg to foot joints will be a huge mortise and tenon. Once the leg is glued and screwed in place I will G&S a block behind it to complete the joint.
IMG_3224.JPEG

Test fit!
IMG_3225.JPEG

Next weekend I'll do some sanding, edge routing, and final assembly. Then the cabinet!.
 
Made some headway on this today.

First order of business is to plane the two faces of each board.
No jointer as I am not concerned with them being flat, just parallel.


Then a trip to the jointer to make one edge flat and 90 degrees to the two faces. Then ripped to final width at the TS. It should be said that the dimensions are irrelevant.

Your first sentence I thought you didn't have a jointer or wasn't using one. Second sentence, tally ho to the jointer we go! Just confused (seems to be my perpetual state of mind).
 
Your first sentence I thought you didn't have a jointer or wasn't using one. Second sentence, tally ho to the jointer we go! Just confused (seems to be my perpetual state of mind).
No problem, my explanation is lacking detail.

I did not face joint the boards as flatness of the faces (taking out any warping) was not important. I only needed the faces to be parallel to each other so a few runs on each face through the planer was all that was needed. I did need the edges to be square to the faces so I used the jointer to get one edge square then ripped the opposite edge. This gave me boards that were S4S at any given section along the board, though the boards themselves may have a little curve or warp to them. As the primary structures (legs and feet) are made up of three parts glued and screwed together, I can manipulate the placement, clamp and coax, so all the edges line up and imperfections cancel each other out. It should also be said that this is not fine joinery and "close enough' is just that.

I hope that is a better description of the work!
 
Last edited:
A 'no pic' update.

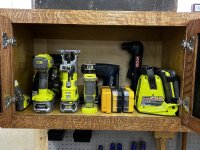
The cabinet is complete and mounted on the stand. Doors are complete and being stained and finished. I hit on a few minor changes and improvements during the build that I will cover when I get the pictures - probably this coming weekend. I've already started moving things into the cabinet. Each item that goes in requires some forethought as I've not had storage on this side of the shop before. So, almost everything that goes in may require a change in work flow/habits.
 
Finished! - almost

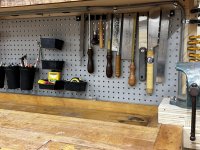
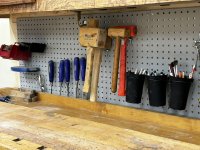
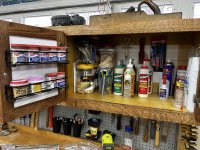
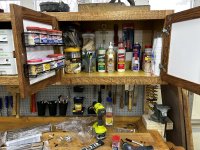
Pretty much complete. I'll move a few things around as I get used to using it and I want to add a small plane till to the right end, opposite the charging station.
The white panels are whiteboard, the black are chalkboard. Good places to jot down a measurement or reminder! I may add two additional "spice racks" in the glue cabinet as I know my wood filler collection is likely to grow. A future project will be adding drawer or cabinet space below the bench. The vice you see does not get used where it is, it just stores there. It actually clamps in the tail vice when being used.

IMG_3243.JPEGIMG_3249.JPEGIMG_3250.JPEGIMG_3251.JPEGIMG_3252.JPEGIMG_3253.JPEGIMG_3254.JPEGIMG_3257.JPEGIMG_3258.JPEG
 
Wow, what a fantastic addition to your bench! I'll be borrowing some ideas for my tool cabinet project. I really like the whiteboard/chalkboard addition. I have a whiteboard I've been meaning to mount in the shop, but didn't have a place for it, it may get re-sized to fit on the inside of one of my doors.
 
Wow, what a fantastic addition to your bench! I'll be borrowing some ideas for my tool cabinet project. I really like the whiteboard/chalkboard addition. I have a whiteboard I've been meaning to mount in the shop, but didn't have a place for it, it may get re-sized to fit on the inside of one of my doors.
I got it at Lowe's - 2 x 4 panel, chalkboard on one side, whiteboard on the other. I think it was about $12.
 
Top