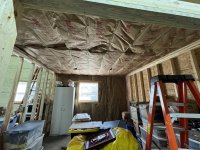
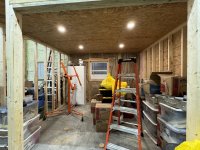
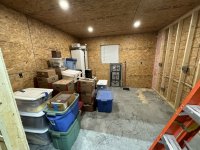
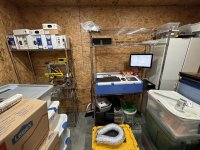
The Farm Shop

I was playing with the new iPhone 15 pro last night and did a 3d scan of the shop. Since iPhone 12 pro, there has been a LiDar sensor on the iPhone. The scanning app uses both the camera and the LiDar to combine the data in a point cloud. Those can then be viewed in a 3d viewer. BTW, they improved the sensor on the 15 Pro, but the accuracy is in the .2 to 10cm range, so there's a lot of things that look "melted" in the scan. The image is overlayed on the side of objects the scan was done on, so when you go to the opposite side, the object is see-through. I walked around adding to the images and trying to get surfaces of both sides of the things in the room, so as you move the mouse around you should see more detail when you're viewing from the area I was in doing the scan.

This link will expire in about 13 days, but until you can view the scan from there...

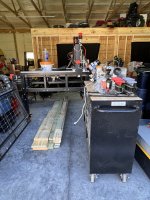
There is a lot of stuff laying around, I'm still going through boxes and sorting things. I have yet to move most of my tools over from the garage and probably won't for another month or so. I have at least one more large load of "stuff" to bring from storage, and the rest will be furniture, which may eat up half of one of the bays.

Anyway, it's pretty cool technology, not good for highly detailed/accurate scans, but it will get better over time. I'm looking at some hand held scanners that are supposed to do up to .1mm of accuracy. Most of them come down to the software and environment you're scanning things in, and what you're scanning as well, but they are far ahead of the iPhone for now.

As for shop progress, need to pickup more OSB and get started on the craft room, just been busy with unpacking and purging to make room in the shop again.
Very cool!
 
Can I assume that if you had the app you are able to do closeups and a walk through? From my laptop I am unable to see much as the detail is just too far way, Kind of looks like a shop that a tornado went through from the laptop.
 
Very cool indeed!
Can I assume that if you had the app you are able to do closeups and a walk through? From my laptop I am unable to see much as the detail is just too far way, Kind of looks like a shop that a tornado went through from the laptop.
I was able to zoom in using the scroll wheel on my mouse. Not sure how you'd do the same with a touchpad, but I suspect there's a way to zoom into the image. That said, is still has a bit of a tornado vibe to it, but it gives a pretty good feel for the layout and available space.
 
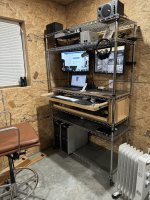
Last night I moved my office from the attic of the house to the new shop office, so I'm officially commuting to work again. ;)
IMG_0380.jpeg

The shop is about 120' from the house. I'm using a wireless bridge to get internet connectivity to the shop from the house. My throughput is about 200 Mbps between the house and shop, which is faster than my starlink internet connection. I've been on Teams and Zoom meetings all morning and things are working as well as they do at the house (unfortunately :) ).

For those that are wondering...The wireless connection uses two Ubiquiti airmax Nanostation 5AC devices. It can be done in either a Point to Point (PtP) or Point to Multi Point (PtMP) connection. I could get about 600 Mbps throughput on a PtP connection. I'm actually using a PtMP connection, which the house has the main antenna, and I have client antennas at the Guest cabin, Garage, and now the shop. Doing the PtMP divides up the bandwidth and connection time between each client that is connected, so in my case: 600 Mbps / 3 clients = 200 Mbps.

The wireless antennas use Power over Ethernet (PoE) to power the device. It only requires the ethernet cable ran outside to the antenna and power is injected over the ethernet cable to power it. The link above does not come with the PoE injectors. They are 24v antennas, so these are the injectors I used. https://www.amazon.com/gp/product/B07KJB712X

There is also a surge protector that the Ethernet line outside goes through. https://store.ui.com/us/en/pro/category/accessories-poe-power/products/ethernet-surge-protector

If anyone has questions regarding setting up the connection, let me know.

When our electric co-op gets us connected to 1Gb fiber, I'll probably have that ran to the shop and then consider burying a fiber line to the house from the shop or upgrade the wireless antennas to wifi7 devices to get full speed at the house.

My view this morning was about a dozen deer laying and grazing in the field, they've migrated out by the creek at this point.
IMG_0382.jpeg
 
I am gonna need this information in a few months when we get the new remote office set up for the Legion service officers, great info Darren thanks for including this.

One thing I found surprising after looking up some info on kind of a side channel was how relatively cost effective pre-terminated direct bury fiber is nowadays. It's not *cheap* but it's competitive and worth consideration if you're not going overly far and especially if you're already burying utilities and running trenches... it would be worth pricing it out. The reason being not just the performance, but the equipment is much simpler to setup and maintain as well which I think could be a consideration.
 
One thing I found surprising after looking up some info on kind of a side channel was how relatively cost effective pre-terminated direct bury fiber is nowadays. It's not *cheap* but it's competitive and worth consideration if you're not going overly far and especially if you're already burying utilities and running trenches... it would be worth pricing it out. The reason being not just the performance, but the equipment is much simpler to setup and maintain as well which I think could be a consideration.
The problem is we don't own the land so the design has to be such that we can relocate it so the power will be via a extension cord (#8 SO cord) and an RV plug and no plumbing to the office. So while your idea is a good one this is not possible. The building is actually mounted on skids so we can transport it to another site if need be.
 
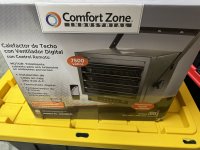
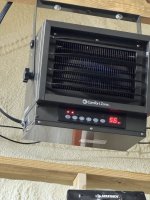
I had a new heater show up today.
IMG_0383.jpeg

Took about an hour to install tonight, since it’s close to the breaker box
IMG_0388.jpeg

It’s 7500w/6500w. I’ve been running two 1500w space heaters in the last week in the shop area. So far the coldest the shop got was 42* on one of the -3* nights.

I’m not planning the run this full time, just when I want to bring up the heat quickly, I’ll continue to run at least one of the space heaters until I get the craft room done. We have some citrus trees from the greenhouse that are living in the shop this winter, they will move in there so I can just heat the smaller space.

I also run a oil filled radiator in my office, but with the computers creating heat it almost is too much.

I’m still planning on mini splits, but will be spring before I tackle those.
 
I finished up a little electrical for the mini-split disconnect, insulated, and started sheeting the craft room walls today.
IMG_0421.jpeg IMG_0423.jpeg

Still have the wall on the right to do between it and my office. I have a few extra R19 batts, but don't really need to insulate between the rooms for temperature, but may use them up there for sound control. The walls on the shop side still need insulation too before sheeting the outside of them.
IMG_0424.jpeg

Having this room done will get most of the things in the boxes out, and move some other shelves and tables here to free up space to move the cnc over to the shop from the garage.

I was planning to head to the re-store sometime soon to see what kind of doors they had on hand. I'd like to find a half glass lite door for my office, but need some double doors for the craft room. Sometimes they get slab door donations, so can build my own frame for one.
 
You must be staying in good shape moving those boxes around. Of course, I would think just handling that OSB would be enough.
Ibuprofen is my friend today. Hopefully we’re about at the point of unboxing most of them. I’d like to not have had to work around them, but I hate wasting a trip to KC and not bringing back a truckload from storage since it’s about 200 miles one way. Timing wise I just didn’t get the walls finished before I have to do that every two weeks.

Surprisingly the osb is actually lighter than the “lite” drywall.

A lot of these are old photo albums, which I want to get back to scanning again to digitize and catalog, then they will go either up in the loft or to the attic. I’m labeling the digital photos with a family, book number, and QR code so that one can find the book the book/photo for making a higher quality scan. Or if looking at the book, view the digital version by scanning the QR code.

Some of this is my wife things I need her to go through and decide what to do with them.
 
Got my wife to come sort through some boxes last night.

Tonight I moved the 3d printer and laser out there from the attic.
IMG_0435.jpeg

The large stack of boxes on the left, all photo albums and pictures, are moving to the attic. A few of the ones on the right move to the loft, the rest are craft supplies. Moving forward!

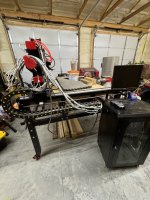
I hope to get the cnc moved over this weekend from the garage. I have a large pile of things to move to the garage too that are more yard related. I’ll get there eventually.
 
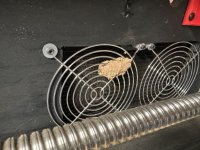
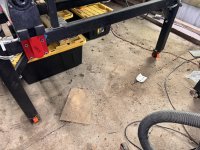
Got the cnc moved over from the garage today. Spent a good hour cleaning it off and making sure the mud dauber nests were all removed and swapping the feet for casters to move it.
IMG_0449.jpeg IMG_0450.jpeg

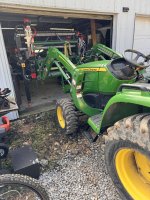
The tractor forks did just catch the middle crossbar of the cnc
IMG_0451.jpeg

Just need to move the outlet/plug over from the garage, the wire is already ran and connected at the breaker.
IMG_0452.jpeg IMG_0453.jpeg
 
Top