Ambitious Office Project

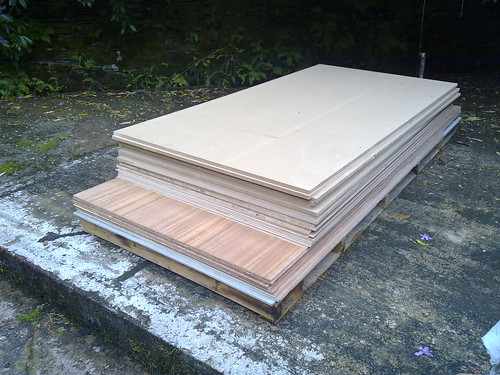
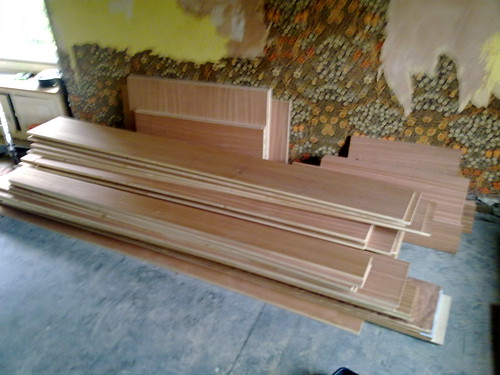
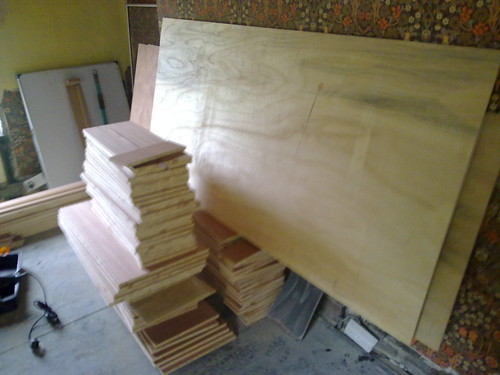
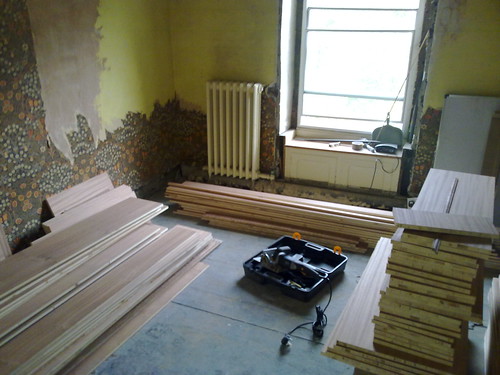
OK... so here is a link to pictures of the bombsite :eek:)

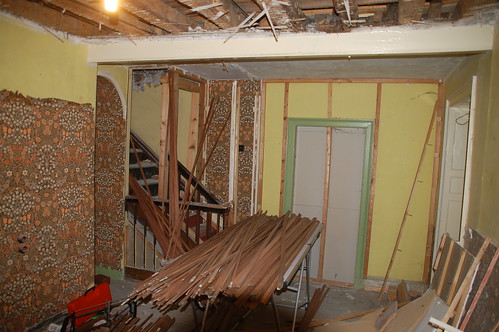
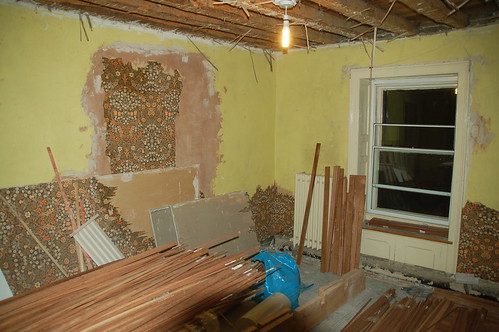
It really felt criminal removing a wallpaper that should probably be in a museum of fine industrial art. In some ways I feel very guilty and quite a vandal. However... it was peeling in many places and had had a "good innings".


DSC_1418 by gavindjharper, on Flickr


DSC_1419 by gavindjharper, on Flickr


DSC_1417 by gavindjharper, on Flickr

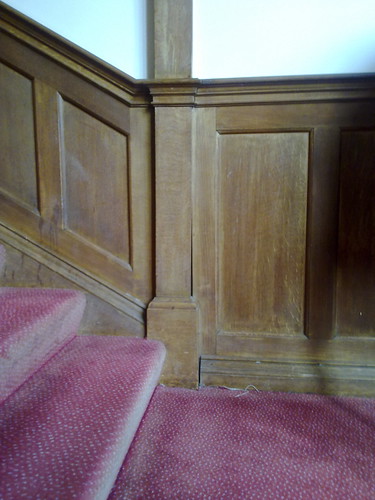
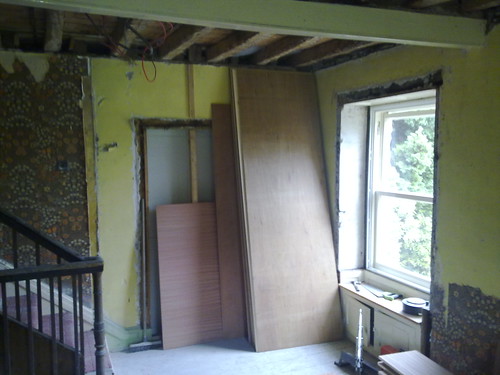
A little bit of history to record for posterity on the interweb for future generations. One of the previous owners of the house Mrs. Beaumont was a big fan of Buttercup Yellow. After peeling away layers of paper in many of the rooms, we have uncovered a running 'Buttercup Yellow' theme. Some of the woodwork under the sashes is also painted yellow. Apparently at some point in the past, all of the exterior wood of the house was painted in this shade. Would love to see a photo.
 
So some of the components for the project....
There was a luthier on eBay, who was selling cut strips for joining the side of a guitar to the back and front. Flexible, sliced from sapele. I saw this and thought he might be the sort of chap who could produce me some nice dentil for cornice mouldings. I'd sent off for some samples of dentils from joinery manufacturers, and it seemed they went one of two ways. Either a very coarse dentil cut from chunky blocks of pine, or a very shallow dentil, which may have been embossed into the wood?

I wanted a dentil that was both fine, but had some depth, as well as nice sharp geometric edges. I drew the dimensions on eBay, sent them to the chap, and he turned me out a nice box of sapele dentil!


DSC_1420 by gavindjharper, on Flickr

So this is my latest acquisition. For £75, I managed to buy a massive quantity of various mouldings. They are all ex Richard Burbidge stock; I was rather pleased with them, as there are some nice panel mouldings, some nice edging strip which will do well for the bookcases, and some more utilitarian squares and strip edges.


DSC_1421 by gavindjharper, on Flickr

An out of focus shot (sorry) of the edging strips which I think will be largely used on the bookcases for the library. They have a nice little double bead detail, which I think will look nicer than just a plain edge-banding.


DSC_1422 by gavindjharper, on Flickr

Originally, the library shelves were going to have chunkier blocks of sapele to stiffen them. I've seen some conflicting opinions on the internet about shelf deflection - I'd welcome advice. I may settle for this cosmetic edge banding on some of the taller shelves, and maybe go for a more robust lipping on some of the lower ones, which will also have larger books on them and so will need to bear more weight.

I'd welcome some advice... The shelves will be 76cm long and made from 18mm Sapele Veneered blockboard. Will these require reinforcement / a centre fixing if they are to last?
 
So some other details....

Here are the columns which I had produced by a local stair-parts company...
Very pleased with their service - so a shout out to Specials Woodturning in Four Crosses, Powys.


DSC_1423 by gavindjharper, on Flickr

This project feels like a bit of a cheat - most of the skilful parts have been sourced from hither and thither, and it will probably be someone else putting most of it together... my input is more design and trying to source bits than anything else.

And so... inside the office will be a radiator cabinet covered by these brass grilles....

DSC_1425 by gavindjharper, on Flickr

Hand riveted brass - these cost a small fortune new, but another eBay bargain!


DSC_1426 by gavindjharper, on Flickr

So these are the turned spindles for the Library stairs... A nice tight barleytwist. Some of the others I had seen looked a little "loose" in terms of the routing; I think they'd just run less flutes down the spiral, which IMHO made them look more machine-produced; but I feel these were a nice product.


DSC_1426 by gavindjharper, on Flickr
Again - a shout out to Specials Woodturning.

And so on a trip to Loughborough, when I was sitting a test for my Masters', the clutch went on my car, and I spent an unexpected day looking around for something to do. I stumbled into this beautiful third (maybe fourth) generation family furniture shop whose name evades me. This is where the pictures came from for the first page. There, I found this beautiful Gainsborough chair. Beautiful, but completely out of my budget. I've found by going to the factory direct of people who make these sorts of things, you can often get part of the product at a really competitive price. it is the varnishing, upholstering e.t.c. where people are "adding value". So... had this beautiful chair frame made, ready for behind the desk :)


DSC_1428 by gavindjharper, on Flickr

Like I say - it's a bit of a cheat's project, when there are skilled craftsmen on here, who could turn this out in an afternoon; but for me, I'm still learning, and even though I've not put things together, I'm taking great joy out of visiting factories, and seeing how these things are made. It's also restored my faith in our countries manufacturing - it's really nice seeing bits of furniture made here, not just shipped from the Far East.
 
I am really impressed Gavin. I admit at first I was a little skeptical, but the more you post, and the more pictures I see, the more convinced I am! Keep it up! :thumb: :thumb:
 
OK... so sharing is caring right....

Inspired by Dave's *AMAZING* Sketch-Up tutorial, I thought I would showcase some of my shambolic 2D drawings :)

I now realise that SketchUp would be cool to learn... I've done these concepts in a combination of Powerpoint, and a Trial version of Visio which has now expired, so I can't edit anything :eek:)

I'm going to try and talk you through what I am hoping to do with the aid of some pictures....

So first up....


Office Bookcases Mock Up by gavindjharper, on Flickr

This is a composite image of lots of little bits of furniture I liked :eek:) What you need to know is that the cabinets on the left are "full depth" whereas the ones at the right are like a 6" deep "faux front" for symmetry sake. One the left, the three top doors will have globe-wernicke style barrister bookcase slides (hardware imported from the U.S. - *proper* scissor hardware, not the plastic hardware Rockler sells. Underneath is a cupboard.

The radiator grille in-between, well that explains itself.

On the right hand side, we have the same front, but much less depth. Instead of barrister bookcases, the three doors will be "invisible hinged" from the bottom, and inside these three bits will be like a "display shelf" - a raked back shelf so I can display books I've written. Underneath, the shallow cupboard will be good for DVD / CD storage.
 
OK... so the next bit is the desk.

I have spent a lot of time thinking of what would be a real balance between form and function. I really like the aesthetic of old "partners desks" but when I see the repro desks designed to accommodate PC's, they always seem to look a bit "contrived", like the PC was never really meant to be there.

I have been looking at partners desks on eBay for inspiration; I even went to Harrods to have a look at the cheap old rubbish and see how I thought I could iterate and improve.

One of my favourite websites for window-shopping is this... mainly because they seem like they make some desks in odd sizes, and give some Sketch-up style diagrams with dimensions which have been a useful guide.

One of the things I have seen in other furniture is the "Pop Up TV Lift" a linear motor, which slides your telly out of the way. I thought this might make a nice idea to hide monitor(s) out of view. The problem is use two monitors as it is now, and a third would be nice some day "for balance".

I've been toying with using some kind of synchronous slide, like the type used with tables where you pull out one side, and the other springs at the same time, for the "left and right" monitors - with the centre monitor moving backwards and forwards to fill the space they create.


Desktop Mock Up by gavindjharper, on Flickr

On the side the user doesn't see, two cupboards either side for stuff like PC / UPS e.t.c. a panel in the middle to conceal the monitors...


Desk Front by gavindjharper, on Flickr

On the "user" side...

Desk Back by gavindjharper, on Flickr

Two shallow drawers either side... for things like stapler, scissors, things you want to hand. My feeling with desk drawers is that rubbish always gets lost at the back of them, so I've kept the drawers short. In the middle, two "stacked" drawers, very very shallow... 40mm high. I think one will be segmented for storing a nice selection of pens and pencils e.t.c. The other might be keyboard storage. Then either side there is a "deeper drawer" for "big stuff" and a filing drawer on each side.
Then there are two large pull out drawers in the side. I think one side might be an "in and out" tray that can be stowed away, whilst the other side will hold a slimline scanner.

You can see this on the side view here. Just a plain panel on the sides.

Desk Side by gavindjharper, on Flickr

One the side away from the user above the PC; I think the drawer above the PC may end up lined and segmented as a "charging dock" with a USB cable inside for charging and storing phones e.t.c. Not sure about the other drawer.

You can see this more clearly in an aerial drawer arrangement for the top level of drawers....


Drawer Arrangements by gavindjharper, on Flickr
 
I thought you might all appreciate this...

I was teaching on a course at Cumberland Lodge, in Royal Windsor Great Park; and I clapped eyes on something I had been searching for for a while - the right detail for the panelling running up my stairs. A google image search turned out a lot of rubbish - no one seemed to nicely detail the top and bottom of a run of half panelling on stairs.

Where there were any details, it was paint-grade, and just tacky "applied mouldings"; but this I think looks really nice...

Another little detail for the project:


19042011211 by gavindjharper, on Flickr


19042011210 by gavindjharper, on Flickr


18042011209 by gavindjharper, on Flickr


18042011208 by gavindjharper, on Flickr


18042011205 by gavindjharper, on Flickr
 
Getting scarily real....

I have ordered the wood!

And there is a *lot* of it being delivered.

I calculated I needed somewhere in the region of 14-18 sheets of 18mm for the furniture, and 10 thinner sheets for the backers of all the book and display cases. I started to look into costs, and to get them down, worked as far up the supply chain as I could.

I saw the first band where they offered discount was at 20 sheets of board... calculating the 20 sheet price vs. the single unit price, it seemed like with all their boards, once you bought 13-14, you might as well take 20 - as you got six boards effectively for free at the lower price.

As the delivery is a little bit - because they are coming from a wholesaler, I thought best to take some spare boards at the lower price - as it was cost-neutral; just needed the storage!

Then.... I got a pleasant surprise. If you took "full packs" of boards, there was a further discount. Happily the 18mm blockboard comes in packs of 20, whilst the 9mm ply for the backs comes in packs of 21 :eek:)

So... where I was vexing myself trying to squeeze them onto the smallest number of boards using a manual method (not one of those whizzy programs for generating cutting lists), I thought instead, I'd go easy on myself, spread the cuts over a wider number of boards - so I'm left with some "manageable size offcuts" not just 8x4 sheets :)

So.... fingers crossed.... I should have a bunch of furniture turn up effectively in "flat pack style" and probably about 8-9 spare sheets for later projects.

Mom is gonna go *nuts* when the lorry arrives :eek:)

Now I am scared - it's feeling a bit more real :eek:)
 
What an epic day.... 40 foot articulated lorry turns up with all the wood *right at the very top*.... we haven't got a forklift or anything to move the stuff... so just got four people and a couple of vans to unload all the wood from the top of the lorry to where it is meant to be. Scary scary scary stuff... will post pictures of it all a bit later :eek:)
 
So I have now bought the lacquer for finishing all of the flat wood. The lacquer is nitrocellulose based pre-catalysed lacquer, of which I have two gallons. I also have a gallon of sanding sealer, and a gallon of dye in Light Mahogany just for the Sapele. I shall try and post some pictures soon of the samples which were stained up.

I'd welcome any advice on applying lacquer with a spray gun - new to the process and feeling my way - but from all comments recieved, it seems like a sensible ay forward given the volume of wood.

Well first of all Gavin if you are going to spray nitrocellulose lacquer make darn sure you have a dedicated spray area with the appropriate explosion proof fan(s), fire suppression, nothing that can or will generate a spark, proper respirator. Then, the proper set up for the material being sprayed.
By atomizing a compound that is highly flammable to begin with you are in essence making a "fuel-air" explosive.

If you do not have the facility to apply this material then I would suggest you go to a non flammable product.

That said and safety concerns resloved the type of spray equipment you use will determine the air needed or not the spray tip size etc. The manufacturer should have either the recommended tip size or a viscosity rating either zahns or ford, there are a couple of others as well that I cant think of at the moment.
This is critical for getting the proper atomization and spray pattern. My suggestion there would be to stop by a local shop that applies their own finishes or an autobody shop and see if one of the finishers would take a minute to give you a quick run through on how the spray pattern should look and the where to set your gun. It's a lot easier if you can actually see it than to try and explain it. Offer to pay them for their time, it will be money well invested.
Good luck!
 
Rich, that sounds like a whole lot of really sound advice.

I'm going to be spraying outside, but I've bought a cheap plastic clip-together gazebo, and a whole load of plastic sheeting to make a spray booth. With several rolls of duct tape I'm guessing I can make something that will keep the elements off the work, allow enough wind to ventilate but stop dust and rubbish landing on the work. Long tube from the compressor to the gun, so the compressor motor is miles from any potential combustible mixtures.

I haven't got explosion proof fans for ventilation - I'm guessing that the breeze and regular breaks will suffice as a "passive" method of ventilation. We have plenty of fire extinguishers, so good reminder.

Hope I'm not posting pictures of the ensuing fireball :eek: :eek: :D

I've been disappointed by other finishes I have seen, and really feel this is the right finish, although - as you state - could really do with better facilities. It's been good having the checklist re: safety. Whilst it's a lot of wood to spray, it's a "one off" job, not continuous production and so I'm hoping I've managed to balance practicality, risk and safety.

I've not long had a couple of small dings on my car done after a van backed into me at slow speed, so this might be a good port of call. I don't think there are any cabinet making firms for some way - so an autorefinishers is a good second choice. I agree wholly, it will be money well invested. I'm even tempted to see if I can find someone who does auto-refinishing who might work for a day on this?

I suppose in retrospect, the choice to spray cellulose might have been a bit gung-ho, but it's in the car now and has been bought, and given my preference for the effect, I think I'm going to press ahead - just a bit more cautiously given the sage words of wisdom.
 
Make sure you get a proper respirator as well. Just pulling the collar of your T-shirt up over your nose while you run in and spray a coat isnt going to cut it with this one. (I've never done that... no... not me..... never....) a couple minutes in an enclosed space with that stuff and you will hear your brain cells screaming as they jump off a cliff like a line of lemmings.....

The nitrocellulose will give you a beautiful finish, it will definitely bring out the features and beauty of the wood!

Looking forward to seeing it as you proceed!
 
Top