- Messages
- 8,633
- Location
- Thomasville, GA
Tablesaw Kickswitch
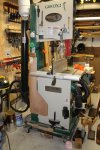
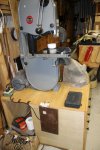
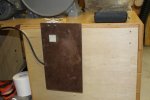
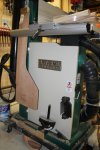
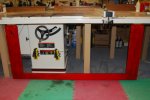
This is another one of those things I've wanted to add for many years and finally took time to do it. Nothing fancy. Just a few pieces of scrap 1/2" plywood. The vertical pieces from the hinges are a single layer; the horizontal piece is two layers.
I removed the fence rail so I could work from the top side of both it and the steel angle. I drilled through the steel angle at the hinge positions, then drilled and tapped the fence rail for 1/4-20 hex bolts. After loosely re-installing the rail, I mounted the hinges and tightened all bolts.
The opening at the ON switch allows for easy access. I added a block of plywood to the back of the left panel to engage the STOP switch.
Oh, yeah -- it's RED! I sprayed a few coats of shellac -- about 1.5lb cut -- to seal the plywood. I had a little of the mix left so I grabbed the TransTint Red dye and went for it!
Attachments

Last edited:
 , and a great idea.