- Messages
- 8,477
- Location
- Yorktown, Virginia
Couldn't find a holster or a nearby maker for my new target pistol so, inspired by this post by Darren, I decided to make my own. Ordered some Kydex, silicone sheet and some misc fittings.
Had a piece of Corian (sink cut out) and some 80/20 aluminum on hand. Drilled and tapped the Corian for a brass 'L' to attach a hose to my lathe vacuum.


Used a piece of Lowe's project foam board to sculpt a form similar to one found on the web and added closed cell foam. The form and foam results in a curved shape that conforms to the body.


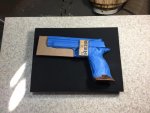
Prepped the gun with several layers of blue painters tape to protect the finish and added blocking to ensure a correct fit and to provide attachment points for mounting hardware.

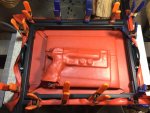
Put the Kydex in the heat press to bring the temperature up to 325F, then folded the hot material over the gun, covered it with the membrane clamped onto the 80/20 frame, pressed down onto the Corian/foam mold and turned on the vacuum. Gloves on and made sure the Kydex formed around the trigger, two dimples that would be the adjustment points and the site channel that keeps the sights clear of the holster. Followed the same procedure for the double magazine pouch. There is a layer of Scotch Brite under the mold to facilitate air flow.


Had a piece of Corian (sink cut out) and some 80/20 aluminum on hand. Drilled and tapped the Corian for a brass 'L' to attach a hose to my lathe vacuum.


Used a piece of Lowe's project foam board to sculpt a form similar to one found on the web and added closed cell foam. The form and foam results in a curved shape that conforms to the body.


Prepped the gun with several layers of blue painters tape to protect the finish and added blocking to ensure a correct fit and to provide attachment points for mounting hardware.


Put the Kydex in the heat press to bring the temperature up to 325F, then folded the hot material over the gun, covered it with the membrane clamped onto the 80/20 frame, pressed down onto the Corian/foam mold and turned on the vacuum. Gloves on and made sure the Kydex formed around the trigger, two dimples that would be the adjustment points and the site channel that keeps the sights clear of the holster. Followed the same procedure for the double magazine pouch. There is a layer of Scotch Brite under the mold to facilitate air flow.


Last edited:

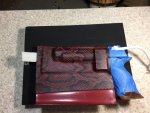
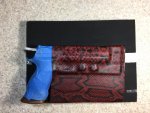

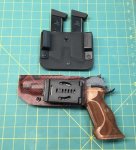


 Those turned out fantastic and I too like that pattern.